The Chat Search button opens a text field where you can describe a discovery that you would like to build and add to your Hub. The Chatbot then builds the discovery as you described it and, if you click Add To Hub, saves it and embeds it in the Hub. You might want to use this feature to get a new discovery into your Hub as quickly and efficiently as possible.
This functionality is available in the User Hub (home page), Admin Hub, Viewer Hub, and Embed Hub.
Tip: Once your discovery is created, you can open it in Discover and edit it as you would any discovery that was created using any other mechanism.
Adding a new discovery to your Hub
Before you begin
-
You can only make use of this functionality if your administrator has selected the Enable Generative AI checkbox in the AI Settings page of the Admin Console. If your administrator does not select this option, the function is not available for use.
- You can only use the Speech-to-Text option associated with this feature if your administrator has enabled it in the Admin Console's AI Settings and you are set up as described in the "Audio Prerequisites" section of Speak to the Chatbot.
Step 1: Open the Search Chat field
From the Hub:
- Open the Tab that you would like to add your new discovery to.
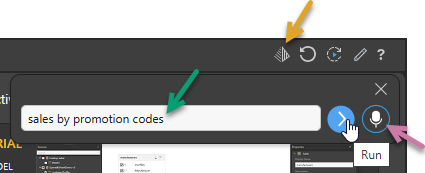
- At the top-right of the page, click Search Chat (orange arrow) to open the field.
You do not need to be editing your Hub to be able to access the Search Chat. This tool can be used in both View and Edit mode.

Step 2: Create the discovery
In the Search Chat field:
- Describe the discovery you want to create, either:
- Type your prompt into the text field (green arrow above) and click Run.
- Hold down the Microphone button (purple arrow) and when it turns red, say your question directly into your microphone. When you are done, release the microphone button.
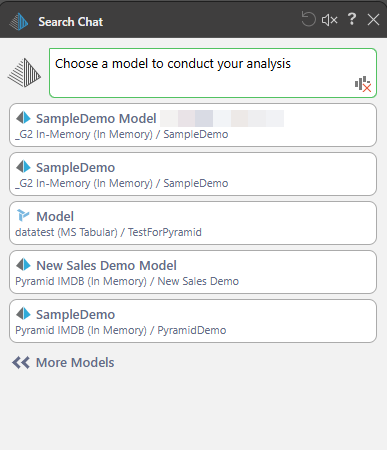
- Once the Search Chat opens, you need to select the Model to use for your discovery:
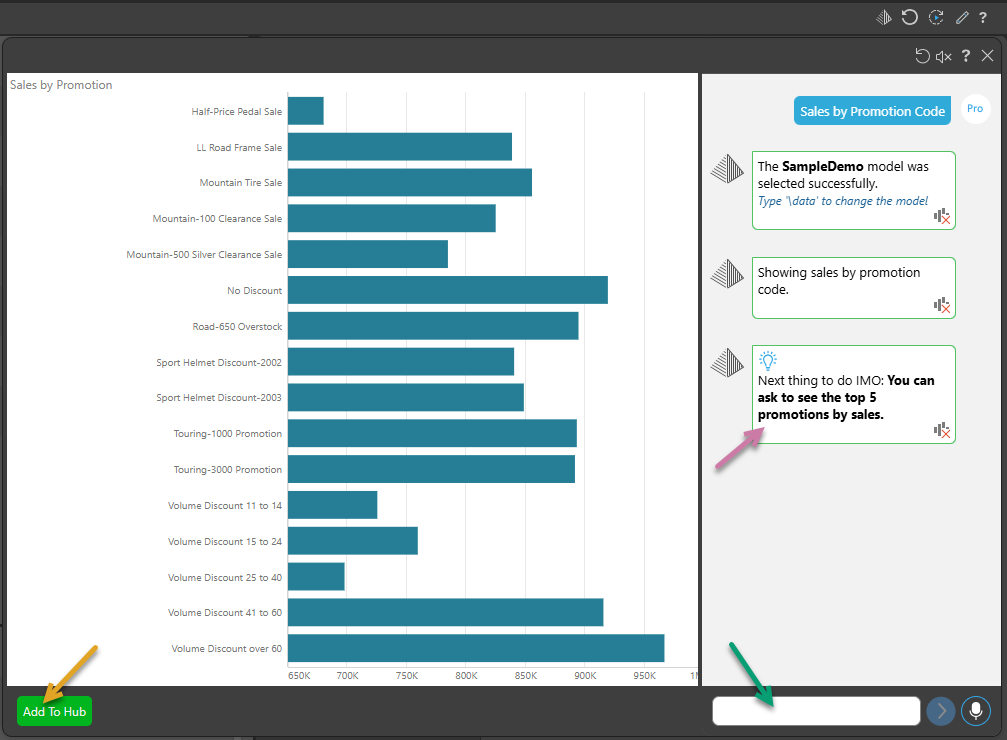
- Optionally, you can continue to interact with the discovery by adding additional prompts to the Chatbot (green arrow above).
- Once your preview is ready, click Add To Hub.
Your prompt should be the same regardless of whether you type it into the text field or use your microphone. For information about prompt content, see Writing Natural Language Queries.

The Chatbot generates a discovery and shows a preview of it:

Tip: In our example, we can see a "Next thing to do" panel in the Chatbot (purple arrow). If you want to apply this suggestion, click the bold text in the Chatbot.
The new discovery that was previewed in the Search Chat panel is:
- Saved to your private My Content folder.
- Embedded in the Hub inside its own container.
What next?
Your new discovery is just like any discovery. You can share it by saving it to a shared folder or edit it in Discover.