Python Learn and Predict Examples
This article reviews examples of the Python learn and predict functionality. To learn more about Python learn and predict, click here.
In the following example, an SVM script is used to predict the purchase of bikes based on a customer's income and number of children.
import pandas from sklearn import svm __pyramidOutput=0 def pyramid_learn(df): X = df.iloc[:,0:2] y= df.iloc[:,2] clf = svm.SVC(gamma=0.001, C=1.0) clf.fit(X, y) return clf def pyramid_eval(model, df): X = df.iloc[:,0:2] y = df.iloc[:,2] output = model.predict(X) correctCount=0 for idx,item in enumerate(output): if item == y.iloc[idx]: correctCount+=1 return str(correctCount / len(y)) def pyramid_predict(model, df): X = df.iloc[:,0:2] output = model.predict(X) return pandas.DataFrame({'Prediction':output})
Learn
In the learn function, X = the first 2 columns given as the input, and Y = the last column given as the output.
def pyramid_learn(df): X = df.iloc[:,0:2] y= df.iloc[:,2]
clf is the ML model that will be returned by the learn function:
clf = svm.SVC(gamma=0.001, C=1.0) clf.fit(X, y) return clf
Eval
The eval function takes the model returned by the learn function (model) and runs it against a testing set (df):
def pyramid_eval(model, df): X = df.iloc[:,0:2] y = df.iloc[:,2]
The output is a set of predictions:
output = model.predict(X)
The predictions are then compared with the actual data, and this comparison returns the model score return str(correctCount / len(y)):
correctCount=0 for idx,item in enumerate(output): if item == y.iloc[idx]: correctCount+=1 return str(correctCount / len(y))
Predict
The predict function applies the ML model to the entire data set and returns the set of predictions:
def pyramid_predict(model, df): X = df.iloc[:,0:2] output = model.predict(X)
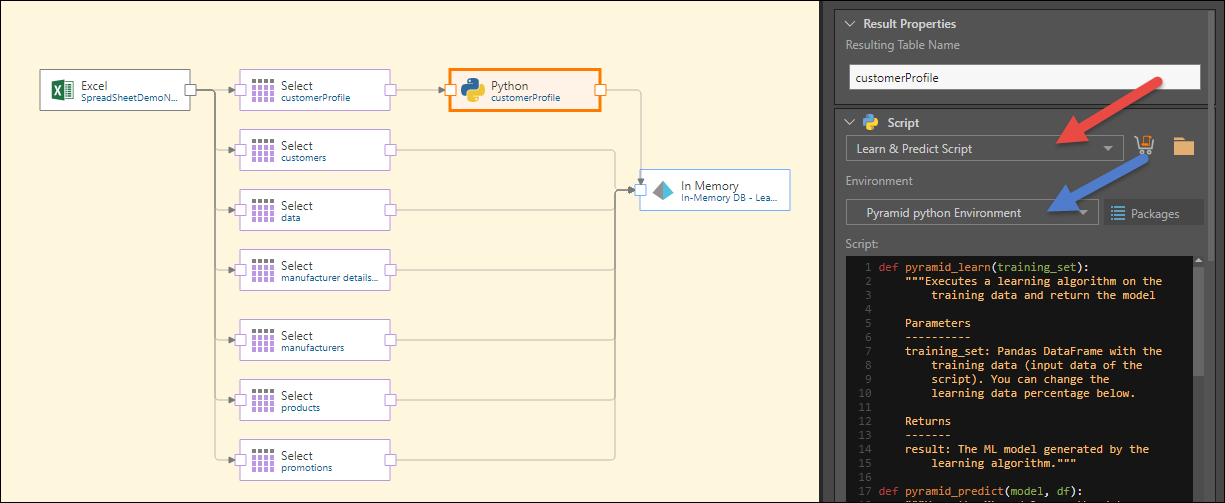
In this example, a learn and predict script is configured on the Python node as part of the data flow.
Step 1
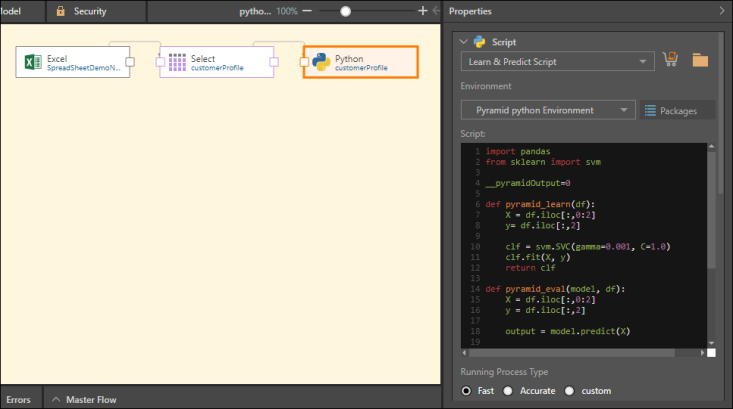
Connect the Python scripting node to the data flow and select the target. With the Python node selected, go to the Script window in the Properties panel, select 'Learn & Predict Script' (red arrow below) and choose the required environment (blue arrow).
Step 2
Paste the above script and choose the required running process type (red arrow below).

Step 3
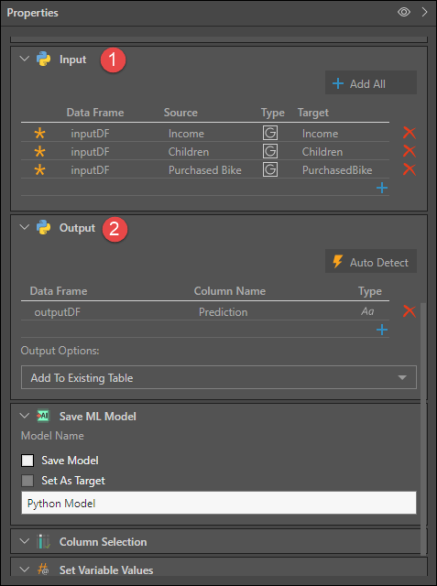
Select the required columns for input, and then configure the output column(s) or table. The column name given to the output must match the output given in the predict function. In this example, it will be Prediction:
return pandas.DataFrame({'Prediction':output})
Set the data type of the output to string.
Step 4
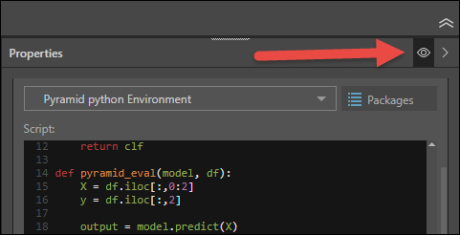
Click the Properties panel Preview icon (red arrow below) to run the script.
Step 5
The output will be displayed in the Preview panel.

Step 6
Configure the data model and security as usual, before saving and executing.
Save the ML model and its results. You can then use the model again in other data flows where the data set has the same structure (columns and data types) as the data set on which the model was configured.
Step 1
Follow steps 1 - 3 from Example 1 to configure the Python node.
Step 2
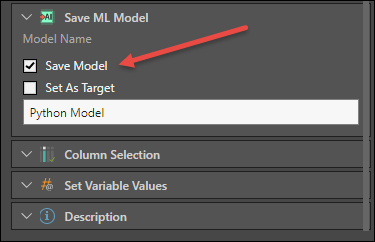
Under Save ML Model, select Save Model and name the model.
The learn, eval, and predict functions will be run, and the ML model that is produced will be saved, and the results stored.
Step 3
Click the Properties panel Preview icon (red arrow below) to run the script.

The output will be displayed in the Preview panel.

Step 4
Save and execute the data flow.
Step 5
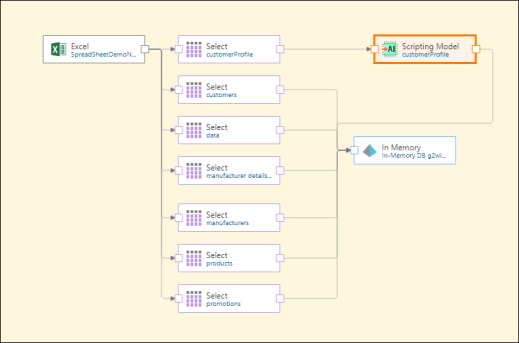
Open Model in a new tab and configure the data flow to which you want to connect the Python target. Connect the Scripting Model node to the relevant table and connect the required target node.
Step 6
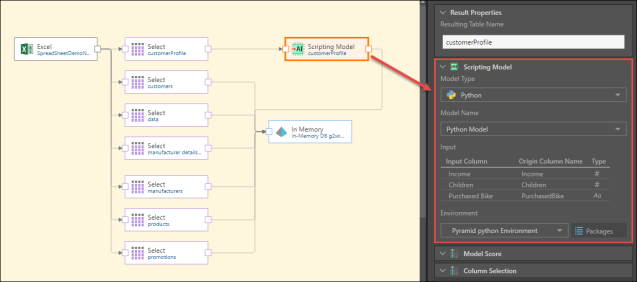
With the Scripting Model node selected, go to the Scripting Model panel, select Python as the Model Type and choose the saved Python target as the Model Name. Ensure that the Input Columns are correct.
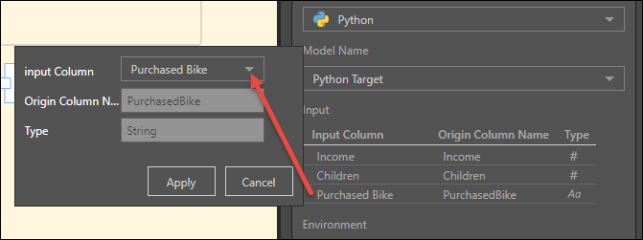
If there is a blank Input Column, click on it and select the required input column from the drop down:
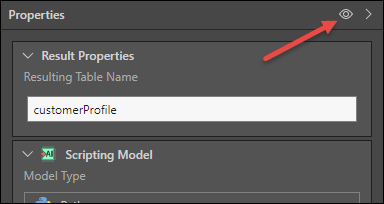
Click the Preview icon in the Properties panel to execute the predict function.
Step 7
Configure the data model and security as usual, before saving and executing.
In this example, the Python node is saved as a ML model and target, meaning that the predict function is not run. The ML model is then connected to a different data flow, where the eval and predict functions are run. In this scenario, the ML model can only be run if the data set has the same structure (columns and data types) as the data set on which the learn function was run.
Step 1
Follow steps 1 - 3 from Example 1 to configure the Python node, but do not connect a target node to the data flow.
Step 2
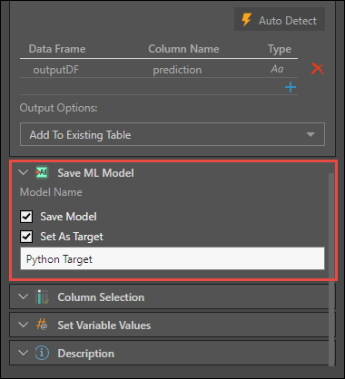
Under Save ML Model, select Save Model and Set As Target, and name the model. Save and execute the data flow.
The learn and eval functions will be run, but the predict function will not.
Step 3
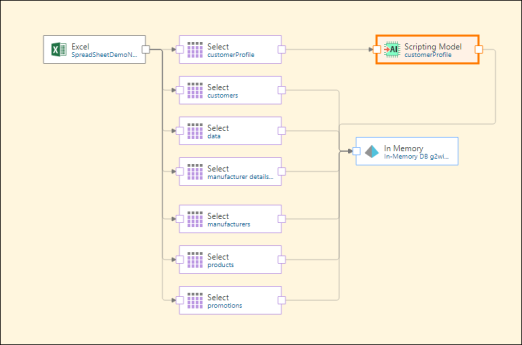
Open Model in a new tab and configure the data flow to which you want to connect the Python target. Connect the Scripting Model node to the relevant table and connect the required target node.
Step 4
With the Scripting Model node selected, go to the Scripting Model panel, select Python as the Model Type and choose the saved Python target as the Model Name. Ensure that the Input Columns are correct.
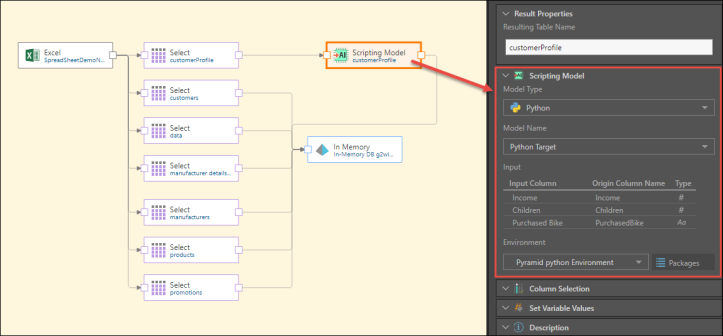
If there is a blank Input Column, click on it and select the required input column from the drop down:

Click the Preview icon in the Properties panel to execute the predict function.

Step 5
Configure the data model and security as usual, before saving and executing.