Note: this feature is available with Enterprise licensing only.
Alerts are a powerful feature that help you track important data. You can easily set up an alert for a data point within a data visualization, and Pyramid will let you know when the value of that data point increases, decreases, or stays the same. Alerts can be configured from both data discoveries and presentations.
Build Alerts
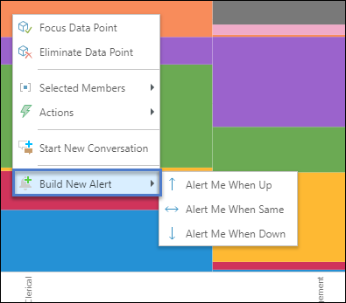
To build an alert, right click on the relevant data point. From the context menu, go to Build New Alert, and select one of three options:
Alert Me When Up: receive an alert when the value of the selected data point increases.
Alert Me When Down: receive an alert when the value of the selected data point stays the same.
Alert Me When Same: receive an alert when the value of the selected data point decreases.
The Alert Wizard will open, where you can configure the alert.
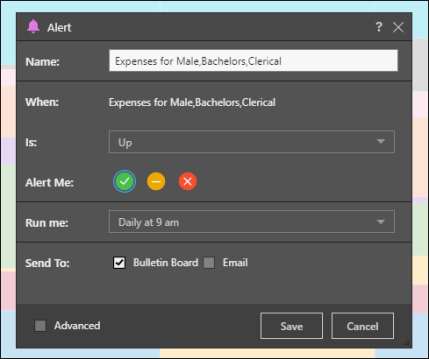
Alerts Wizard
Name: by default, the alert is named according to the selected data point, but you can change it.
When: set the conditions for what will happen when the selected data point us up, down, or the same.
Is: choose Up, Down, or Same.
Alert Me: select the icon that should represent the status of the alert when the given conditions are met. For instance, if Sales go up, select the green check mark; if Costs go up, select the red X.
Run Time: choose the time and frequency at which the alert job should run.
Send To: have the alert sent to the bulletin board or to email.
Click the save button to commit the alerts job.
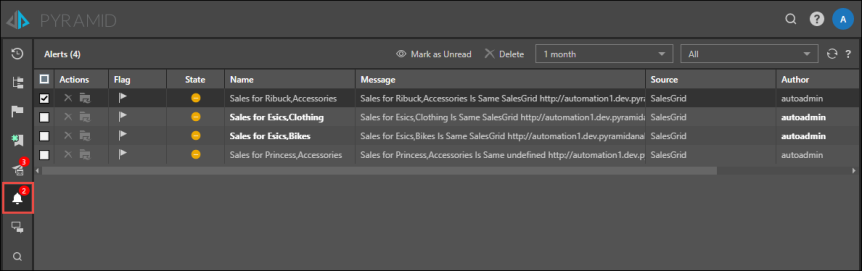
Alerts Feed
View your alerts from the Alerts Feed. Each alert listed will display the following information:
Actions: from the Actions column, delete the alert or go to the discovery's item location.
Flag: flag an alert to remind yourself to take an action.
State: displays the status of the given data point; whether the value was up, down, or the same at the time the alert job was run.
Message: displays the status of the alert job.
Source: the name of the data discovery where the alert was built.
Author: the user who built the alert.
Name: the name of the alert job. If the alert is unread, the name is displayed in bold.
Run-Time: the date and time that the alert job was run.
When you select an alert's checkbox, two buttons will be enabled along the top of the page: Mark as Read/ Unread, and Delete. This allows you to perform the same action for multiple selected publications.
To mark an alert as read, click on it or select its checkbox and click 'Mark as Read'.
Filter
Filter the list of alerts by time and status.
Time filter: filter the list according to a time period or a custom date range. To filter by a custom date range, click Custom, then enter the From and To dates.
Status filter: filter the list to see all alerts, or only those that were read, unread, flagged, or unflagged.