In this example, learn how to inject a range of elements driven by a parameterized custom list. Once saved in Discover, add the date range slicers to presentations and publications.
This is a good way to create year-to-year and month-to-month date ranges. In this example, a range of Month elements is created. The end month is selected from the Month slicer, and the start month is selected from the Number of Months slider. Both the start and end month will be added to the query, together with the range between them.

STEP 1
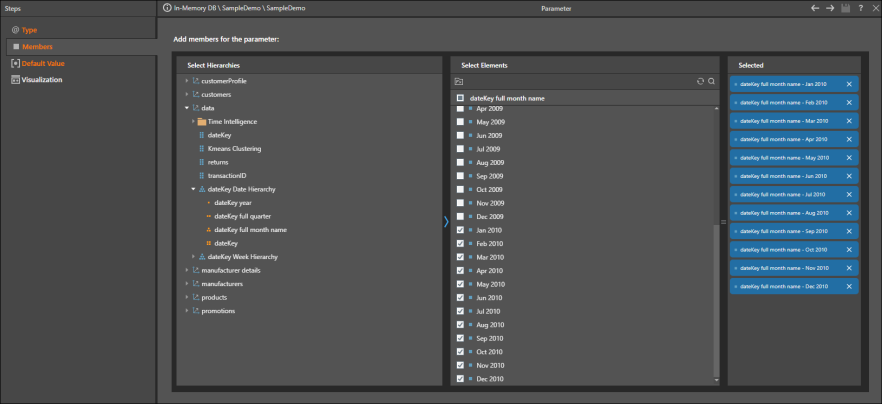
Create a text parameter containing the required months.
STEP 2
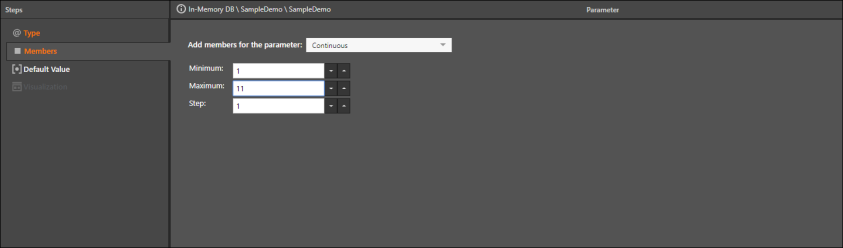
Create a numeric parameter containing the required number of months. In this example, the minimum is set to 1 and the maximum is set to 11, meaning that when a month is selected from the Month slicer, the maximum number of months that can be displayed in the query will be 12. You can select a slider or a text box visualization.
STEP 3
In List, create a Custom List with the following syntax:
Range(lag([data].[dateKey full month name].@[memberparameter],[global].#[numericparameter]),[data].[dateKey full month name].@[memberparameter])
Where memberparameter is the member (text) parameter created in step 1, and numericparameter is the numeric parameter created in step 2.
The range function is used between the member parameter [data].[dateKey full month name].@[memberparameter] and the lag of the same parameter, by the numeric variable parameter [global].#[numericparameter].
Note: To add the member parameter to the formula, open the relevant hierarchy and click the Fx button in the Elements panel. Find your member parameter in the content tree under the Elements panel. To add your numeric variable, find and select it from the Numeric Parameters panel.

STEP 4
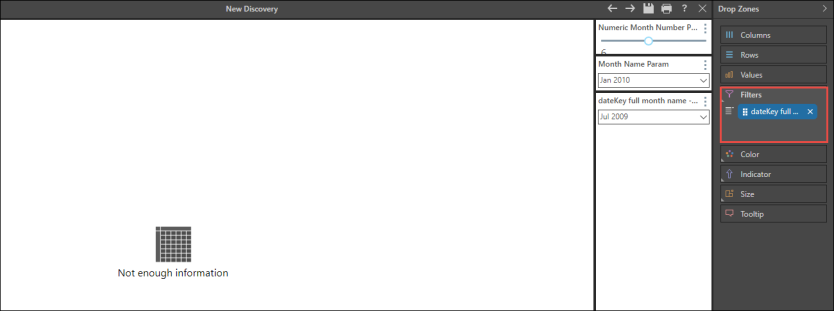
To use the custom set in Discover, add it to the query and move the blue chip from the Filter zone to the Rows zone.
STEP 5
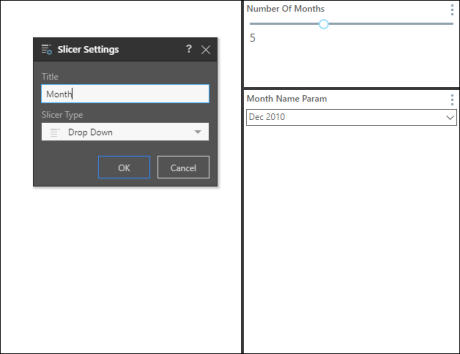
Edit the slicer names as required.
STEP 6
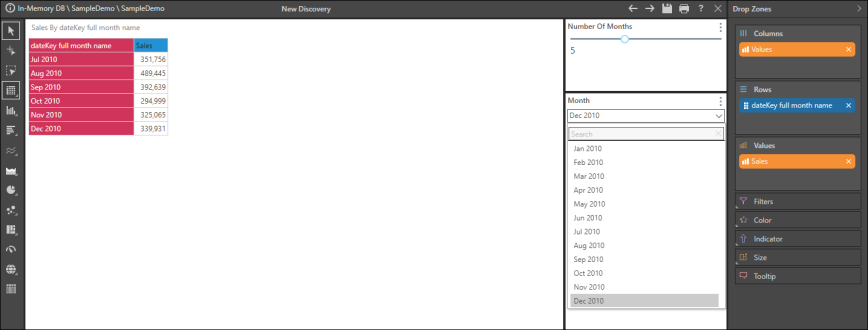
Use the Month slicer to select the end date for the range of months, and use the Number of Months slider to select the lag (start month). The selected end month and lag value will be added to the query, along with the range, so if 5 is selected from the slider, a total of 6 months will be displayed.
Click here to learn how to add date range filters using two text parameters.