Dynamic Member Security
PQL Script Editor for Security
You can build your script in the PQL Editor, which displays a range of PQL functions and the meta-structure of the data model.
How to Set Dynamic Member Security
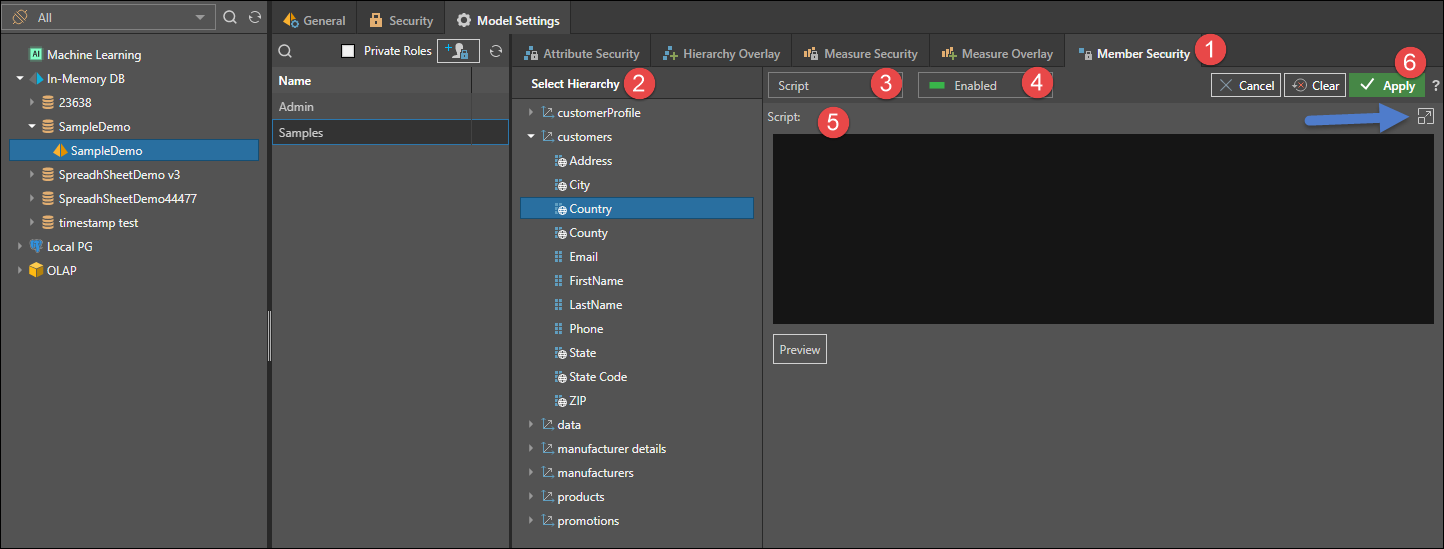
- After choosing the relevant data model and role, open the Member Security panel.
- Choose the required hierarchy from the Select Hierarchy panel.
- Security tables and columns will appear under Member Security, and will displayed in red font; you can use them to build your script if relevant.
- Switch from Basic to Script from the drop down.
- Choose whether to enable or disable the members for the given role.
- Write your script; click Advanced Script icon (blue arrow) to open the PQL Security Script Editor.
- Click Apply to save changes.

Visual Totals in Security
The Visual Total option is available in security settings and is unique to the security for Parent-Child hierarchies. It allows administrators the option to show end users hierarchical totals based on the elements accessible to the user (via security) only (visual totals=ON); or to show them the actual totals irrespective of what they can or cannot see (visual totals=OFF).
Security Tables
If the data model contains security tables or columns, these will appear in the Select Hierarchy panel under Member Security, and will be displayed in red text (red highlight below).
Security tables are like normal tables but are often included in the data schema to allow for efficient scripting options when creating dynamic security logic. In this scenario, member security can be set for these hierarchies, and they can be used to build custom sets which are targeted to specified user roles using the PQL Identity functions when working from script mode.
Importantly, security tables are ONLY visible in the security editor for this purpose. They are not shown to end users for normal analysis, scripting or logic.

Security Script Examples
This script cross joins all countries with the userID column in the security table (as shown above), and only shows those with a value. It effectively only shows a user the countries and all related data in the model that have values when filtered by their username.
NonEmpty( AllMembers([customers].[Country]) , (StrToMember([Security].[UserId],UserName())) )
Similar to the above one, this filters the security table to only return rows that have the username of the current user in the UserID column. Since this table is joined to the rest of the model, it filters out all other data to only show those data elements where the current user has values.
StrToMember([Security].[UserId],UserName())
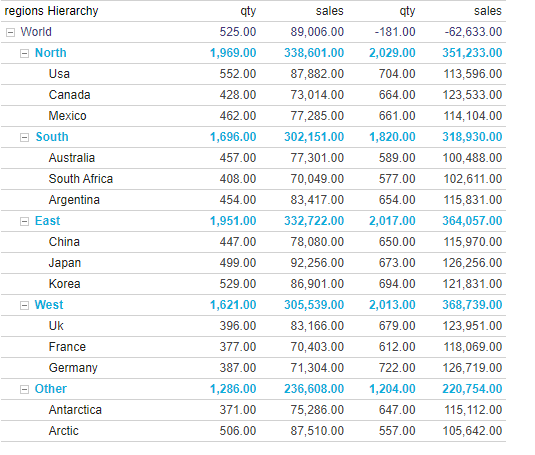
In this example, a parent-child hierarchy is in place. The first 2 metrics are values for each member, self and child. The second 2 metrics are child only.
Roll-up: north and south are added to the world. east and west are deducted. other is neither.
The full grid of data may look like this:

This logic lets the user see the "north" region and all its descendants.
{[regions].^[regions Hierarchy].[world].[north], AllDescendants([regions].^[regions Hierarchy].[world].[north])}

In this example, the logic lets the user see the north, north descendants and the east (without its descendants). Visual totals are enabled as well.
{[regions].^[regions Hierarchy].[world].[north], AllDescendants([regions].^[regions Hierarchy].[world].[north]), [regions].^[regions Hierarchy].[world].[east]}

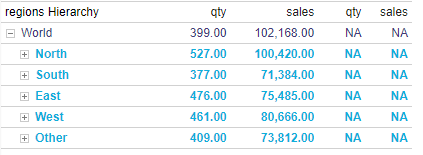
In this example, the logic lets the user see all the child regions of the world, but none of their descendants.
{[regions].^[regions Hierarchy].[world], [regions].^[regions Hierarchy].[world].children}
