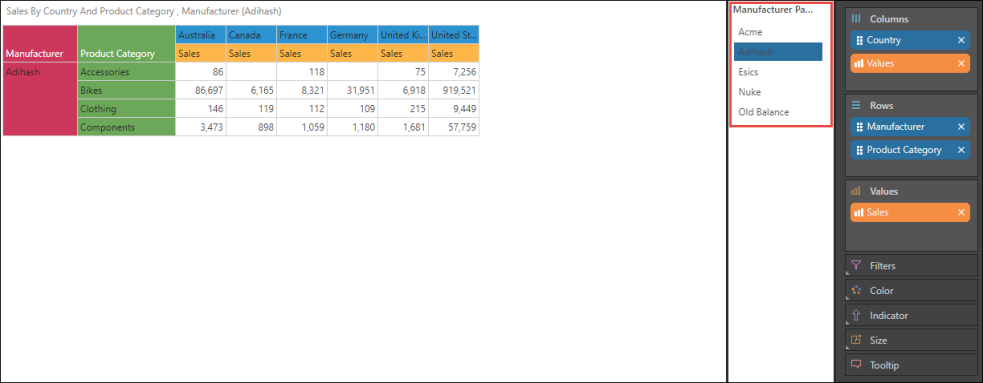
A dynamic list is made up of a set of elements, measures or custom element lists, from a chosen data model. This is in contrast to static parameters, which are 'hand-built' with static logic.
Creating a Dynamic List Parameter
Data driven dynamic list parameters can be built using quick tools directly in Discover. However, they can be designed with more control from Formulate using the Parameter wizard. Editing of parameters is also done in the Formulate tool.
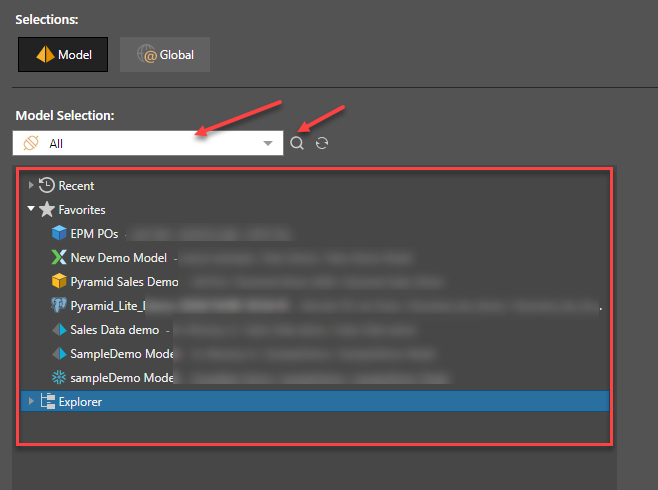
To begin, launch a Formulate session and choose Parameter. After selecting model as the parameter's scope, you need to select the target data source model that this parameter will operate against. Choose any model in the system from the drop down listing (red box below). Use the filtering and search tools (red arrows) to find your model more easily.
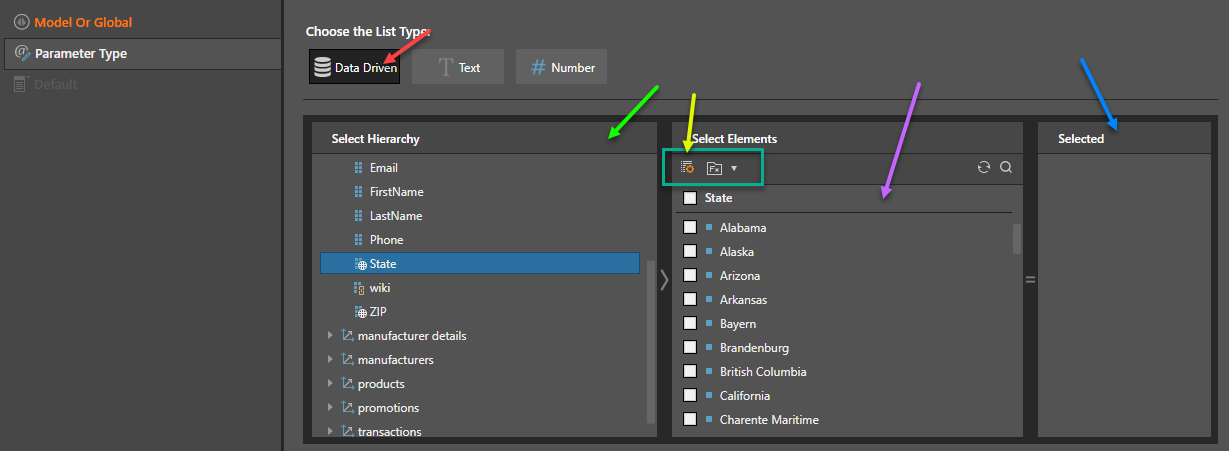
Next you need to choose its type: Data Driven (red arrow below) - since our dynamic list is going to be driven by the data in the model itself.
Then, select a hierarchy from the model (green arrow) and then select elements (purple arrow). If you have logical selections made with other list definitions you can use those (teal box below) or hand select the elements. The selections will appear in the last panel (blue arrow). Click the List Builder button (yellow arrow) to import and auto-select a list of elements.
Dynamic Measure Parameters
Dynamic Parameters are usually built against hierarchies. However, they can also be built using measures - using the same technique as above. These can then be used as a measure parameter slicer in queries in Discover and Present. This way, you can inject the required measure into the query at runtime. Measure parameters can also be built on the fly in Discover.
Examples
The example below shows a simple flow of how to build and use a dynamic list parameter. For a more advanced example see the manual cascading slicer example.
STEP 1
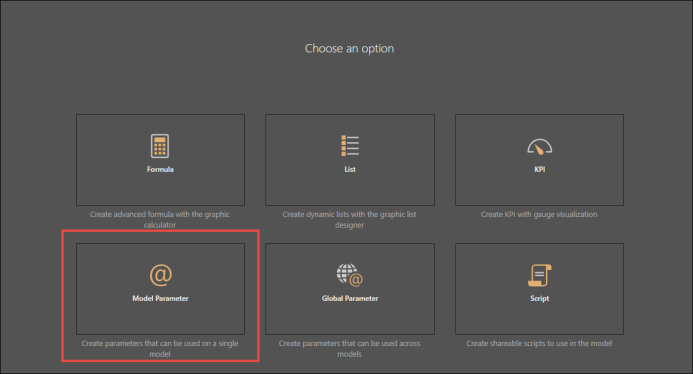
Start by opening the Model Parameter module, and select a data model to work on.
STEP 2. Type
Under Type, select Text, to produce a parameter slicer that will display a list of elements.

STEP 3. Members
From the Select Hierarchies window, open the dimension where your required member hierarchy is located. Click the relevant hierarchy to select it - its elements will appear in the Select Elements window. Select the elements that you want to include in your parameter. If required, you can use the list builder to import and auto-select a list of elements (red arrow below).
You can also select other parameters that have been built using the selected hierarchy. If the Fx button appears, this indicates existing parameters (green arrow). Click the Fx button and find the required parameter in the folder tree.

STEP 4: Selection Mode
Multi Select: allows the selection of multiple elements simultaneously from the parameter slicer
Single Select: allows the selection of one element at a time from the parameter slicer

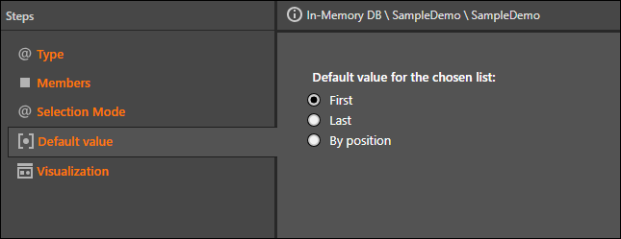
STEP 5. Default Value
Select the default value (where the value will appear within the visual when the parameter is injected into a query) for the selected set of elements.
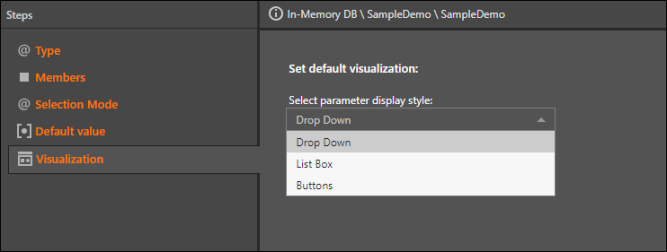
STEP 6. Visualization
Select the visualization type for your parameter slicer. You can choose between a drop down list and a list box. The drop down box is useful if your parameter is based on a large set of elements. Save your parameter.
STEP 7. Open in Discover
To inject your parameter into a new discovery right away, click Quick Discovery button in the ribbon.

Note: the Quick Discover button will only be enabled after saving your parameter.
To access your parameter later in Discover:
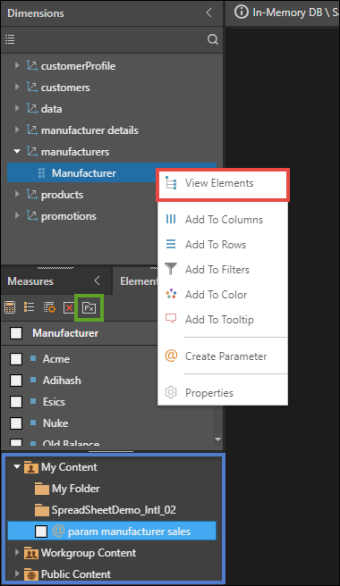
- In the Dimensions panel, find the hierarchy that your parameter was based on. Right click on the hierarchy and click View Elements (red highlight below)
- At the top of the Elements panel, click the Fx button
 (green highlight)
 - Find and select the parameter from the folder tree (blue highlight)
Your parameter will be added to the query as a dynamic slicer. Add any other required hierarchies or elements, and measures to the visual.
