Master Page Templates
- There are two types of templates: cover page templates, and content slide templates
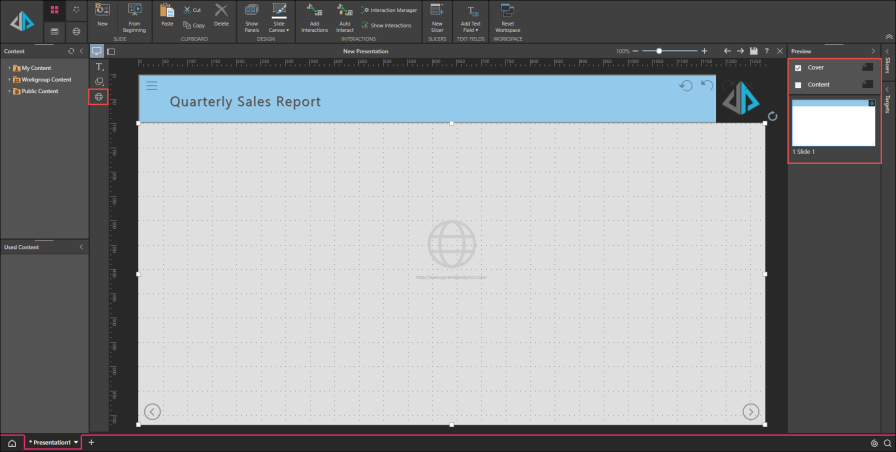
- Ensure that the relevant template type is selected from the Preview panel. Proper selection will be indicated by a blue highlight and ticked checkbox. Red stripes will appear on the workspace background behind the slide canvas.
- Use the canvas menu to add textboxes, shapes and banners, and web assets to the templates
- Add images using the Import Images button in the Home ribbon, simply drag and drop them from their folder location. Hold down the shift key while resizing to maintain the original aspect ratio.
- Set the required slide navigation from the Navigation Options drop down in the Presentation ribbon; you may select arrows, tabs, or drop down navigation. Resize the navigation elements as desired.
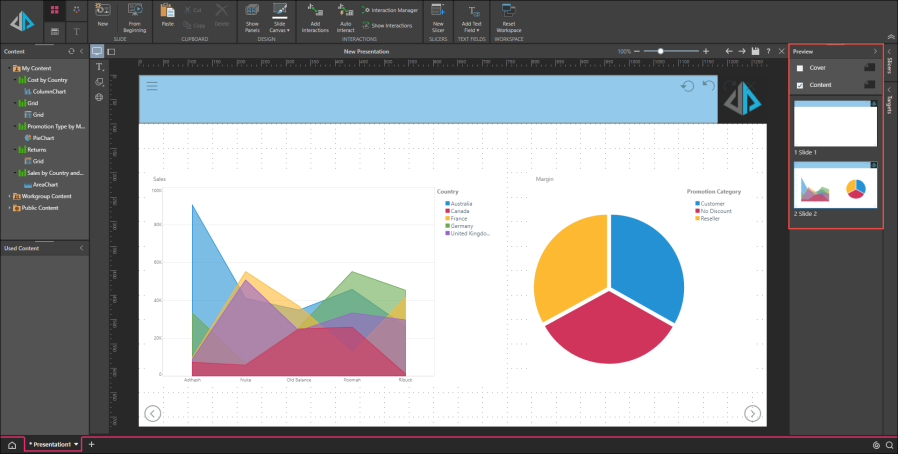
- To apply the template to the content slides, ensure the template's checkbox is selected when working on the slides. To do this, first ensure the content template is properly selected and then click the relevant content slide from the preview panel.
Master pages can be added to themes from the Admin console. This means that when the theme is selected for a presentation or publication, the associated master pages will be loaded. Click here to learn more.
Walkthrough: Build Master Page Templates
STEP 1
From the right-hand Preview panel, select Cover (to configure a cover page template) or Content (to configure a slide template). When properly selected, you’ll see a striped red background behind the slide.

STEP 2
From the canvas menu, add text boxes, shapes, and website embed.

STEP 3
To add a banner, add a square from the shapes menu. Drag the square out into a banner. With the banner selected, open the Component ribbon, and select the required fill and border colors, and border thickness

STEP 4
Add any required text to the Cover page by adding a textbox. With the textbox selected, open the Component ribbon and apply any desired font changes.

STEP 5
Add images by dragging them from their folder location, or clicking Import Images from the Home ribbon.

STEP 6
Add content from the Cover page template to the Content template by copying, selecting the Content template, and pasting.

STEP 7
To apply master page templates to slides, ensure the relevant template is checked, and select the slide. In this example, the web page asset function is used to embed a website on the cover page.

STEP 8
To build the content slides, uncheck the cover page template and check the content template. Add another slide to the presentation by clicking New in the Home ribbon, or right click in the Preview panel and select Add Slide. Ensure the required slide is selected, and add the required visualizations.

STEP 9
When ready, click From Beginning in the Home ribbon to preview the presentation.
