You can change your presentation's canvas size either to one of the available "presets," which are standard sizes, or you can specify a custom canvas size to use for your slides in pixels. As an example, you might want to change your canvas size if you are distributing your presentation into a region where the standard sizes are different or if you are embedding custom-sized output into a web page.
It is important to note that your canvas size does not refer to a fixed size, but to the number of pixels that your canvas includes (width x height). What your presentation looks like on your monitor, therefore, depends on both your selected canvas size and your monitor's resolution (number of pixels in a unit of surface area, such as pixels per inch or PPI).
Note: Sizing always applies to all slides in a presentation. Present Pro doesn't let you resize just one slide within a presentation. Note that this effectively means that all slides in a presentation also have the same page orientation.
Canvas size availability
You can only select or change the Canvas Size for a presentation:
- If you are working on a presentation for a Desktop device.
- If your presentation has a Fixed or Tooltip layout.
Note: These options are initially set when you create a new presentation. You can create different Device options from the buttons at the top-left of the canvas (see green selection, below). For more information, see Devices.
Change canvas size

Note: The Canvas Size drop-down is only available when working with a presentation with a Fixed layout and Desktop device. If your presentation has a Tooltip layout, the Canvas Size button is available on the Design ribbon but it opens the Canvas Size dialog.
From the Design ribbon:
- Select the canvas size you want to apply:
- To apply one of the preset sizes, click the Canvas Size drop-down (yellow arrow) and select the preset size you want to use from the sub-menu.
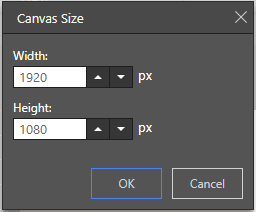
- To apply a custom canvas size, click Canvas Size > Custom (blue arrow). The Canvas Size dialog opens. Specify your required width and height in pixels and click OK to apply your changes.
- Select one of the following master page options for your resized presentation:
- To replace the current master with the master associated with the new canvas size, click Yes, replace. You should select this option if your different canvas sizes have different branding options controlled using masters.
- To stop using the current master, click Yes, delete. Warning: Selecting this option means your resized presentation will lose its old master-driven appearance settings.
- To keep the current master (the master associated with your old canvas size), click No, keep existing. You should select this option if you don't want to change your masters at all, you only want to change your presentation's canvas size.
A Confirm Override dialog opens. This dialog indicates whether or not your new canvas size is associated with a set of master pages in admin ("pre-defined master pages") and allows you to select the masters to use for your presentation once it is resized.
The size of your presentation and any associated master page changes are applied. These changes affect every slide in the presentation.
Preset / Standard sizes
4:3 aspect ratio - Designed for older computer monitors
- 1024 x 768
- 1400 x 1080
- 1600 x 1200
16:9 aspect ratio - Designed for HD and wide-screen displays
- 1280 x 720
- 1440 x 810
- 1600 x 900
- 1920 x 1080
Canvas Size dialog
Tip: You would typically choose to apply a custom size to your canvas if you are embedding custom sized dashboards into a web page. For more information, see Embedding.