Slicers are used to filter queries using hierarchy elements from the data model. Using the Formatting panel and the formatting selection tool, set styling preferences for the slicers to customize the slicer colors, title position, and title icon. This gives you the flexibility to apply your own styling, or make styling changes in accordance with your organization's branding.
Formatting effect at runtime
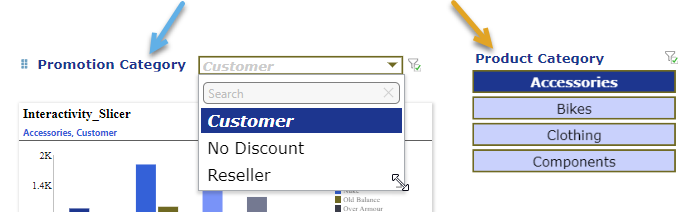
Slicers are most typically single select drop-downs (blue arrow below), but can also be multi-select drop-downs, list and text boxes, buttons (orange arrow below), trees, and calendar tools. When you configure the slicer formatting, you are changing if and where the slicer title and icon is positioned, the text and other formatting associated with the slicer title and elements, and any relevant border options (button borders, drop-down borders, and so on).
Open the Slicer Formatting panel
Slicers are formatted in the Formatting panel. Open the Formatting panel by:
- Clicking the Formatting Selection tool in the Toolbox and then clicking the slicer.
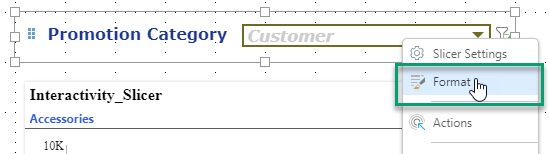
- Right-clicking the slicer and selecting Format on the context menu (green highlight below).
- Selecting the slicer on the canvas, and opening the Formatting panel.
Slicer Formatting Panel
The Slicer Formatting panel comprises three tabs, allowing you to edit formatting for the slicer title, slicer elements, and border.
Slicer Title
The Slicer Title tab allows you to apply formatting changes to the slicer's title, without affecting any other components of the slicer:
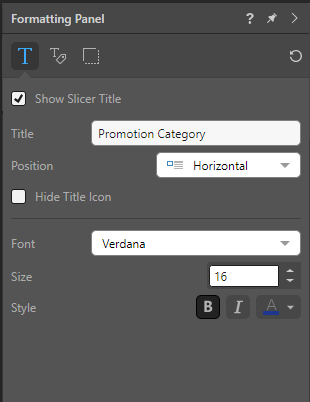
Show Slicer Title
Clear the Show Slicer Title checkbox to hide the title for the slicer. For example, clearing this checkbox for the Promotion Category drop-down (blue arrow above) means that the title "Promotion Category" is not shown alongside the drop-down and that the drop-down itself will take up all the available space.
Title
Position
- Auto: Pyramid will automatically determine the best position for the slicer title, based on the slicer's location on the canvas.
- Horizontal: Place the title alongside the slicer (blue arrow in the image above).
- Vertical: Place the title above the slicer (orange arrow in the image above).
- Hide: Hide the title.
Hide Title Icon
By default, a title icon is located next to the title indicating the current slicer type (blue arrow in the image above). Select the Hide Title Icon checkbox if you don't want to display the icon (orange arrow in the image above).
Font
- Font: Change the font type for the slicer title.
- Size: Change the font size for the slicer title.
- Style: Change the font style for the title; bold, italics, or color.
Slicer Elements
The Slicer Elements tab shows formatting options for the elements within the slicer (the elements in the drop-down list, for example):
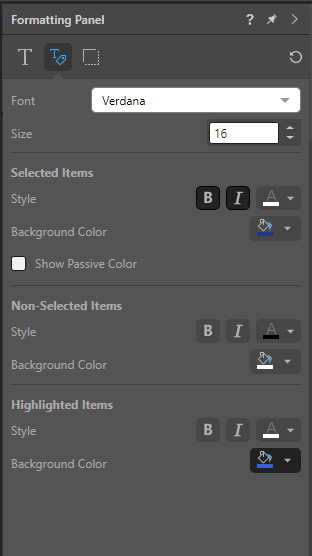
- Font: Change the font type for the slicer elements.
- Size: Change the font size for the slicer elements.
Selected Items
Change the formatting for items that are selected in the slicer (in the preceding examples, Customer and Accessories):
- Style: Change the text style for items that are selected in the slicer; bold, italics, and font color.
- Background Color: Change the background color for selected elements.
- Show Passive Color: (Drop-downs and trees only.) Select this checkbox to use the Background Color (above) for the selected slicer both when the slicer is open and when it is in its collapsed (default) state. Clear this checkbox to only use the Background Color for the selected items in the open drop-down or tree.
This example shows the effect of the Show Passive Color option on two drop-down lists viewed at runtime:
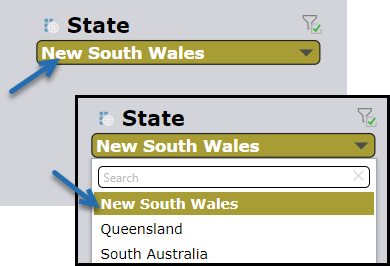
- Where the Show passive color checkbox is selected, the Selected Item Background Color (olive green in this example) is used for both the selected item shown in the slicer when is collapsed and the same item when the slicer is opened (blue arrows):
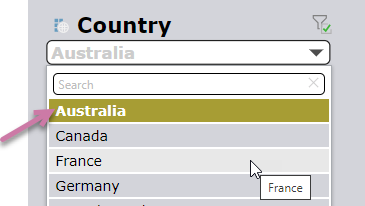
- Where the Show passive color checkbox is not selected, the Background Color is only used for the selected item when the slicer is open (purple arrow). When the slicer is collapsed, the default color is used.
Non-Selected Items
Change the formatting for items that are not selected (in the preceding example, the items other than Customer and Accessories):
- Style: Change the style for all elements in the slicer that are not selected; bold, italics, and font color.
- Background Color: Change the background color for all elements in the slicer that are not selected.
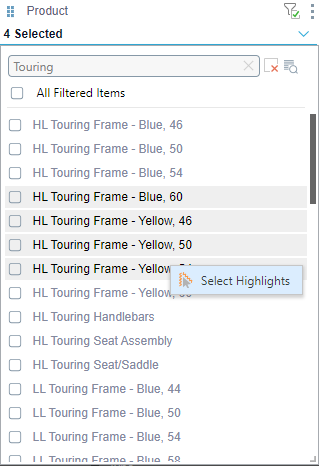
Highlighted Items
Change the formatting for items highlighted in the slicer:
- Style: Change the style for the element that is highlighted by the slicer driving the interaction.
- Background Color: Change the background color that will be displayed for the highlighted element.
The following example shows a multi-select drop-down list with several slices highlighted. For more information about these appearance settings, see Making Slice Selections in the Discover help.
Slicer Border
From the Slicer Border tab, adjust the color and width of the border:
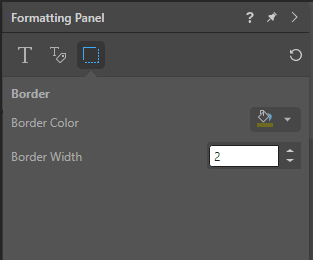
- Border Color: change the color of the slicer's border.
- Border Width: change the width of the slicer's border.
Reset

|
Click this option at the top-right of the Formatting panel to Reset all formatting back to the defaults. |