Targets enable interactions between visuals on different slides in a presentation or interactions that originate externally and are used when launching a presentation programmatically or using a direct link. The two main uses of this functionality are:
- Cross-slide interactions: You can create interactions that use the target to allow cross-filtering between different slides. For example, where runtime users select manufacturers from a visual on a Sales slide to cross-filter the visual on the Returns slide by those same manufacturers. For this type of interaction, the Target mediates the interaction.
- External interactions: You can also reference Targets when you open your presentation from a direct link (URL parameterization) or use the Embed API to open the presentation programmatically, including hierarchy data in the link that initializes your slicers or visuals with specific data.
The following video demonstrates the creation of a cross-slide interaction using targets:
Tip: In addition to the main use cases (described above), you can also use Targets to pass data selected at runtime to other items that are opened using Actions (including tooltip presentations). This enables runtime filtering and highlighting when the action is used. For more information, see Creating Actions in Present Pro.
Cross-slide interactions
You can cross-filter visuals across the presentation, meaning you can pass values from one visual to another across different slides, using Target objects. When the presentation is viewed at runtime, selecting members or using the right-click Interact function on one visual affects other visuals where an interaction has been created between the first visual and a Target, and the Target and the second visual. In this way, the target acts as a "highway" between slides, allowing users to pass selections from one slide to another.
Tip: You do not need to create a Target object to create an interaction between two visuals on a single slide. In fact, if you have Auto Interact enabled, interactions are created automatically as you add your visuals to the slides. You only need to create Targets to mediate the interactions between visuals on different slides or where you want to inject data from external resources when opening presentations using a direct link or programmatically.
- Click here for more information about cross-filtering
Step 1: Create a new Target
With the Targets panel open in Present Pro:
- Click the Plus icon.
- Optionally, right-click Rename Target to open a pop-up and give your Target a meaningful name.
A new target is added with the name Target# where # is the next available number in the sequence.
A new target is created in your Targets list.
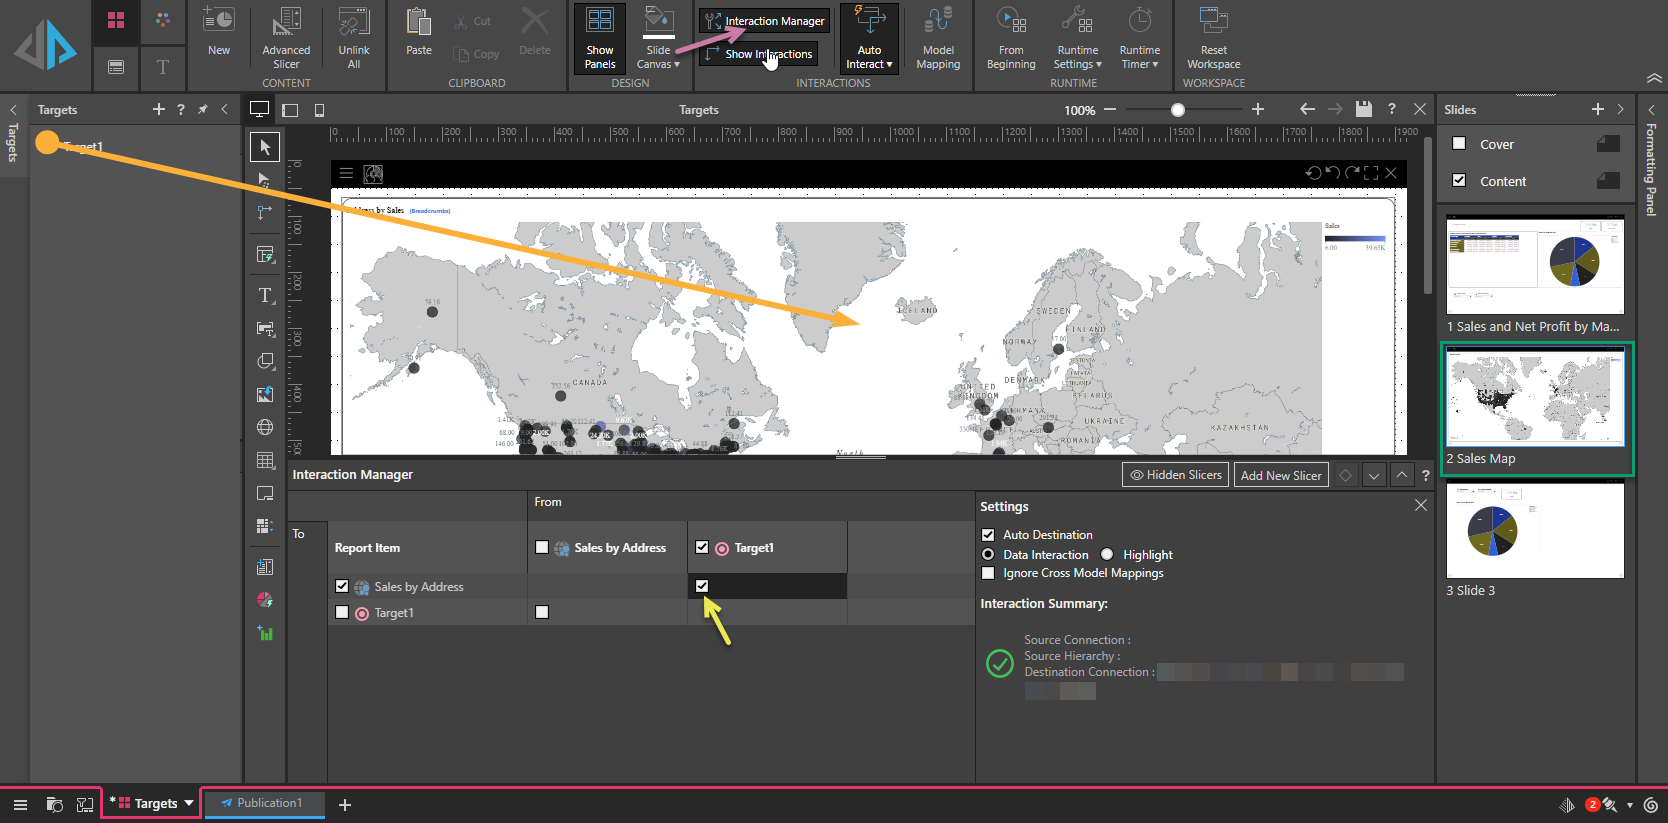
Step 2: Create a visual to Target interaction
You are going to need to create two interactions for your cross-slide interaction to work. This is the first one, creating the interaction between the visual that your user clicks at runtime and the Target object.
With the correct slide open on the canvas:
- Click Interaction Picker in the Toolbar (purple highlight, below).
- Click the visual that you want to drive the interaction, and then drag your cursor to the item that you want to be the target of your interaction.
- Optionally, select the arrow that indicates your new interaction.
As you drag your cursor, a green arrow is drawn. Once you drop, the two items are connected, and the interaction arrow becomes orange; this indicates that the interaction was successfully added.
The Interaction Manager opens. Note: The interaction that was just created, and has been selected on the canvas, is indicated in the following image by the yellow highlight:
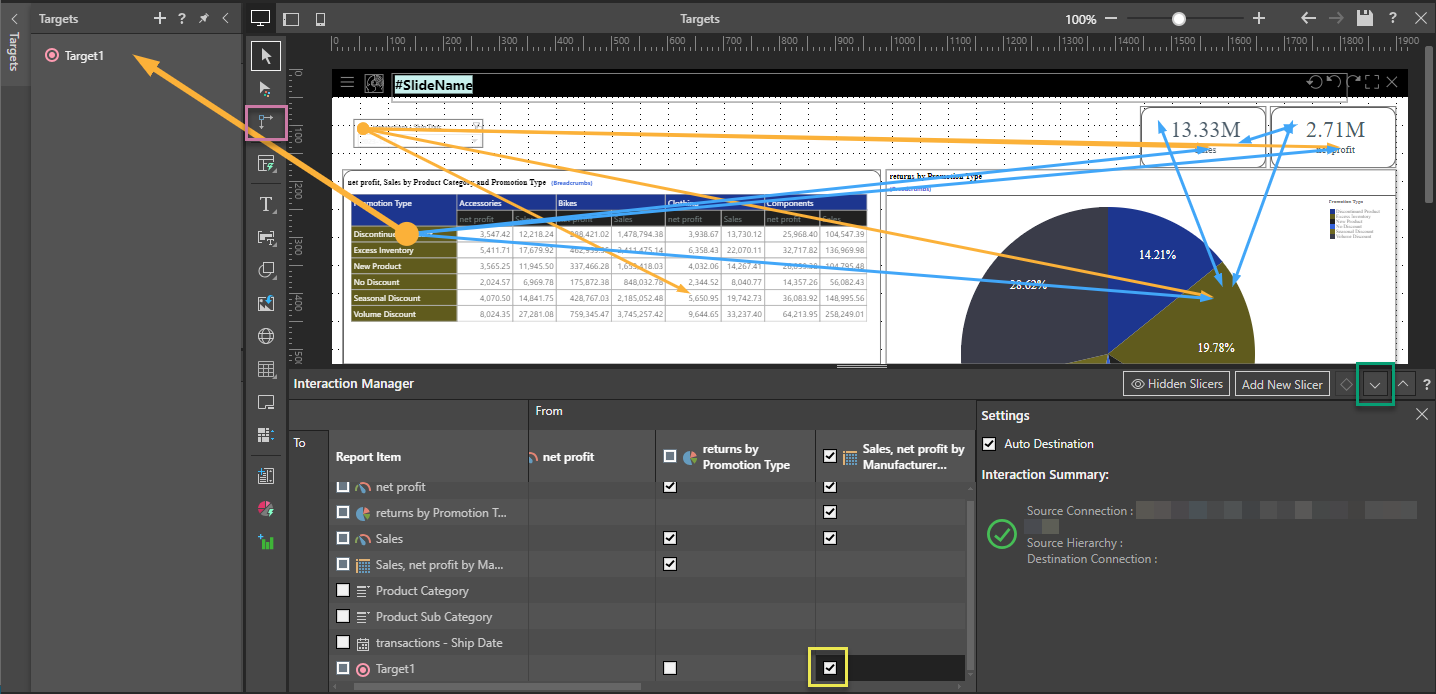
Tip: You can click Minimize (green highlight) whenever you are ready to close the Interaction Manager.
Step 3: Create a Target to visual interaction
This step creates the second interaction, this time linking the Target from the previous step and the visual that you want to be cross-filtered when the source visual is selected. Once this step is complete, the target visual will be filtered in response to selecting members on the driver visual.
- Open the appropriate slide by selecting it in the Slides panel (green highlight, below).
- Add an interaction from the Target to the target visual:
- Click Interaction Manager in the Presentation ribbon (purple arrow).
- Create the link from your Target to the visual by selecting the checkbox on the intersection From the Target and To the visual (yellow arrow).
- Save your changes.
Note: This slide contains the visual that you want to filter with reference to your selections in the source visual.
Step 4: Test that your cross-slide interaction is working
- Launch the presentation at runtime by clicking Run or pressing F2 on your keyboard.
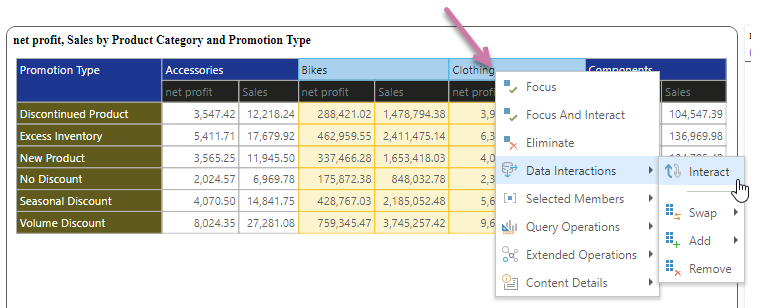
- Run a cross-slide interaction from the driver visual; select the Bikes and Clothing member elements (
Ctrl+clickto select a second element), and then right-click Data Interactions > Interact: - Navigate to the slide containing the target visual.
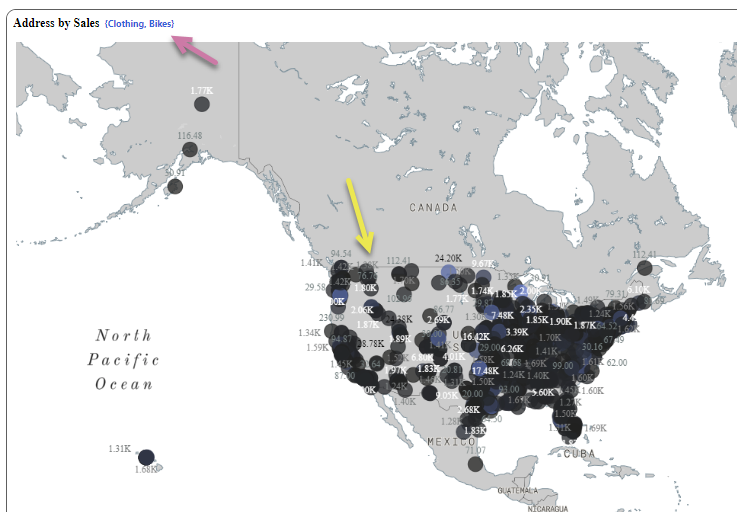
Tip: In the following example, you can see that this visual has been filtered by the selection made in the previous visual, because the subtitle contains breadcrumbs showing the {selected elements} from the source visual (purple arrow). This is only the case where the visual shows a breadcrumbs subtitle. Note that this selection doesn't just affect the subtitle, it is filtering the whole visual (yellow arrow).
External interactions (target parameterization)
Targets can also be used to pass values from external URLs or embedded code to visuals or slicers. This functionality allows developers to initialize the values of targeted items based on how they are opened (or launched). This is called target parameterization and is an extension of direct URL loading or URL parameterization and is also exposed as set of functions in the Embed APIs.
To parameterize a presentation using Targets:
- Add a Target.
- Create an interaction between the target and the relevant visual or slicer.
- Do one of the following:
- URL parameterization: Write or copy the presentation's direct URL link and add to it the presentation's target along with the member elements that should be loaded from the target interaction. You can share these links with others, and, depending on the presentation's runtime settings and the recipient's license type and profile, they can ensure that the recipient has access to the given data only.
- Embedded parameterization: Write JavaScript code to embed content on host page, and then pass a filter item to a named Target, to inject it into the launch of that embedded item when it loads. Click for more on the embedding API, embedded filters, and embedded targets.
Targeting Slicers
You can also target an interaction to a slicer and use target parameterization to load the presentation with a given slicer selection applied. If the slicer has actions attached to it, the Slicer Actions will also be triggered as part of the load.