Use the database manager to manage the Database and set database security.
Tip: This topic describes data source Database management. For information about managing your Servers and Models, see Data Source Servers in the Admin Console and Data Model Management in the Admin Console, respectively.
General
Use the Server Tree on the left to find and select the Database you wish to manage. For more information about Filtering and Sorting this tree, see Server Tree.
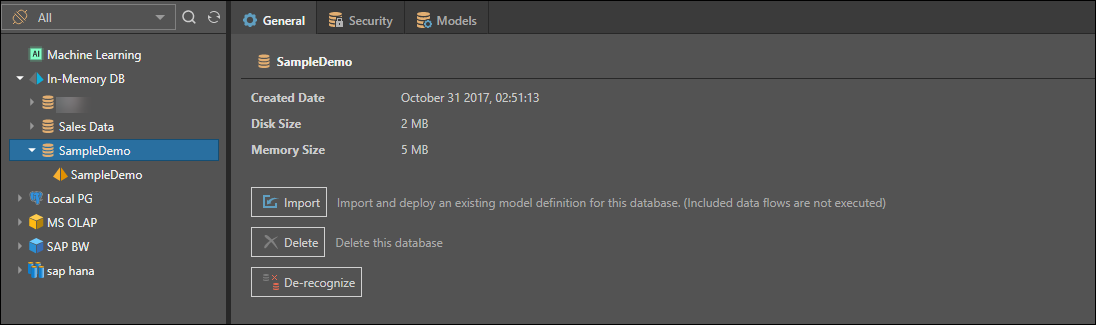
Once the Database is selected in the tree, the General tab shows:
- Import: click to import an exported data model into the selected database.
- Delete: click to delete the database.
- De-recognize: de-recognize the database in the Pyramid repository.
- Audit Trail: show a history of general activities on the database.
The Created Date, Disk Size, and Memory Size will also be displayed if viewing settings for In-Memory Databases.
Security
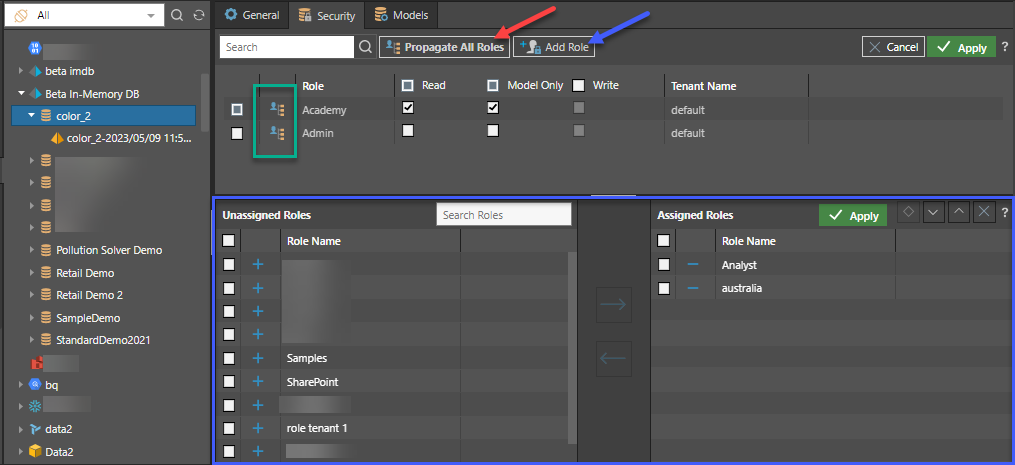
For a given database, select the Security tab to manage access to this database by role.
- Select the roles that should be assigned to the database:
- Read: Users belonging to a role that has read only access will be able to query the database (subject to model specific access)
- Model Only: Users belonging to a role that has Model Only access to the database, have access to existing semantic models and not to the underlying data source the database belongs to. This enables users with restricted data permissions to build data models without having access to the underlying data source.
- Write: Users belonging to a role that has write access will be able to write back into the specific database using the data modeling tools
- You can assign the same role permissions for all of the subordinate models within the server by clicking Propagate Roles button.
- Use the role-specific propagate button to propagate a single role at a time.
- Click Add Role to add a new role to the list. By definition, this will propagate UPWARDS to the server level as well.
Click Apply to save your selections.
Models
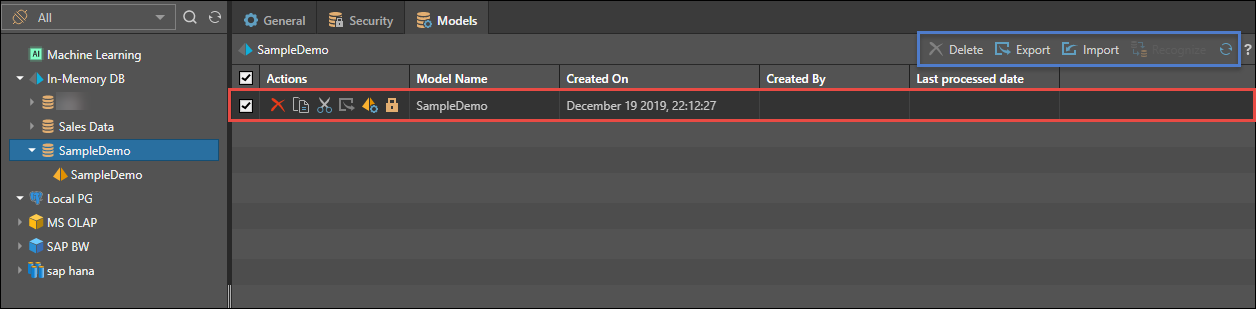
Click the Models tab to see the list of data models attached to the database. For each data model, you'll see:
- Actions:
- Delete: delete the data model.
- Copy to Model: copy the data model to a different database.
- Move Model: move the data model to a different database.
- Export: export the data model to a "pie" file.
- Edit: go to the data model's General tab. This is a shortcut button.
- Security: go to the data model's Security tab. This is a shortcut button.
- Model Name: the name of the data model.
- Created On: the date and time that the model was created.
- Created By: the user who created the model.
- Last Processed Date: the date and time the data model was last processed.
Macro Actions
Users can use the checkboxes in the list to perform bulk actions. Not all actions are available on every database type.
- Delete: delete all the selected models
- Export: export all the selected models
- Import: import a new model definition and attach to this database
Xtender Databases
If you have enabled the Xtender 'database' option for this data source, you will see this extra tab. You simply need to add the alternative database names to be used for this primary database for each tenant. As users connect from their respective tenants, the queries will be redirected to these alternative databases instead of the original.
If no database name is supplied, the connection reverts to the original primary database name.
The Xtender engine is licensed separately.