Analyst users can create and edit schedules for publications using the Schedule Manager. Publication schedules are used to build publications and distribute them through the Bulletin Board, using email, or to a distribution location on an external File System.
Note: This topic describes the CMS view seen by Analysts. Pro users can additionally schedule Models. For more information, see Scheduling for Pros.
Opening the Schedules View
To view the Schedules associated with one of your content items:
- Select the content item in the Content Explorer.
- Open the Schedules panel for the content item:
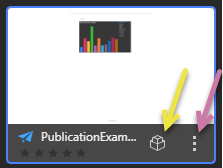
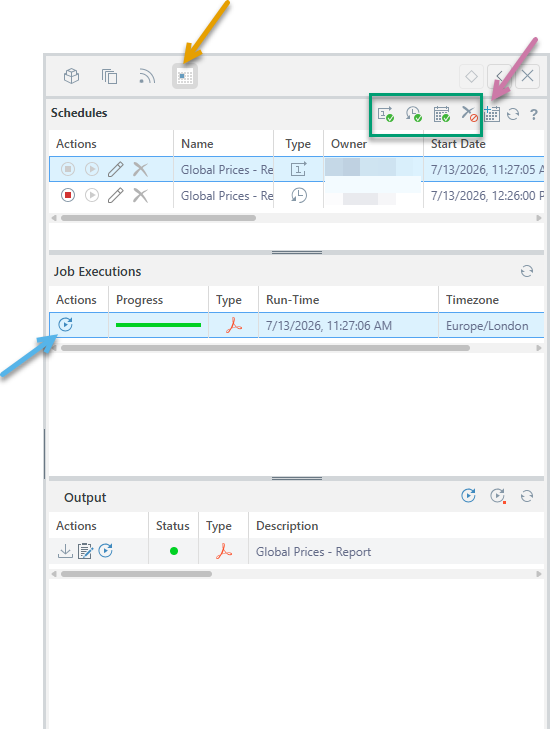
- Click Metadata (yellow arrow above) and, from the top of the right-hand metadata panel, select Scheduling (orange arrow below).
- Click the Ellipsis to open the context menu (purple arrow) and select Actions > Subscriptions.
Note: You are viewing Schedules that are associated with a particular publication in this view. To view and interact with all your subscriptions or scheduled items, see Schedule Manager for Analysts.
The Schedules view opens to the right.
Note: The schedule tools can only be viewed for one content item at a time. If multiple objects are selected in the content manager, the schedule options are unavailable.
Schedules View
The following example view shows the Scheduling for a publication:
- Schedules: The top panel, visible by default, displays all current schedules.
- Job Executions: The middle panel appears when a schedule is selected in the top panel. It displays jobs that are created each time a schedule is run.
- Output: The bottom panel shows output files (such as PDFs, Word documents, and so on) related to the selected job execution.
See below for more details.
Schedules
When you open the Schedules panel, you'll see a list of schedules associated with the selected publication. By default, only "live" schedules are shown. These include active recurring schedules and one-off schedules that are pending or completed within the last 24 hours.
Schedule Filters
Toggle the following options (green highlight above) to show and hide schedules based on their current status:
- Expired one offs: Show or hide non-recurring schedules that have expired.
- Inactive recurring: Show or hide recurring schedules that are no longer active.
- Inactive on demand: Show or hide on demand schedules that are no longer active.
- Deleted: Show or hide deleted schedules.
Note: All of the preceding filters are "hidden" by default.
New Schedule
 Click New Schedule (purple arrow above) to create a new schedule for the publication you currently have selected in the CMS. For details of the schedule creation settings, see: Scheduled Publishing in Publish Pro.
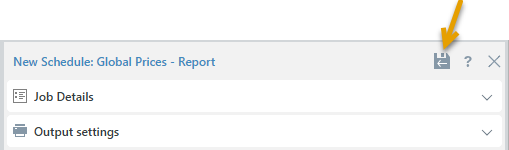
Once you have completed all details, you will need to click Save & Close (orange arrow below) to create and launch your Schedule.
Tip: The same panel opens when you choose to Edit an existing schedule. Note that when you are editing a schedule, there is one additional button alongside Save and Close that allows you to toggle between basic and advanced settings.
Schedule Rows
The top panel displays a table of existing schedules for the selected item, you can:
- Use the Action buttons to start, stop, edit, or delete the schedule.
- Select the row to view its job executions in the Job Executions panel. Note that these are instances when the schedule was run in the past.
Job Executions
The Job Executions panel displays a list of jobs that were created each time a schedule was run. (The job executions are for the selected schedule.)
Each job execution has the following columns:
- Actions: Option to re-run the entire job.
- Progress: Shows the job's progress, including the percentage and status of individual tasks:
- Blue: Tasks waiting in the queue. You may want to refresh the view when you see this status.
- Red: Tasks that have failed.
- Orange: Tasks currently processing.
- Green: Tasks completed successfully.
- Type: The file output type (relevant for publications only).
- Run-Time: The date and time the job was executed.
- Timezone: The timezone that the job was executed in.
Outputs
Each job produces one or more outputs, which are shown in the bottom panel. The outputs from publications are each of the rendered reports - and usually there are multiple rendered output types.
You can view the output of a specific job execution by clicking on the job.
The Output panel displays the results of job executions. (The outputs are for the selected job executions.) Each output entry includes the following columns:
- Actions: Download the output file, view the Print & Export Summary, or re-run the specific task.
- Status: Indicates the result of the output task:
- Red: Task failed.
- Orange: Task partially failed.
- Green: Task completed successfully.
- Type: The output file format (for example, PDF, Word, or Excel).
- Description: The name of the scheduled job.
- Start Date: The date and time the output task began running.
Above the list, there are buttons in the header to rerun all tasks (which is the same as rerunning the entire job as described above) or rerun only those tasks that failed.