It's important to re-process your lite model to ensure that the data in the materialized model is up to date. Depending on your data source type, you can set up a processing schedule to rerun the model on a regular basis. The model can be rerun or scheduled from within the definition file, or from the content manager.
Reprocess from the Definition File
To reprocess the model from the definition file, find the file in the content explorer (by default, it's saved to your My Content folder) and open it in Model.
Manual Reprocessing
To manually reprocess the model:
- Click the Run button in the top left corner of the interface (green arrow below):
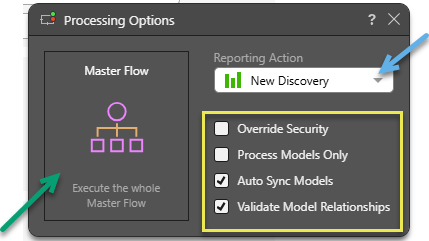
- Select the Reporting Action you require:
- Select the processing options to apply:
- Override Security: Override the metadata security set from the Admin Console or the Materialized Manager. Disable if metadata security should not be affected by processing the data model. Click here to learn more.
- Process Models Only: Only process the models. Do not process the Data Flow or Master Flow.
- Auto Sync Models: Synchronize the columns in the Data Model with the columns in the Data Flow; this is important where changes were made from the Data Flow.
- Validate Model Relationships: Check that the join definitions between tables are valid. The validation process may impact model processing time, so, although the validation is enabled by default, it can be turned off if needed.
- Click here to learn more about processing.
- After setting the processing options, click Master Flow on the left (green arrow) to process the model. The model will begin reprocessing, and you can view its progress in either the Progress panel or the Job Spooler.

The Processing Options dialog opens:
Choose which module the new data model should be opened in: Discover, Smart Discover, Smart Publish, or Smart Present. The data model opens in the given reporting tool as soon as processing is complete. If you don't want any reporting tool to open automatically, select None.
Scheduled Reprocessing
New Schedule
Create a processing schedule by clicking Schedule from the ribbon to open the scheduler, where you can select the New Schedule option to begin the process.
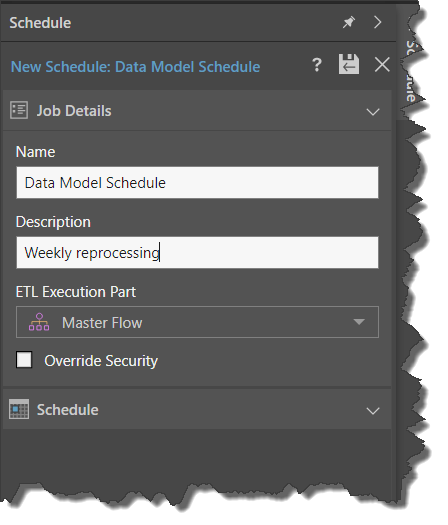
Job Details
Name the scheduling job and add a description, then select which part of the Data Flow should be reprocessed (either the master flow, or only the model).
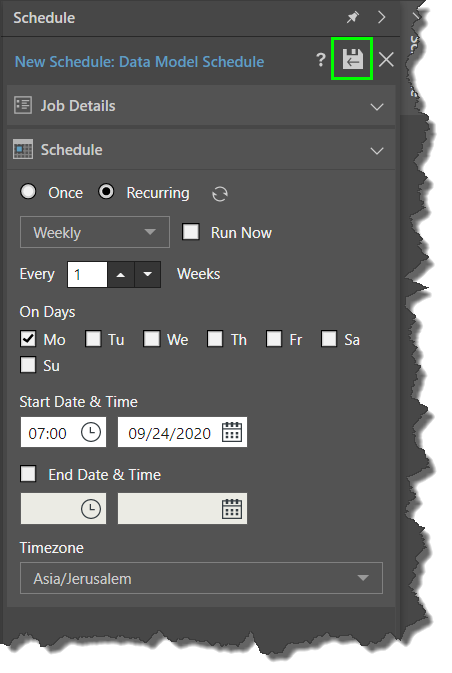
Schedule
Configure the schedule. You can create a one-off schedule, or a recurring schedule.
Once you've defined the schedule, click Save & Run (green highlight below), and then be sure to save the model file.
- Click here for step-by-step instructions for building and editing model schedules.
Reprocess from the Content Manager
You can reprocess the model directly from the content manager, without opening the definition file. To do this, find the file and open its Actions panel, then click the Scheduling icon. Click the New Schedule icon to define a schedule for the model.
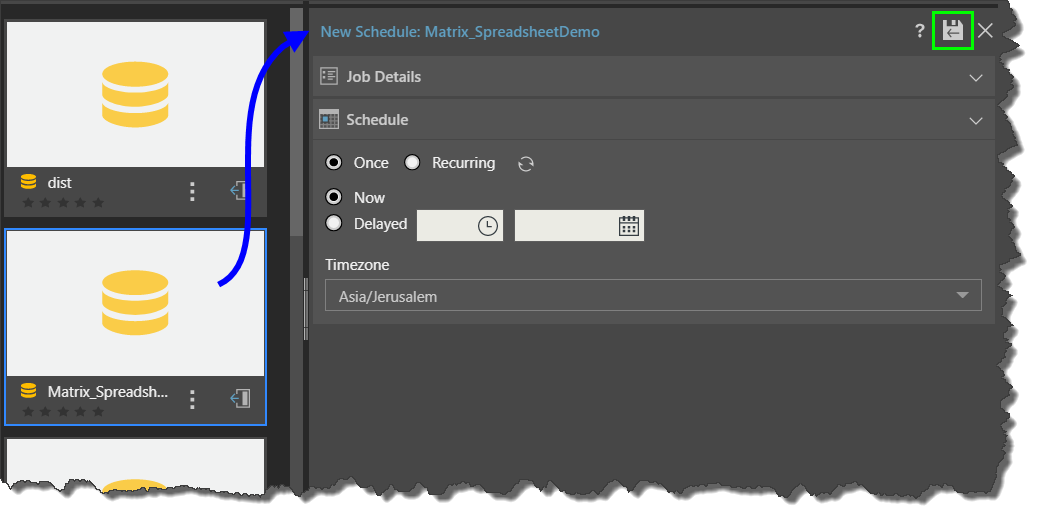
Using the schedule, you can reprocess the model on a one-off basis (either immediately or at a later date or time), or on a recurring basis.
Finish by clicking Save & Run (green highlight above) to commit the schedule.
- Click here for documentation on scheduling from the content manager.