Building a new smart model is a simple and fast process, involving importing the file data source to the Smart Model wizard and setting a few preferences, like naming the model, selecting the server destination.
Opening the Smart Model Wizard
The first thing you need to do when creating a Model is to open the Model page:
- Click Model in the App Toolbox at the far-left of your Home Page.
- Click + > New Model from the App Tabs along the bottom of your page.
- In the Content Explorer, navigate to the folder you'd like to create a new Model in and right-click New Item > New Model from the background context menu. For more information, see Content Management Actions for Pros.
Creating your Smart Model
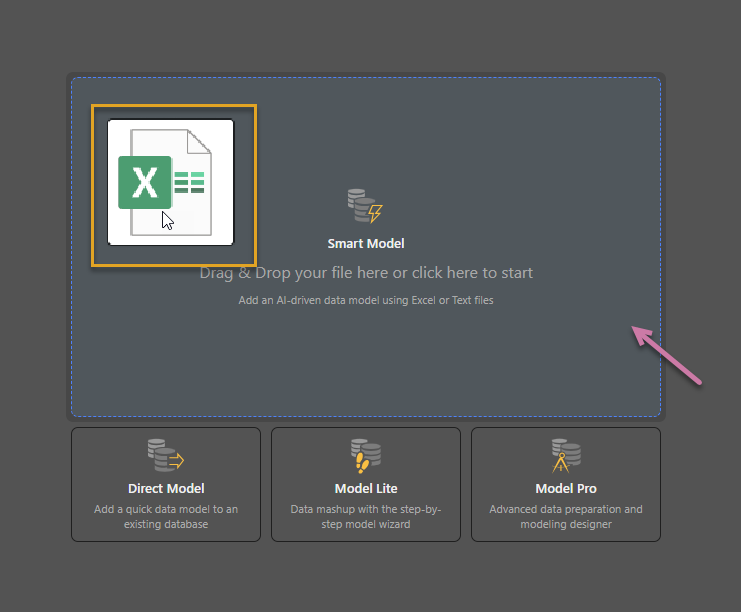
To use file data as a data source, you can do either of the following:
- Drag the file from its folder location (orange highlight below) and drop it onto the Smart Model target.
- Click the Smart Model target (purple arrow) to open the Open dialog, then find and select the file data source from its folder location.
Once the file source has loaded, configure the new model in the Smart Model wizard:
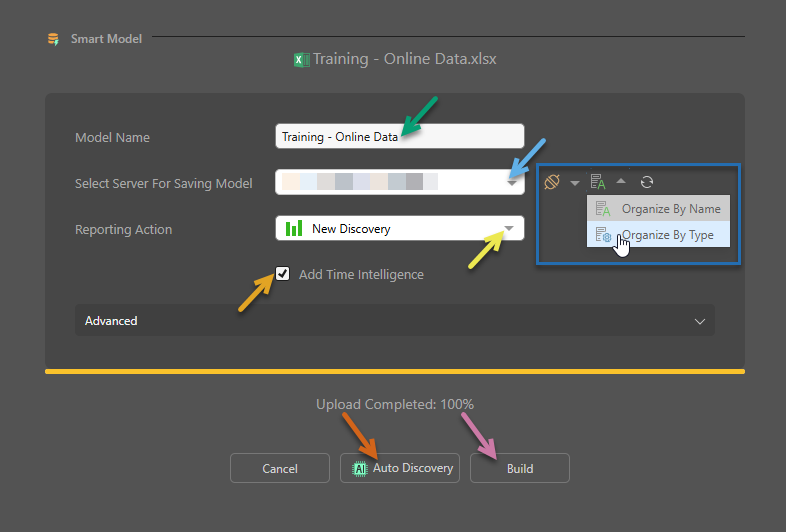
Model Name
By default, the file name is loaded as the model name, but you can change the name here (green arrow above).
Select Server for Saving Model
You must select a server destination for the new model. This is the server where the model should be stored and is selected from the servers dropdown list (blue arrow), which displays the servers that have been configured by the admin. Your new data model will be stored on the selected server.
Filter and Refresh the Servers
Filter the Server dropdown list using the options to its right (dark blue box):
- Use the Data Type dropdown list to limit the list of servers to only those of the selected type. In the example above, All has been selected so the Server dropdown list includes servers of all types.
- Use the Sort By dropdown list to organize the list of servers by name or by data source type.
Click Refresh to refresh the list of servers.
Reporting Action
Select the default reporting action that should occur immediately after building the model (yellow highlight above). This can be New Discovery, Smart Discover, Smart Present, or Smart Publish.
Time Intelligence
Select this option to generate time intelligence columns from an existing date/time column (orange arrow above).
If the data source includes a date or date/time column, time intelligence functionality can be enabled to automatically generate time intelligence columns. Time intelligence columns are made up of logical date/time groupings, like weeks, quarters, months, and years. Adding time intelligence to the model enables users to add those columns to queries later on, and to build advanced date/time calculations in the Time Calculation Wizard.
Pyramid automatically organizes time intelligence columns into a dedicated folder in the data model, and creates 'regular' hierarchies from the time intelligence columns. These hierarchies enabled drill functionality in the query in Discover and Present.
Process the Model
To generate the new model there are two options:
Build
Choose this option (purple arrow above) to build the data model; it will be opened in Model (where you can make edits to the model, set security, schedule processing, and more), and in Discover, where you can build discoveries.
Auto Discovery
Auto Discovery (brown arrow above) is an augmented analytics discovery tool for auto-analyzing your data and producing machine-built analyses and visualizations. It is used to find interesting correlations and patterns in the data, and to show views of data that you may not discover on your own. When Auto Discover is run on the model, Pyramid uses a range of machine learning tools and algorithms to produce a series of discoveries, which are displayed in a presentation.
To create an auto discovery, click Auto Discovery. The Auto Discovery dialog opens (image below), and you can set the location for the auto discovery to be saved.
- Choose a parent directory: Select the parent folder for the auto discovery from the dropdown list.
- Enter new folder name: Specify a folder name for the output of running auto discovery. The auto discovery output will be saved to this dedicated folder within the given parent directory. By default, the model name is used as the new folder name, but you can change that using this field.
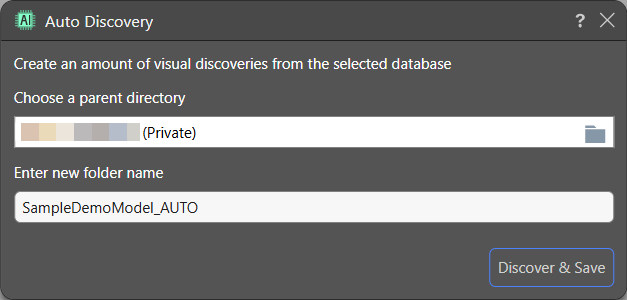
After clicking Discover & Save, the model and Auto Discovery are built. The data model is opened in both Model and Discover, and the progress of the Auto Discovery can be monitored from the Job Spooler.
- Click here to learn about Auto Discover.