Once you have created a presentation in Present Lite or Present Pro, you can save it either to your own personal folder or to folders that you share with other Pyramid users. Present offers all the typical save functionality including Save, Save and Close, Save all open items, and Save as, as well as advanced options like Save as version if you want to track changes to the presentation over time, and Make shareable to save formerly one-off items into the Content Manager.
Note: The Save and share functionality is the same across all of the Pyramid apps. For more information, see Saving Content.
Tip: In addition to the save options described in this topic, you can also save one-off items on your presentation (visuals, illustrations, and so on) to the Content Manager using the Make shareable right-click option.
Save and Save as
The basic save options are:
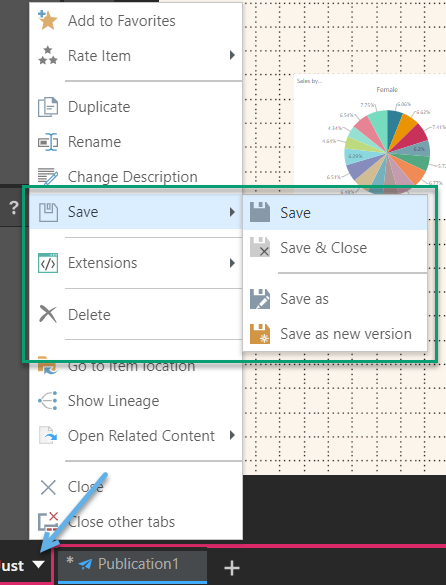
- Click the Save icon in the status bar.
- Open the App Tabs menu and select one of the Save options:
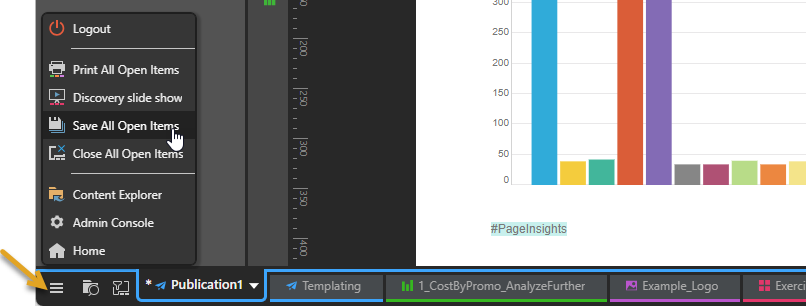
- If you want to save multiple open items, open the Home menu and select Save All Open Items. This saves all open items.

Note: The option to Save as new version allows you to create a new version of an existing item. The purpose of this advanced function is to allow you to perform change management functions, including tracking changes over time. For more information, see Save as new version.
If you select Save as, or select Save where the item has not previously been saved, the Save as dialog opens. You need to navigate to and select the save location for your item.
Save as dialog
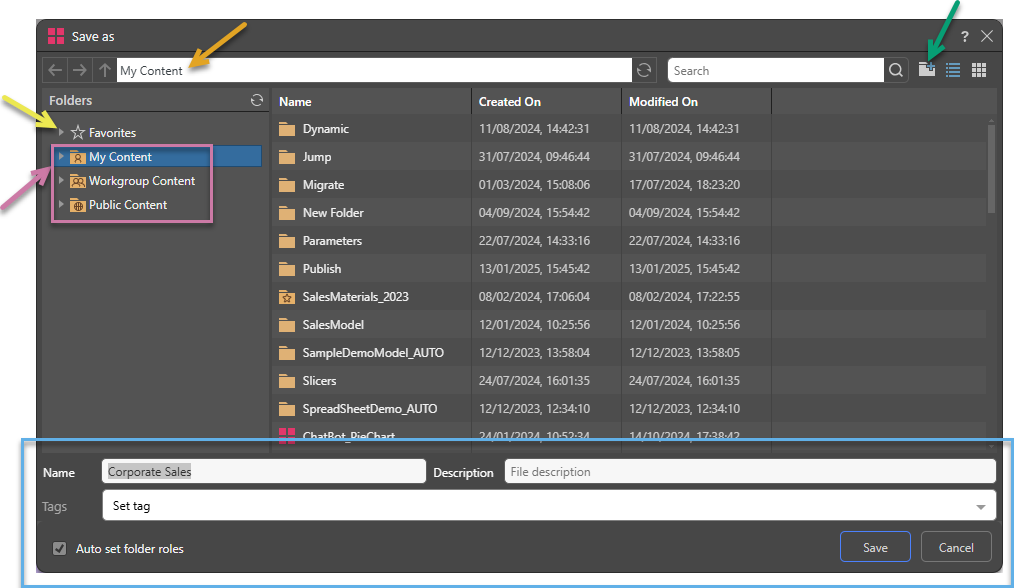
The Save as dialog opens when you either save an item for the first time, or are choosing to save an item with a new name or to a new folder:
Folders
The Folders panel contains a Favorites shortcut (yellow arrow) and the folder tree (purple highlight). Navigate through the tree and select the folder that you want to save your item to.
Favorites
Use the Favorites option to access those folders that you have flagged as "Favorites." The Favorites option is not a folder; it is a shortcut that allows you to go to your most used or preferred folders without having to navigate the tree. When you access a Favorite folder in the Save dialog, you are saving the file to the location in the tree that you flagged as a favorite.
- Click here for more information about Favorites in the Content Manager
Folder Tree
You can choose where to save your content to in the folder structure. You are presented with those folders that you have WRITE access to. Once inside the folder tree, you can also access the folder navigation bar (orange arrow above) to more easily move around and add new folders to the tree on the spot (green arrow above).
- My Content: The content in this domain is private. You should save to this folder when you don't want to share your content with others yet. Note that Admins will be able to see this content.
- Workgroup Content: Group content is made READ and WRITE accessible to other users who share your security roles. Note that full write permissions are granted to users with access to the Workgroup folder.
- Public Content: Public content is made accessible to all user roles DEPENDING on the role security of the folder or item.
- Click here for more details about the folder structures
Metadata
- Name: The item name.
- Description: A description of the item to help you and other users to understand its purpose and use, now and in the future.
- Tags: Add metadata tags for the search facility. Tagging helps users to find content items in the content system. For more information, see Content Tagging.
- Auto set folder roles: When saving an item into the public folder, role access is assigned automatically. You can override this default setting by clearing this checkbox and specifying role access details. For more information, see Assigning Content Access.
Saving at runtime
If you are viewing a presentation at runtime, you can interact with its visuals using the Chatbot or in Discover Lite (opened using the Analyze further tool), and then save those updated visuals to your My Content folder from the Analyze Further tool.
- For more information, see Analyze Further.
Closing Unsaved Items
You can close items at any time without saving them to the content system. When you close the unsaved item, you are prompted with a warning dialog:
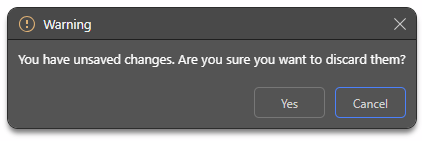
- Click Yes to close the app and discard any unsaved changes.
- Click Cancel to continue working.