To enable content migrations between Pyramid instances using the Migration Wizard, your administrator must first set up details of those instances as Migration Destinations in the Admin Console. You should do this, for example, if you're using SDLC and you want to easily migrate content between your test, dev, and production instances.
Important: The Migration Wizard is only available to Enterprise Administrators with the Enterprise Edition of Pyramid. For more information, see Pyramid Licensing.
About this Feature
Pyramid supports the classic Software Development Life Cycle (SDLC) methodology, where content is developed on one Pyramid instance (dev), shifted to a testing instance (test), and then pushed to a final production Pyramid instance. If you want to use this methodology and are going to use the Migration Wizard to migrate your content between instances, you need to set up your Migration Destinations to push the content to.
The options for migrating content between instances are:
- API programmatic Export / Import: Use the REST APIs to import and export content.
- Manual Export / Import: Use the context menus (right-click import and export) in the Content Management System to manually move files.
- Migration Wizard: Use the Migration Wizard in the Content Management System to migrate files. To be able to use the Migration Wizard, it is necessary to follow the steps in this topic to configure Migration Destinations using the Admin Console.
Open the Migration Destinations panel
Your Migration Destinations are set up by an Enterprise Administrator in the Admin Console at Content > Migration Destinations.
When you are either creating a new Migration Address or when an item is selected in the top panel, this page is split into two panels:
- The top panel contains the list of existing Migration Destinations.
- The bottom panel allows you to view, create, edit, and test the address details for the destination that is either being created or is selected in the top panel.
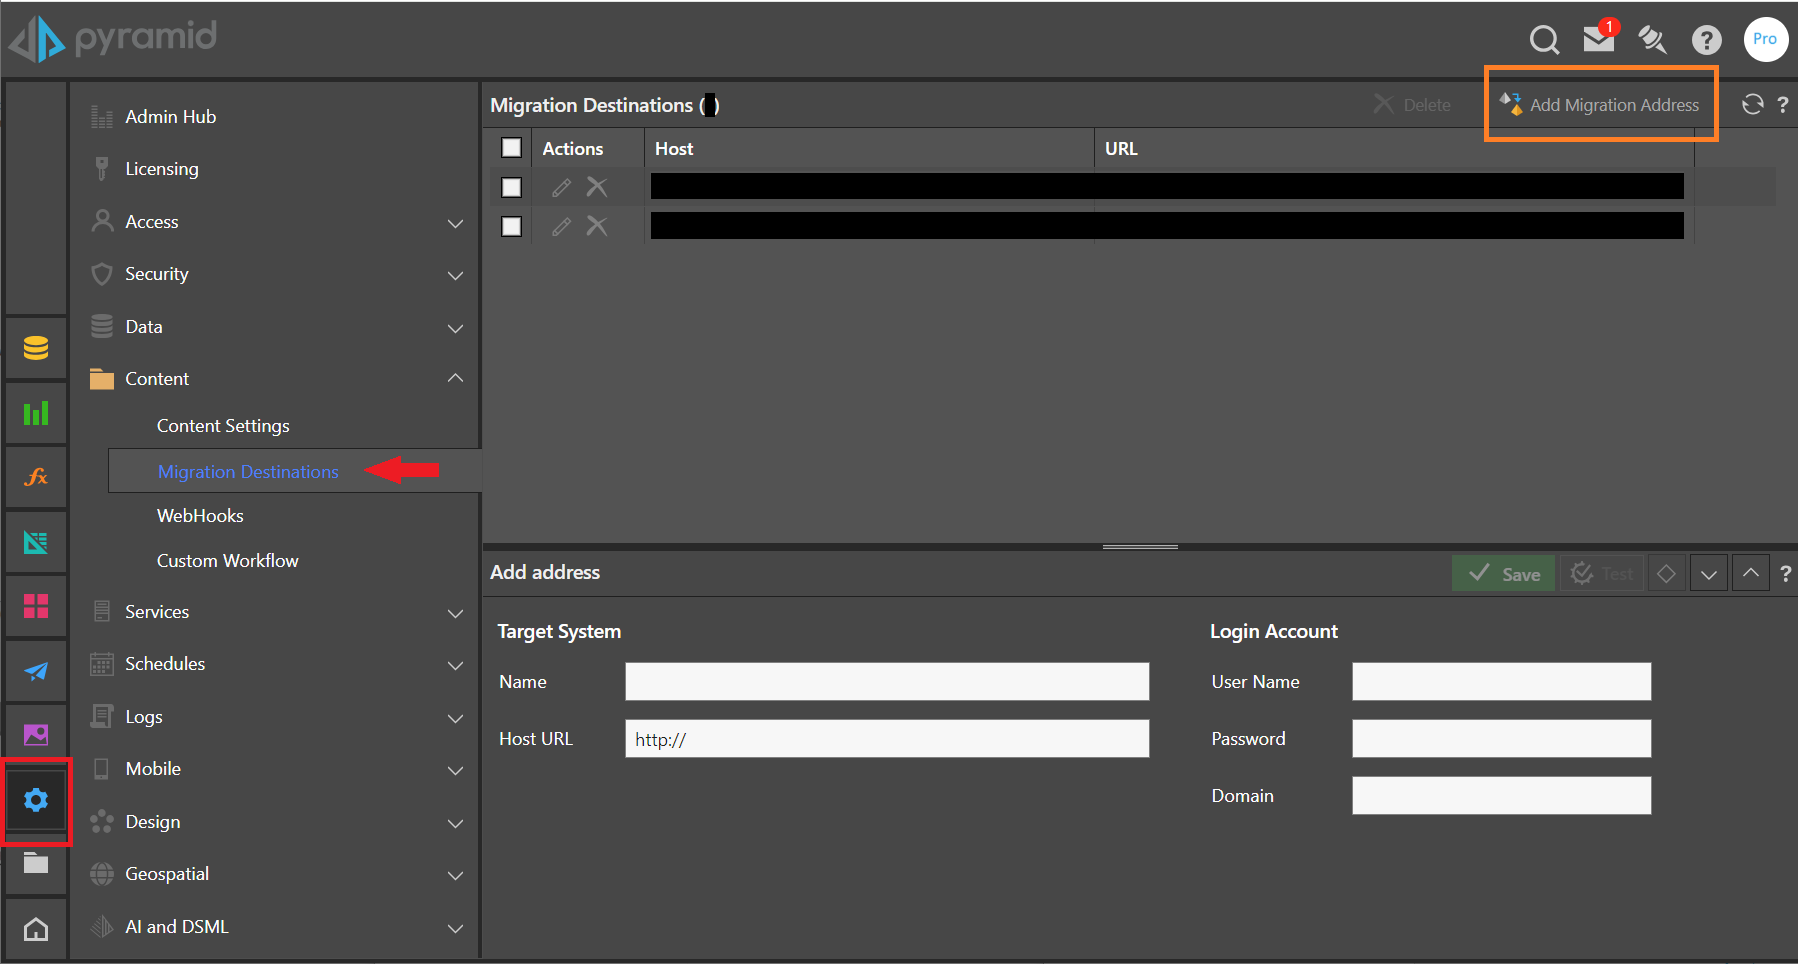
Setting up Target Destinations
To setup a migration destination that can be used with the Migration Wizard:
- Click Add Migration Address (orange highlight above).
- In the Add Address panel, supply the following details:
- Name: A recognizable name for the destination.
- Host URL: The URL for the Pyramid instance that will be the target of the migration. Be sure to use the HTTPS prefix if the destination is SSL secured.
- Login Account: Provide details that will be used to auto-login to the destination to retrieve the target's folder structure.
- Note: If the target system uses Active Directory, provide the NetBios domain name.
- Click Test to confirm that the connection works.
- Click Save to create your Migration Destination.