Waterfall charts allow you to display a running total for a given data point as values increase and decrease over time.
Watch these two videos to learn how to build waterfall charts.
Building a Waterfall Chart
Before you begin
Create a new discovery from the User Hub, App Tabs, or on the right-click in the Content Explorer. As part of this process, you will need to open the appropriate Data Model for your analysis. For more information, see Access Discover Pro.
Step 1: Create your Basic Visual
To set up the basic visual:
- Add the hierarchy to the Categories zone.
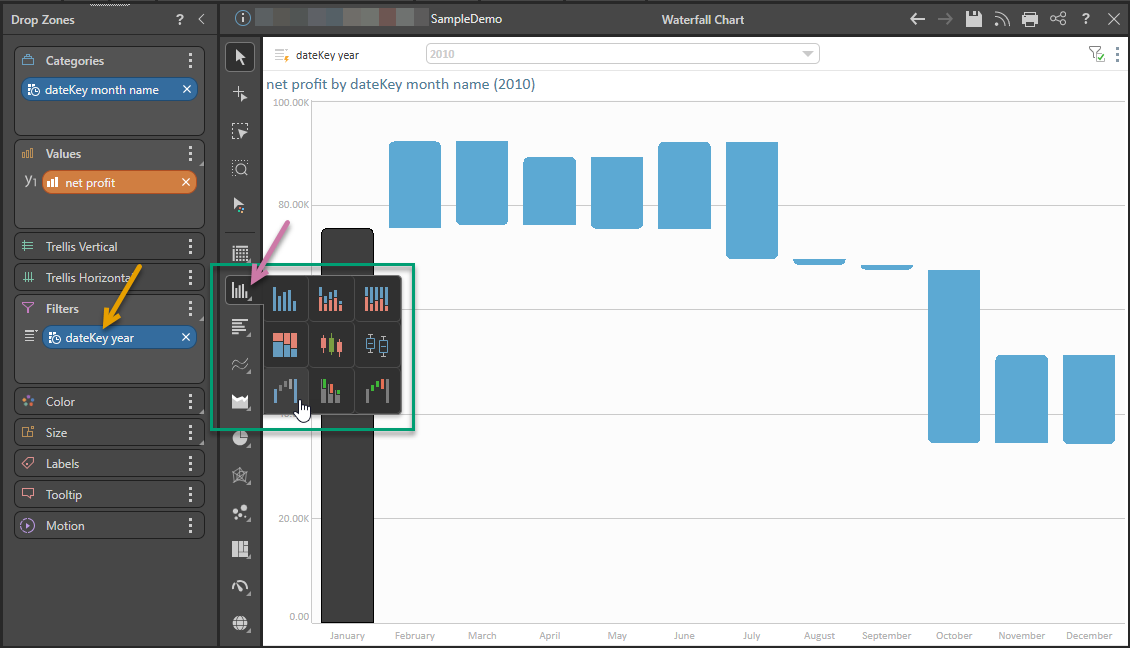
- Right-click Column Chart > Waterfall Chart from the Toolbox (purple arrow below).
- Add the measure to the Values zone.
Double-click the dimension in the Dimensions panel.
Tip: This submenu option may also include the IBCS Waterfall chart.
Double-click or select the measure that you want to add in the Measures panel.
For example, add the Month Name time dimension to the Categories drop zone, then the measure Net Profit to the Values drop zone. The following example also includes a Year Filter, which is added by right-clicking the Year dimension in the Dimensions panel (orange arrow) and selecting Add To > Filters.
Step 2: Add Color Logic
At this point we can add color logic to the given measure, to make the chart more meaningful:
- Create a second "orange chip" that is a custom measure chip representing differences between values in the chart that you want to visualize using colors.
- Drag the new custom measure chip to the Color drop zone and drop it onto the appropriate secondary menu.
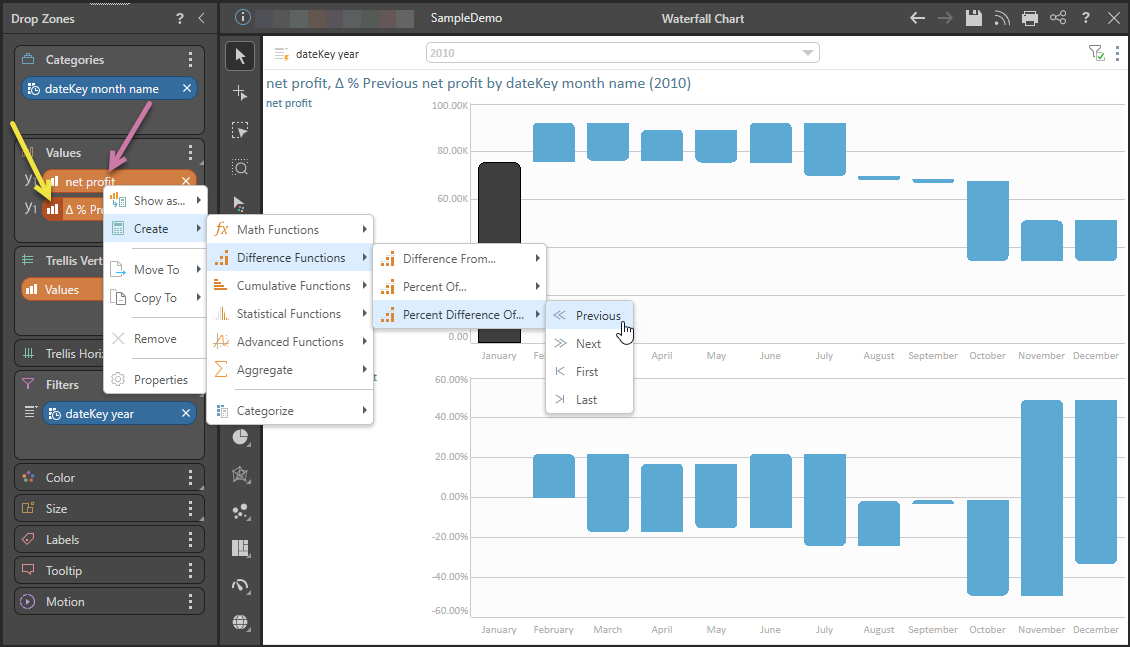
In the following example, the net profit chip (purple arrow below) is right-clicked, and a Difference Function is created that shows the difference of each data point to the previous data point as a percentage (Percent Difference Of... > Previous). For more information, see Context Calculations.
This action creates a new custom measure chip (yellow arrow) representing the difference function.
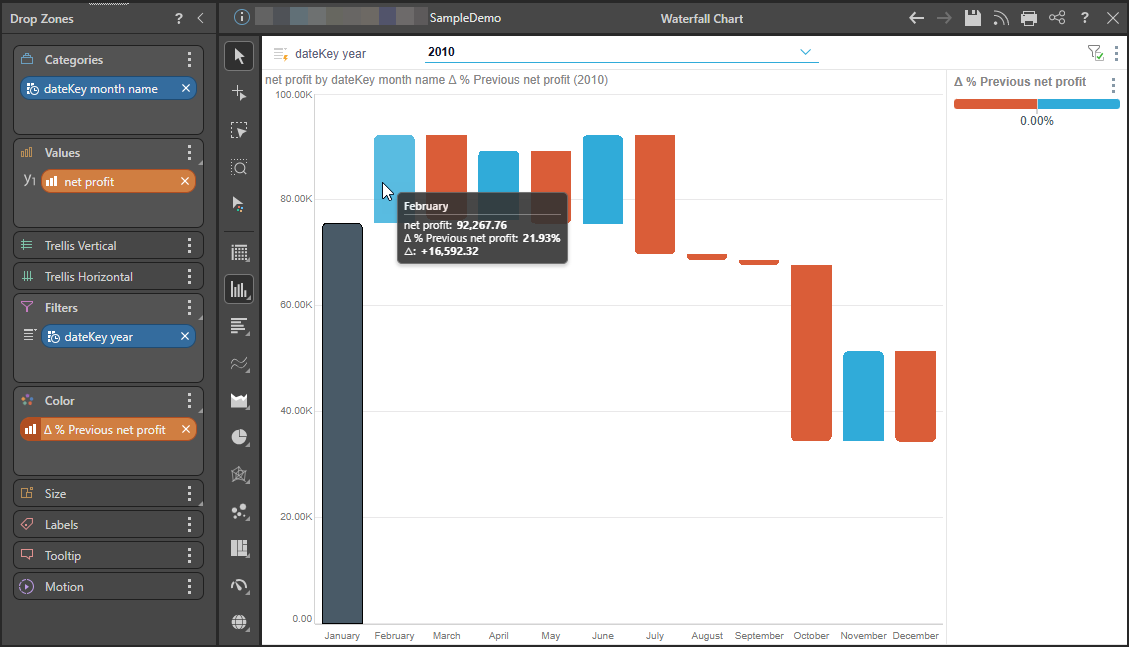
In the following example, the chip is dropped onto the Positive Negative option. Accordingly, the chart is color coded so that each bar displays the percentage difference from the previous bar. Increases are shown in blue, while decreases are shown in red as described in the legend.
Tip: Hover over the bars to see the exact percentage difference and value in the tooltip.
Related information
Quick Styles
Waterfall Quick Styles are preset formatting options that let you change the look and feel of a Waterfall chart with one click. Applying a Quick Style updates multiple settings at once, including data point transparency, data labels, and legend placement.
- Click here to learn more about Waterfall Quick Styles