The Pivot node is used to convert tabular format grid (generally referred to as a table or list) into a cross tabulated grid (often referred to as 'crosstab' or matrix grid). Cross tabulation is used to organize and aggregate raw categorical data into a grid format, which is useful for comparing and analyzing data. If your source data contains tabular data, as is often the case with databases; and you need to convert these to a matrix grid, this is done with the 'Pivot' node.
How to Pivot a Table
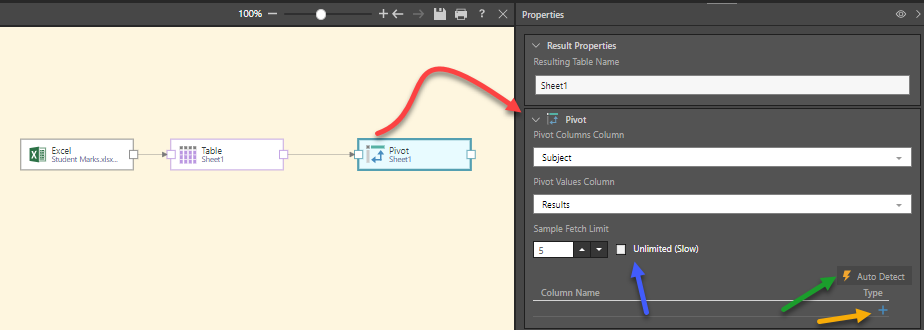
Connect the Pivot node to the table node containing the tabular grid. Go to the Properties panel to configure the node:

- Pivot Columns Column: Select the column to be used as the matrix column. This means that the values in this column will become column headings in the matrix.
- Pivot Values Column: Select the required values column (measure) that will represent the values in the matrix.
- Sample fetch Limit: Define the sample size to be used when fetching data from the table. The more rows chosen will result in a more accurate result, but will take longer to run.
- Unlimited (Slow): Select the unlimited checkbox (blue arrow) to fetch all rows of data for the sample. This will take longer to run.
- Auto Detect: Click the auto detect button (green arrow) to automatically detect the correct column names.
- Add Column Name (+ sign): Click the plus sign (yellow arrow) to manually add column names that might not be detected due to a smaller sample being used or to cater for future requirements.
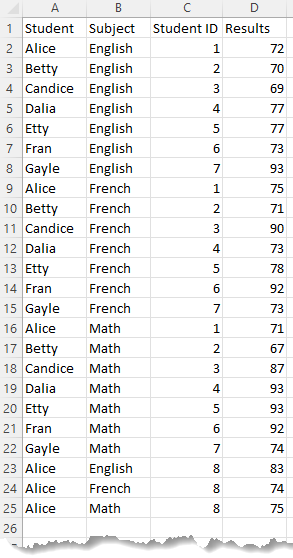
Source Data
In this example, the source data is formatted in a tabular list with the student results appearing in a single column (Results).

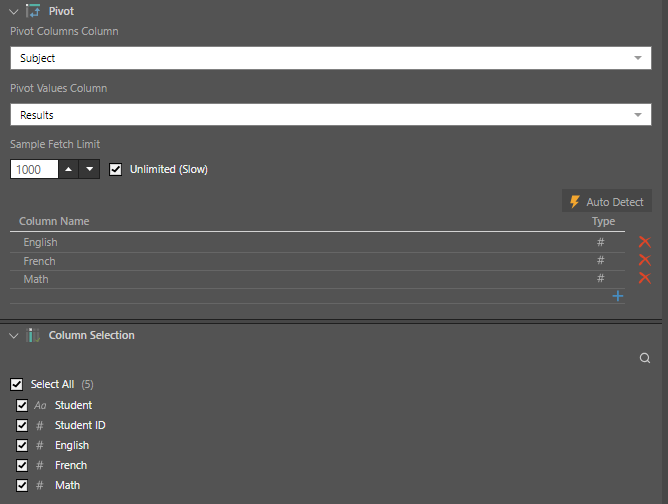
Properties Configuration
Subject column was selected for the Pivot Columns Column and the Results column was selected for the Pivot Values Column. By clicking on Auto Detect, the column names are detected. Note how they are included in the column selection together with the Student and Student ID columns.

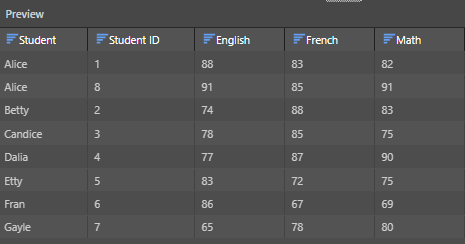
Preview of Data
Clicking on the preview button results in the display of a matrix table where each Subject (English, French, Math) appears as a separate column. The Student Results column is displayed as the values in the matrix. Note how the student Alice is correctly repeated as there are two students with the Name 'Alice'; each with a different Student ID.

Related information
Common Properties
There are a number of fields that are present in the Properties panel when you have any of the preceding nodes selected on the canvas. These fields include Result Properties, Column Selection, Set Variable Values, and Metadata.
- Click here for more details about the Common Properties