If your presentation has a fixed layout, you can add vertical and horizontal guidelines to the canvas, and show rulers along its top and left sides. These options help you when you are laying out the items in your presentation, allowing you to have confidence that you are creating a professional appearance.
Note: These tools are only enabled when you are working on a presentation with a fixed layout. A presentation with a tile layout uses the tile lines to achieve similar ends. For more information, see Grid and Tile Lines.
Accessing Guides and Rulers tools
The Guides (blue arrow) and Rulers (orange arrow) tools are accessed from Present Pro's Design ribbon:
Guides
Guides or "Guidelines" give you visual cues about where you might want to drop your items when you're formatting your presentation. They show on the canvas as horizontal or vertical dotted lines for you to arrange your items around.
Note: While you are editing your presentation, so long as the Guides option is enabled, your guidelines will show on every slide in your presentation. This helps you position the items on your slides in a consistent manner, optimizing the appearance of the slides at runtime especially during a slide show.
Add guidelines
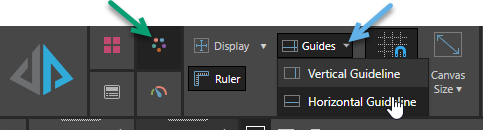
From the Design ribbon (green arrow above):
- Click the Guides dropdown list (blue arrow above) and select either Vertical Guideline or Horizontal Guideline.
- Drag the guideline on the canvas (green arrow above) to reposition it as needed.
- Repeat to add additional vertical or horizontal guidelines as required.
A guideline is added to the canvas.
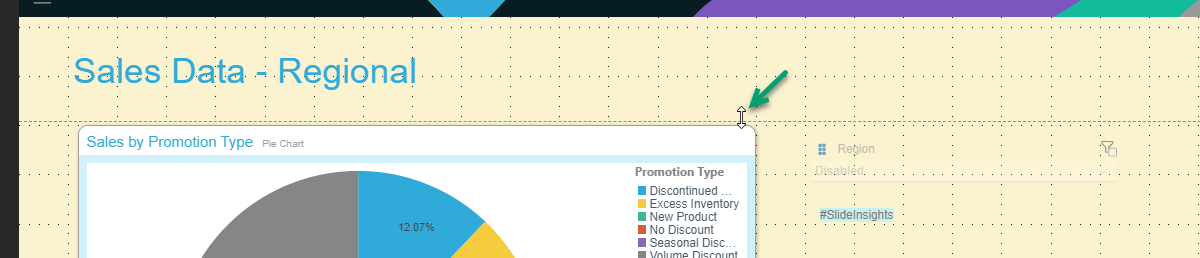
Note: Your cursor changes to a double-headed arrow when you are in the correct position over the guideline to reposition it.
Note: It is important to note that the guidelines you add will be visible on all of the slides in your presentation while you are editing it in Present Pro. This helps you to line up your items and give your slides a consistent overall appearance.
Show or hide guidelines
Click the Guides button to show or hide the guidelines that are currently present on the page.
Move guidelines
Hover over the guideline. When your cursor changes to a double-headed arrow, drag the guideline to the required location.
Remove guidelines
Select the guideline you want to remove, and right-click Remove.
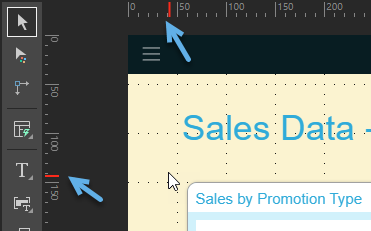
Rulers
To help you with positioning your items, you can show a horizontal ruler above the canvas, and a vertical ruler to the left of the canvas. When you are then moving items on the canvas, a red line on the ruler indicates where your cursor is positioned.
Show or hide rulers
The rulers are enabled automatically:
- Clear the selection of the Ruler button to not show rulers at the top and side of the canvas.
- Reselect Ruler to show rulers again.
If you are showing rulers, the location of your cursor in relation to the rulers is indicated by a red line, as highlighted by the blue arrows: