Actions are added to presentations to help your users get the most out of their presentation information at runtime. Actions allow your users to jump to another place in the presentation (slide, mini-tab, or content item), open a URL, or open a tooltip. Actions can also allow your users to run some JavaScript or PQL to trigger a completely custom behavior.
Use the options in the Actions Panel to configure specified actions that will be triggered when a user clicks somewhere on the visual or slide. Present Actions are identical to Discover Actions, but include extra capabilities for slide jump actions unique to Present.
The following video demonstrates the creation of Tooltip Actions in Present Pro:
Note: Actions are not available in the Community edition.
Actions
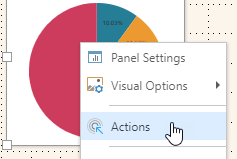
Actions are not visible on the canvas of your presentation. You can see them in Present Pro by selecting the visuals or slicers on your presentation and opening the Actions panel from either the Component ribbon or by selecting the Actions option on the context menu:
Open the Action Panel
Component ribbon
With a visual selected on the slide, click Actions (purple arrow) on the Component ribbon:

Note: The icon (yellow arrow, above) and options on the Component ribbon differ depending on the visualization type for the selected visual.
Context menu
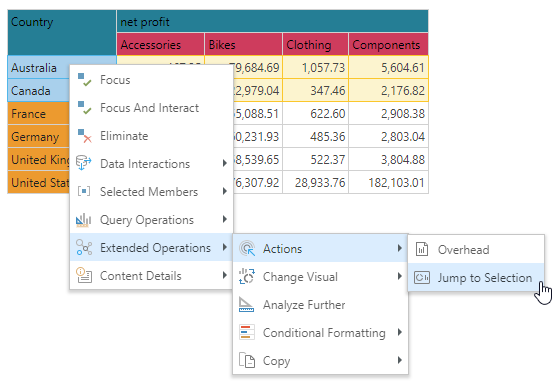
For visuals and slicers, you can also use the Actions context menu (opened on the right-click or long tap) to open the Action panel:
Note: When you open the Actions context menu for a slicer, only the Jump to Tab and Jump to Slide options are available from the Actions panel. For a visual, the Actions panel allows you to jump to another place in the presentation (slide, mini-tab, or content item), open a URL, open a tooltip at runtime, or run some JavaScript to trigger a custom behavior.
Jump Action (alternative process)
For shapes, text, and graphic assets, there is an alternative Click Action context menu item. Selecting this option opens a similar panel (the Jump Actions panel), which allows you to create actions to jump to items, print, subscribe, or open the bookmarks "on click." For more information, see Jump Actions.
Click Actions
For Jump to Slide, Jump to Content Item, Jump to Tab, Jump to URL, and Execute JavaScript actions, you may also be able to run the Action "on click." That is, you may be able to run the action when you Click (or Tap in some cases), Double-click, or Alt+click the Target Element. The availability of the click action depends on the configuration of the Run From attribute in the Action panel.
Creating actions
Creating visual actions
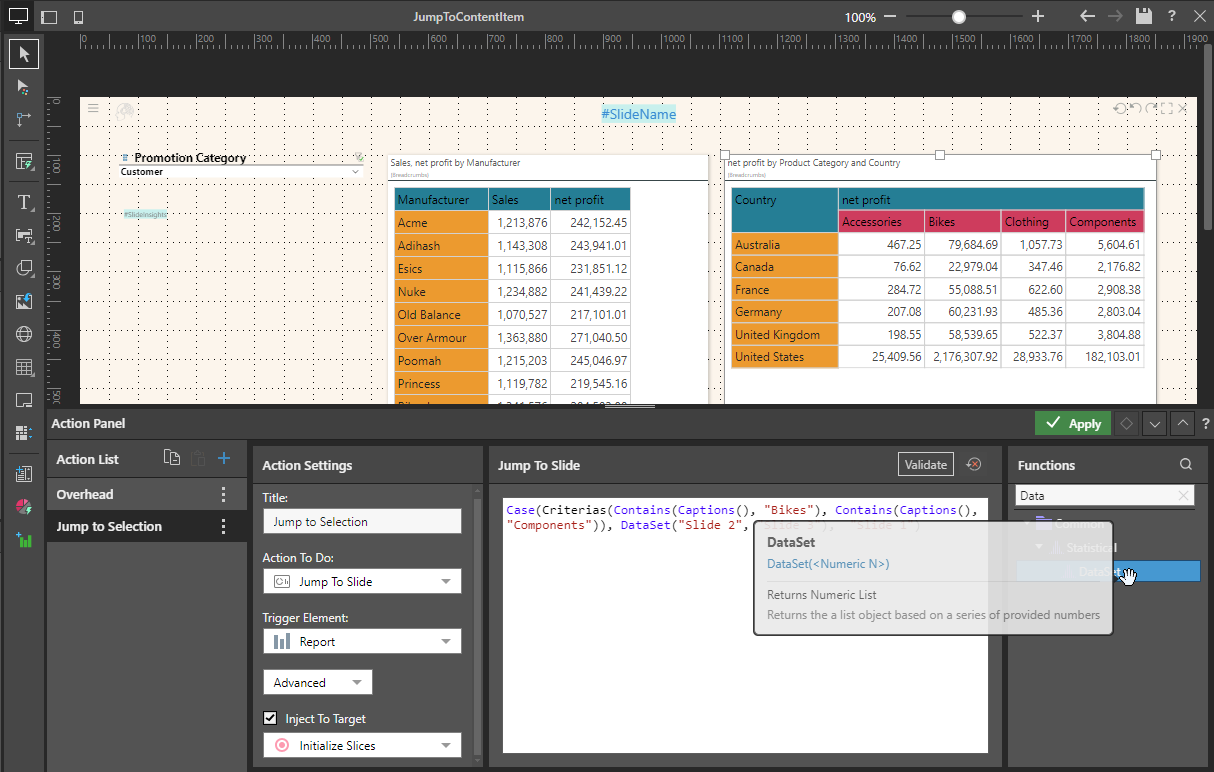
The Action panel is the main Present Pro interface that you can use to create, remove, and edit those Actions that you want to make available to your users at runtime. This topic describes how to use the Actions panel to create and manage different types of actions.
- Click here to learn more about Visual Actions
Creating slicer actions
Slicer Actions let presentation designers decide which actions should happen when an end user picks an item from a slicer at runtime. The action that the designer configures either changes the tab displayed in a Mini-Tab slicer (Jump to Tab) or opens another slide in the presentation (Jump to Slide).
- Click here to learn more about Slicer Actions
Creating tooltip actions
Create a tooltip action that opens a specified visual or presentation as a "graphical tooltip" when you hover over a measure in your visualization. Tip: You can display different tooltips for each measure as per your requirements.
- Click here to learn more about Tooltip Actions
Actions at Runtime
Your user typically accesses visual actions through the context menu, which opens with a right-click on a desktop or a long tap on a mobile where the action is a supported type:
- Click here to learn more about Actions at runtime
Note: The name of the action on the right-click menu matches the title in the Action Settings panel. It is, therefore, really important to select a name that makes it clear to your user what the action does.
Related information
In addition to defining Actions in presentations, you can also define them in Discover. For details about adding actions to your discovery, see Action Panel in Discover Pro.