In Tabulate, you can apply formatting to individual cells and groups of cells. Formatting can greatly enhance visibility, particularly when working with large worksheets. Modifying default formats allows you to make changes such as altering font color, style, and size, adjusting text alignment within cells, and applying various formatting effects.
Formatting Panel
To access the Cell formatting options in the Formatting panel:
- Select the cell or cells that you want to format, and right-click Format Cells.
- If you already had the Formatting panel open, select some cells in the spreadsheet to change to the Number tab.
You can then select one of the Cell formatting tabs along the top of the panel: Number, Font, Fill, and Border. For details of the Number formatting tab, see Number Formatting.
Font tab
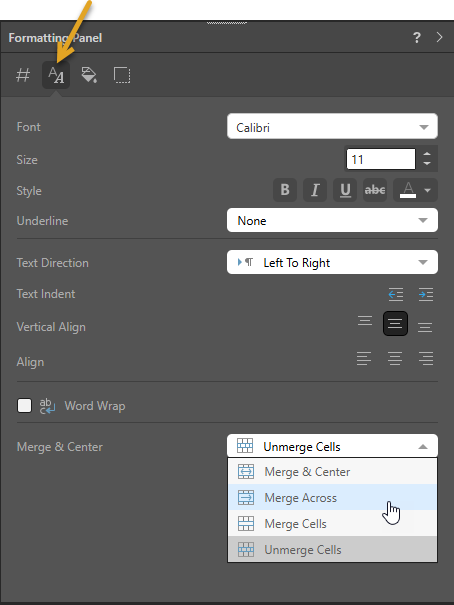
The Font tab specifies the appearance of text within selected Tabulate cell or cells. Select the text that you want to format, right-click Format Cells and pick the Font tab in the Formatting panel.
|
Field |
Description |
|---|---|
|
Font |
To use a different font style, click the arrow next to the default font and choose your desired font. |
|
Size |
To incrementally increase or decrease the font size, click the Increase or Decrease font buttons. Otherwise, type the font size you want into the text box. |
|
Style |
Use the Style options to make the text or numbers Bold, Italic, or to add an Underline. Note: Selecting "Underline" resets the value in the Underline field to Single, indicating a single underline. Tip: You can change this to Double if you want a double underline. To "cross out" your text or number, select the Strike-Through option. To change the font color, click Font Color (letter 'A' with a colored underscore) and select your required color. |
|
Underline |
See above. |
|
Text Indent |
To increase or decrease the indentation of the text, click increase or decrease indent. |
|
Align |
To position the text horizontally, click the left, center, or right button. The text is aligned according to your selection. |
|
Vertical Align |
To position the text vertically, click the top, middle, or bottom button. The text is aligned according to your selection. |
|
Word Wrap |
To see extra-long text in a cell, click Word Wrap and wrap the text onto multiple lines. |
|
Merge and Center |
To merge cells, select the appropriate Merge & Center option from the dropdown list. Note: When you merge cells that contain data, only the content in the upper left or left-most cell is preserved. When you unmerge cells, you return to the state before the cells were merged. |
Fill tab
The Fill tab specifies the background color for your selected Tabulate cell or cells. Select the cells that you want to format, right-click Format Cells and pick the Fill tab in the Formatting panel.
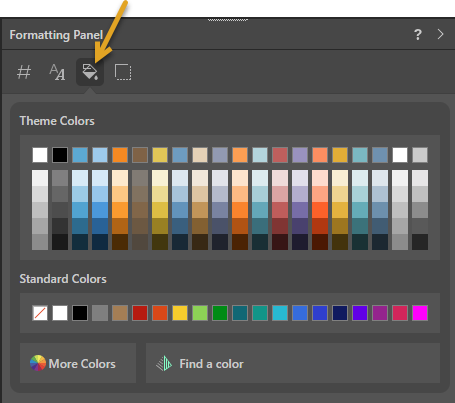
The Color Picker panel is divided into parts:
- Theme Colors: These colors have been assigned from the report's current theme.
- Standard Colors: These colors are available for all visuals, regardless of the report theme.
- Custom Colors: These colors have been used already and can be used again.
- More Colors: This tool allows you to choose a custom Hex or RGB color.
- Find a Color: This tool allows you to use artificial intelligence to generate a color in response to your prompt.
Border tab
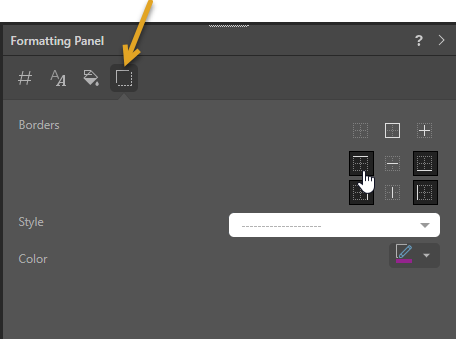
The Border tab specifies what borders your selected Tabulate cell or cells should have. Select the cells that you want to format, right-click Format Cells and pick the Border tab in the Formatting panel.
|
Field |
Description |
|---|---|
|
Borders |
Toggle the border buttons to show or hide: all borders, outside borders, internal borders, top, bottom, right, or left borders. |
|
Style |
Change the line style to be solid, dashed, dotted line, or to select a different thickness. |
|
Color |
To change the color of the grid's borders, click Color and then select a new color using the color picker. |
Tabulate Ribbon
Clipboard options

Use the Clipboard settings to cut, copy, and paste to content of your cells.
- Click here for more information about Tabulate Clipboard tools
Format Painter
To copy the formatting from one cell, or group of cells, to another:
- Select the cell or cells with the formatting you want to copy.
- Click Format Painter.
- Select the cell or range of cells that you want to apply the formatting to.
When you release your mouse button, you apply the formatting change.
Font formatting

The Font settings (orange box, above) enable you to specify the appearance of text within your spreadsheet's cells. Select the cell or cells whose content you want to format and pick the option you want from the ribbon. This sets the font to use, the size and color of your text, and so on.
You should be aware that, although most of this is basic text formatting, some of these options are specific to cell formatting in Tabulate:
- Borders: Apply borders (left, right, all, and so on) to the selected cell or cells. Tip: You can open the Formatting panel (described above) by selecting Custom Borders from this dropdown list.
- Border Color: Change the color for any borders that have been enabled for the selected cell or cells.
- Background Color: Change the background color for any cell or cells that are selected in the spreadsheet. Select your color using the standard Color Picker.
- Clear: Clear the content or formatting from the selected cell or cells:
- Select Clear > Format to retain the cell data, but clear any formatting.
- Select Clear > Data to clear the cell data, but retain any formatting.
- Select Clear > All to clear the cell completely, both the cell data and any formatting.
- Click here for details about the standard Font Formatting options
Positioning text in a cell

The Paragraph settings (green box, above) enable you to arrange text within the selected cell or cells. Select the cell or cells whose layout you want to affect and pick the option you want from the ribbon. This sets the alignment, wrapping, merge option, and so on:
- Vertical Alignment: Position the text at the top, middle, or bottom of its cell.
- Horizontal Alignment: Align the text to the left, center, right of its cell.
- Text Direction: Set the direction for the text in the selected cells. If you select the Context option, Pyramid will change the direction as appropriate to the text entered. For example, even where the spreadsheet as a whole is configured to show a left-to-right language such as English, selecting Context and typing some Hebrew or Arabic into the cell, will change the text direction to right-to-left automatically.
- Indentation: Increase or decrease the indentation for the selected text.
- Word Wrap: Where necessary, wrap long text onto multiple lines.
- Merge & Center: Combine and center the contents of the selected cells into a larger cell. Note: When you merge cells that contain data, only the content in the upper left or left-most cell is preserved. When you unmerge cells, you return to the state before the cells were merged.
Other topics