Python packages are managed from the Admin Console under Scripting Environments. Select the required environment from the relevant dropdown list in the Properties panel. You can then click the Packages button see which packages have been downloaded to the given environment.
Configuring the Python Scripting Node
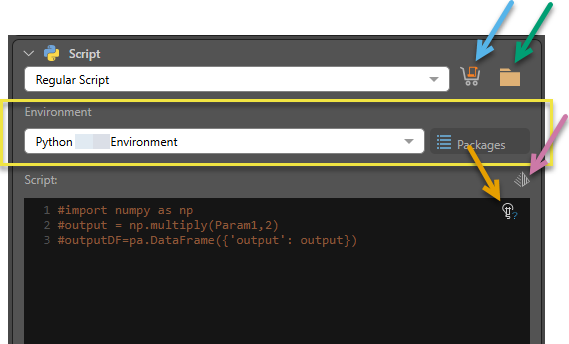
You can use the options in the Script Properties panel to provide the Python script in one of the following ways:
- Generate Your Script: Get an AI-generated Python script, based on a given prompt (purple arrow below).
- Marketplace: Download a script from the Pyramid Marketplace (blue arrow). Once downloaded, the script will appear in the script window.
- Pick a Script: Open the content manager folder tree to select a script that was built and saved in Pyramid (green arrow). Once the script is selected, it will appear in the script window.
- Write or Paste a Script: Write or paste a script directly into the script window at the bottom of the Script Properties panel.
Script Type
You can use the dropdown list at the top of the Script Properties panel to select one of the following:
- Regular Script.
- Learn & Predict Script. Learn and predict scripts are trained on a given data set and can then be used to make predictions.
Environment
You can use the Environment dropdown list to choose the virtual Python environment that uses the required Python version and packages (yellow highlight above).
Pyramid enables Admins to create multiple virtual environments, where each of these environments can use a different Python version and different third-party packages.
Packages
View the list of packages that have been downloaded to the currently selected virtual Python environment.
Script Window
Any script that is downloaded, generates using AI, injected from a shared script, or written or pasted is written in the Script window.
Use AI to Generate a Script
Pyramid's Generative AI integration lets you use AI to generate Python statements. This is useful if you want to generate code quickly, or don't know the syntax, for instance. To do this, click the Gen AI icon (purple arrow above) from the Properties panel. In the text field at the top of the Generate Your Python dialog, enter a description of the query you want to perform.
The dialog for generating your script contains the following fields and buttons:
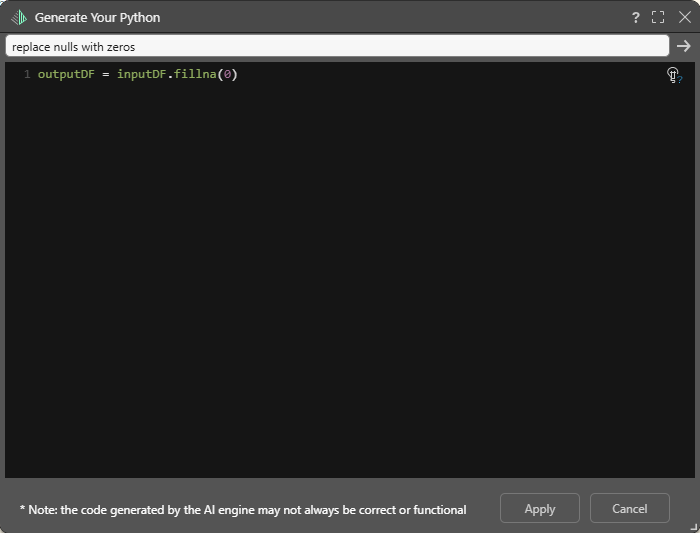
- Text Field: Enter a description of the query you want to perform and click the arrow to enter your query description and return it as a script.
- Script Window: The AI-generated script will appear in the scripting window.
- Explain Code: Open an AI-generated explanation of the script that was returned in the scripting window.
- Apply: Apply the script to the Query node.
- Cancel: Close the dialog without applying any changes.
Explain Code
 Use the Explain Script function to produce an AI-generated explanation of what the script does (note this is available even if the script was not itself AI-generated). Note: Each time you click the Explain Script button, a new explanation is generated. For more information, see Explain Script.
As an example, you might want to copy this explanation and paste it into the Description field.
Warning: When using LLMs, your assets are generated using public domain algorithms. This can produce erroneous and inconsistent or random results. Use at your own risk.
 Example: Use AI to Generate a Python Script
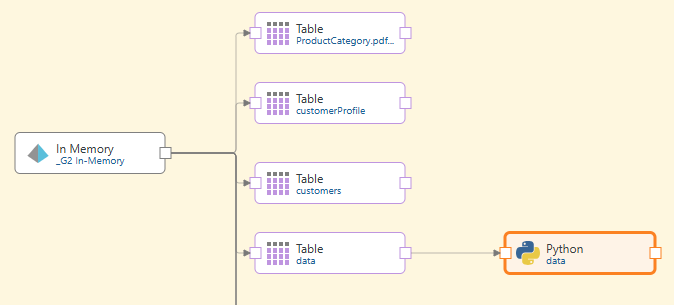
In this example, the Python scripting node was connected to the fact table:
AI was used to generate a script to replace nulls with zeros:
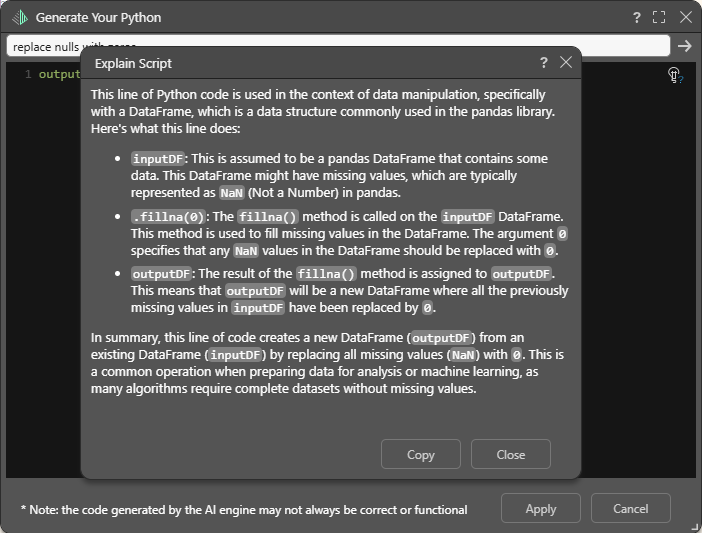
Opening the Explain Script dialog, we can see an explanation of the AI-generated Python script:
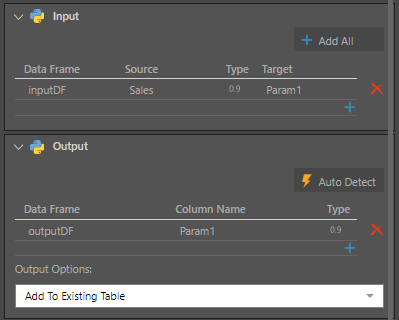
The Sales column was given as the input, and the output added to the existing table:
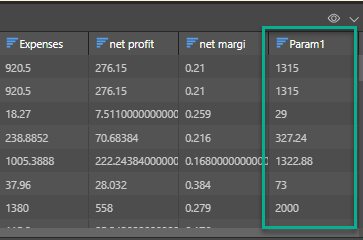
When the Python node is previewed, we see the new column at the end of the table:
Inputs and Outputs
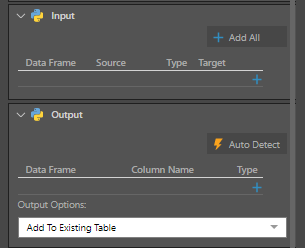
The input window is used to configure the columns that will be injected into the script. The output window is used to configure the new columns that will be produced by the script. You can also determine whether the new columns will be added to the existing table (the table connected to the Python node) or stored in a new a table.
- When you download a script from the Marketplace, Pyramid automatically detects the inputs and outputs.
- When writing a script or choosing a shared script, you'll need to configure the input and output columns yourself.
You also have the option to use to let Pyramid auto detect the output from the script.
Preview
Click the Preview icon from the Script Properties panel to load run the script and preview the results in the Preview panel. Any errors will be displayed in the Error panel.
Example: Round Numbers Script
In this example, the Python script 'Round Numbers' was downloaded from the Marketplace and used to round numbers in the Overhead column.
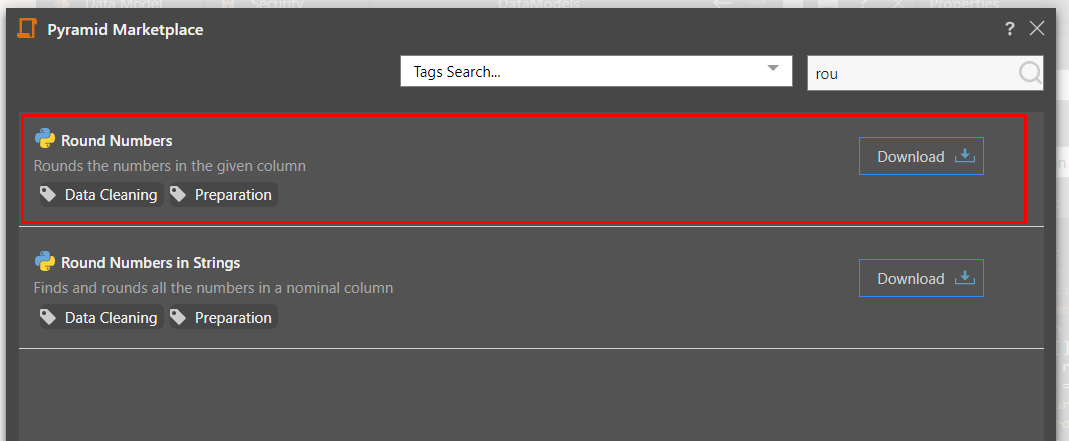
Upon downloading, it was automatically added to the Script window:
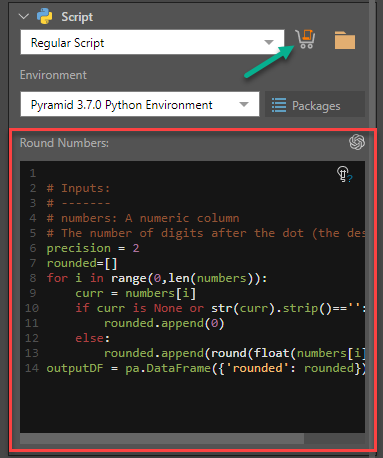
The downloaded script is as follows. Depending on the script, some objects can be changed manually if required. For instance, in this example the "precision" object determines the number of decimal places that will be returned. This is set to 2, but can be changed. If you want the column's values rounded to whole numbers, change the precision to 0.
# Inputs: # ------- # numbers: A numeric column # The number of digits after the dot (the desired precision) precision = 2 rounded=[] for i in range(0,len(numbers)): curr = numbers[i] if curr is None or str(curr).strip()=='': rounded.append(0) else: rounded.append(round(float(numbers[i]),precision)) outputDF = pa.DataFrame({'rounded': rounded})
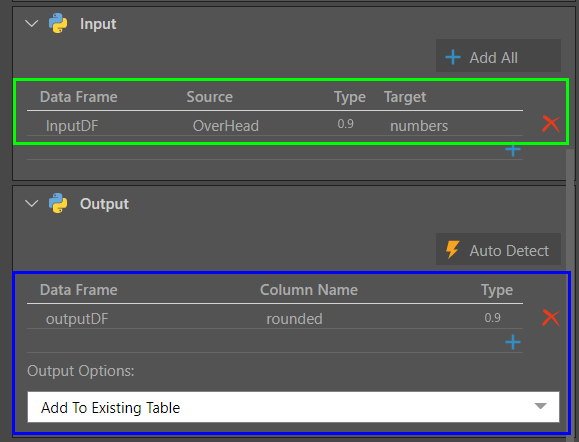
The Input and Output columns are loaded automatically when a script is downloaded from the Marketplace. However, you may need to edit the Input columns manually to ensure the correct columns are selected.
In this example, the OverHead column is the input, and the output is a new column called 'rounded', added to the existing table.
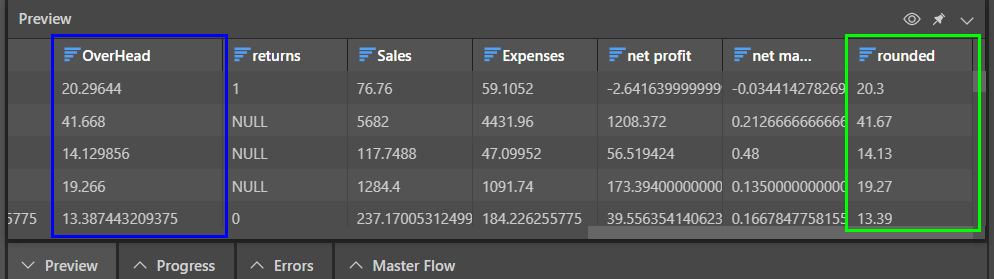
When the script is previewed, we see the table in the Preview panel. The original Overhead column (blue highlight below) is retained, and the new 'rounded' column is added (green highlight below):
Example: DBSCAN Clustering
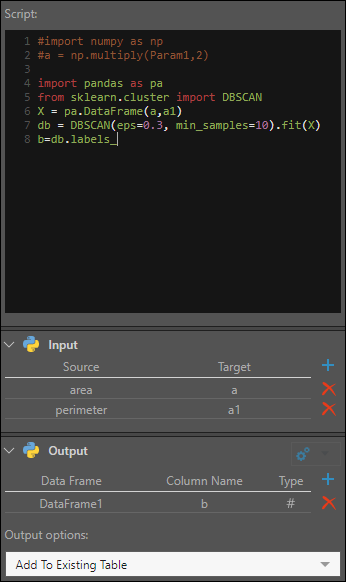
In this example, an eye-ware company wants to use DBSCAN clustering to cluster distances of their customers to each other.
They want to group data points together based on two conditions: when their distance from the other data points in the cluster does not exceed 0.3 km; and when there are at least 10 data points in the cluster.
import pandas as pa from sklearn.cluster import DBSCAN X = pa.DataFrame(a,a1) db = DBSCAN(eps=0.3, min_samples=10).fit(X) b=db.labels_