The Users page is the central manager for viewing, adding, importing, editing, and deleting users in Pyramid. You should use this page to add a new user, import a number of users in bulk, edit the details and roles for an existing user, and manage the users in your system (enabling and disabling access, revoking access, and so on).
Important: Your Authentication Provider can be one of: Database (the internal and default authentication provider), Active Directory, Azure Active Directory, Open LDAP, SAML, and OpenID. Which authentication provider you are using determines which fields you complete when adding users and how some of those values are used by the system. Some of the information in this section, therefore, differs depending on your authentication provider.
Opening the Users page
To view the user list, open Pyramid and go to the Admin console:
- From the main menu, click Access > Users.
The Users page opens, with the current User List (that is, the list of enabled users in Pyramid) in the main body of the page. When you select a user in the user list, the details associated with that user are shown and can be edited in the bottom panel (the Edit User panel). You can also click New User to add a new user in the bottom panel.
Note: If you have just installed Pyramid the only user visible in this list will be the initial user.
User List
The user list at the top of the page describes the users that have been created in Pyramid. The following columns are shown in this top panel only:
- Actions - Options that allow you to edit the selected user, edit the user's roles, delete the user, and open the audit trail for the user.
- Status - Shows the current status of the user account (green = enabled, red = disabled). Click this option to Enable or Disable the user (the disable option does not delete the user account).
- Disabled accounts are not shown in this view by default. Click Show Disabled from the overhead menu to include disabled users in this list.
- Domain - This is the domain name and is only relevant where the Authentication Provider is Active Directory or LDAP.
- Profile - This is the profile that the user has been assigned. Profiles give different access to the authoring workflows and apps to different groups of users.
The other columns in this view are also seen in the Add Users or Edit Users panel at the bottom of the page. You see these panels either when you select to add a new user (if you are not using search) or
when you select a user in the Users List to edit their details. For more information a list of these values and details about editing existing users, see Add Users or Edit Users.
Overhead menu
New user
To add a new user or a set of new users, you can select New User and then select a <user type> from the overhead menu. You will then need to provide details of your users either manually or via search depending on your authentication provider.
- Click here for details about Adding Users
- Click here for details about Adding Users through Search with certain identity / authentication providers
Import
To import a Bulk Load of new users, you can create a CSV file in the Pyramid User format that lists the users that you want to add, and then use the Import option in the overhead menu to load those users into the system.
- Click here for details about Adding Users in Bulk
Search users
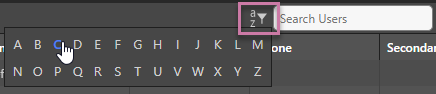
- Use the Search Users text field to find users by username, first name, or last name.
- Select a letter from the last name filter (purple box) to filter the user list by the first letter of the user's last name.
Tip: You can also click the filter icon at the top of each column to filter the options in that column. These filters are specific to the type of content held in the column.
Bulk actions
Select users using the checkboxes; once selected:
- Click Enable/Disable to enable / disable all selected users.
- Click Delete to delete all selected users.
View options
- Click Show disabled to include disabled users in the user list. To hide these users again, click Hide disabled. (Note that, when you "show disabled," you are only including those disabled users in the list that also fulfill the other filtering criteria that have been applied.)
- Click Column view to select those columns you want to show in this list.
User Details
User details are shown in a panel at the bottom of this page in the following circumstances:
- If you select a user in the user list at the top of the page. The details shown in this panel are those of the selected user, you can typically edit the user details in this panel. For more information, see Editing Users.
- If you select New user at the top of the page. The panel is either the Search page (where the authentication provider is Active Directory, Azure Active Directory, Open LDAP, or SAML or OpenID where Provider Provisioning Settings are configured on setup) or the Add user page otherwise. You can use these panels to add one or more new users.
User Security
There are several buttons at the top of the User Details panel that typically enable user-centric security operations associated with the selected user.
Note: Some of these options are only shown for some authentication methods, or are only available if you have sufficient access to change the setting for the selected user.
Sync
Available to: All admins.
- Click Sync to refresh the details of the current user with the details from the authentication provider. This overwrites any values in Pyramid with values from the authentication provider.
Note: The Sync action refreshes the main fields associated with the user with the equivalent values from the authentication provider, including details that are read-only on edit in Pyramid (such as user name). This action does not overwrite the secondary user details (Second phone, Proxy Account 1, Proxy Account 2, or Language), which are Pyramid-specific values.
User Impersonation
Available to: Enterprise admins can impersonate any user, Domain admins can only impersonate users who are not admins.
- Click Impersonate to impersonate a user's account and login to the application as the selected user. When you click this button, you are logged in to the application and granted the rights, capabilities, settings, and access of the selected user.
To exit the impersonation, you should log out of the application, close your browser, and then log back in as yourself.
Note: User impersonation is available with an Enterprise license only.
Multi-Factor Authentication Token Reset
Available to: All admins if multi-factor authentication is enabled for one or more web servers.
- Click Clear Token to clear the selected user's MFA token, forcing that user to re-enroll with their authenticator app.
You may want to use this capability if the user has lost their settings on their authentication device. Once cleared, the user will be prompted to reset their authenticator token at their next login.
Force Password Reset
Available to: All admins if the internal (database) authentication provider is in use.
- Click Reset Password to force the selected user to enter a new password when they next login.
Tip: Admins can control the strength of the password required for this reset by setting a minimum password strength for all new passwords. These settings also include an option to automatically force a password reset for each and every user on the chosen time-cadence.
Revoke Access Cookie
Available to: Enterprise admins only.
- Click Revoke Access Cookie to revoke the access cookie and cancel all the current sessions in Pyramid for the selected user. This forces the user to login again.
This capability allows admins to resolve different access scenarios, including:
- If the admin wants to change a user's details (roles, license type, tenant, admin access) with immediate effect, they can change those details and then revoke the cookie.
- If the admin wants to disable a user's access, they can disable the user in the User list and then revoke the access cookie to revoke system access.
- If the admin wants to reset the MFA token, they can revoke access to force the user to re-enroll in the MFA.
- If the admin wants a user to reset their password, they can revoke access and force the user to supply a new password (when used in tandem with the force password reset, above).
Get Authentication Token
Available to: All admins, but only available to Domain Admins where the user is also at their tenant.
- Click Get Authentication Token to copy the Authentication key for the selected user to your clipboard.
You can use this authentication key when you: Create an OData link.
Note: If you are an Enterprise Admin, you can copy the Authentication Key for any user. If you are a Domain Admin, you can only copy the Authentication Keys for users at your tenant. If you are a Basic User, you can only authenticate as yourself so you should go to the User Info page and click the Copy icon alongside the Authentication token.
Related content
If you are managing your users, you may also want to learn about the following related areas:
- User types indicate the level of access given to a user when they log in to the apps, and what their related capabilities should be. Users can be Pro users, Analyst users, Viewers, or Basic users with each of the user types granting fewer access rights than the previous. For more information, see User Types and Roles.
- Administrators are users whose access rights allow them to manage other users and complete administrative tasks within Pyramid. Enterprise admins have complete access to the entire system and its settings, while domain admins are limited to managing specified parts of the system. For more information, see Admin Rights.
- Profiles customize the client experience for different types of user. For example, Pro users may or may not have access to the Formulate app, depending on their assigned profile. For more information, see Profiles.
- Multitenancy allows a single instance of Pyramid to serve multiple Tenants, with each Tenant's data and settings kept completely separate from the other Tenants. When you create users, you need to indicate which Tenant they belong to. For more information, see Tenant Management.
Note: The number of available client licenses purchased determines how many seats are available for each user type. For more details, see Licensing