The Schedule and Subscription Manager in the Content system is a personalized interface for users to manage their own schedules and subscriptions from across the platform. You can manage and edit these schedules from this view.
The Schedule Manager gives users a bird's-eye view of:
- All items they are subscribed to in Discover, Present, Publish, and Tabulate.
- All data alerts they have set up in Discover and Present.
Accessing the Schedule Manager
Click the Ellipsis icon to show the hidden views, and then select Schedule Manager:
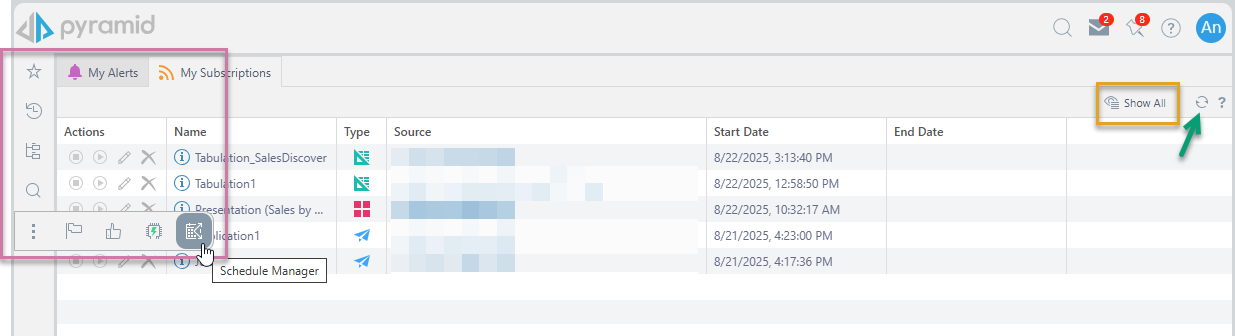
For an Analyst user, this view contains two tabs:
- My Alerts: All the alerts configured by the current user.
- My Subscriptions: All the subscriptions configured by the current user.
Subscriptions or Alerts
Whichever tab you have selected at the top of the page, the list of all items of that type are shown in the middle of the page.
Header
- Show All: Show all schedules, both active and inactive.
- Hide Inactive: (Not shown.) Show active schedules only.
- Refresh: Refresh the list.
Rows
The panel displays a table of existing schedules for the selected item, you can:
- Use the Action buttons to Start, Stop, Edit, or Delete the Subscription or Alert.
- Hover your cursor over the info icon to view more details about it.
- Select the row to view its job executions in the Job Executions panel.
Job Executions
With a row selected in the previous panel (green arrow), the Job Executions panel (purple box) shows to the right of the page:

The Job Executions panel displays a list of jobs that were created each time a schedule was run. (The job executions are for the selected schedule.)
Each job execution has the following columns:
- Actions: Option to re-run the entire job.
- Progress: Shows the job's progress, including the percentage and status of individual tasks:
- Blue: Tasks waiting in the queue. You may want to refresh the view when you see this status.
- Red: Tasks that have failed.
- Orange: Tasks currently processing.
- Green: Tasks completed successfully.
- Type: The file output type (relevant for publications only).
- Run-Time: The date and time the job was executed.
- Timezone: The timezone that the job was executed in.
In this view, using the checkboxes to select one or more Job Executions enables the Delete option in the panel.
Output
With a row selected in the Job Executions panel above (purple box), the Output panel is shown at the bottom of the page (orange box above).
Output Header
Above the Output list are buttons to:
- Rerun All: This reruns all tasks, which is the same as rerunning the entire job.
- Rerun All Failed: This reruns only those tasks that failed.
- Refresh: Refreshes the current list.
Schedule and Common
The Output panel displays the results of job executions. (The outputs are for the selected job executions.) Each output entry includes the following columns:
- Actions: Download the output file, view the Print & Export Summary, or re-run the specific task.
- Status: Indicates the result of the output task:
- Red: Task failed.
- Orange: Task partially failed.
- Green: Task completed successfully.
- Type: The output file format (for example, PDF, Word, or Excel).
- Description: The name of the scheduled job.
- Start Date: The date and time the output task began running.
Alerts
The following items differ for Alerts:
- Actions: Re-run the specific task only.
- Alert Status: The status of the alert.
- Message: The alert message.
Editing Subscriptions
Click the Pencil icon beside any subscription to edit its details.
 When editing a subscription, a toggle button allows you to switch between Basic and Advanced Schedule settings: In the Advanced view you can define recurring or on demand schedules in detail. In the Basic view you can select from one of the "preset" schedule options (Weekdays at 7AM, for example).