Slicers are user-defined data-driven filters that let you simply and conveniently filter queries dynamically in your live presentations. For example, a slicer may be drop-down list that lets your users filter their sales visuals by country when they are viewing a slide at runtime.
When adding a slicer to your presentation, you have three options: use an existing slicer or parameter from Discover, build a new slicer on-the-fly within Present using the Quick Slicer option in the Toolbox, or build a new slicer on-the-fly within Present using the Advanced Slicer wizard. This topic describes how to use the Advanced Slicer wizard to create a new slicer for your presentation.
The Advanced Slicer wizard allows you to manually configure all slicer settings, giving you a lot of control over the slicer's behavior. You should use this option if you want to make use of settings to select specific elements, change the initial state of the drop-down (default selection, disable, and so on), or otherwise want to configure the slicer in the first instance.
Tip: If you want to add a very basic slicer, you can add the slicer using the Quick Slicer option in the Toolbox. This adds a drop-down where the slices match the dimensions in the selected hierarchy exactly. If you create a slicer using this basic option, you can still set its advanced settings later (to limit the elements, to change its type, or to otherwise configure its content) in the Slicer Settings panel.
Open the New Slicer panel
To add a new slicer to the presentation, open the Advanced Slicer wizard:
- Select the Advanced Slicer option from the Present or Slide ribbons (green highlight below):
- Click Add New Slicer in the Interaction Manager:
- Click New (green arrow) in the Slicers panel:


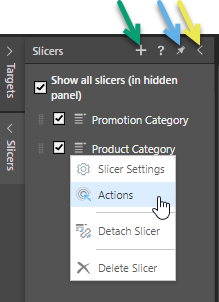
The following describes the options in the Advanced Slicer wizard. You need to make your configurations and click Apply to create your slicer.
Tip: If you have an existing slicer and you want to configure its details in the Slicer Settings panel, see Slicer Settings in Present Pro.
New Slicer panel
Data Source
Start by selecting the Data Source tab from the first column; this will prompt you to select a model, hierarchy, and elements:

Note: The other tabs (Type, Load Time, and so on) are disabled until you have selected your data source and slicer hierarchy.
Choose Model
From the Choose Model panel, select the data model that contains the hierarchy you intend to use for your new slicer.
Select Hierarchy
This panel displays the dimensions and hierarchies of the selected data model; choose the hierarchy that will be used to build the slicer.
Elements
Choose the hierarchy elements that will be included in the slicer. There are three ways to determine the slicer's elements:
- Free Selection: Select the elements from the hierarchy that you want to include on the slicer.
- Level: This option is relevant when working with OLAP or Tabular hierarchies, or regular SQL hierarchies. When creating a slicer based on a regular hierarchy, select this option to specify a particular level of the given hierarchy.
- Lists: Choose this option to use a custom list as the slicer.
Type
The Type settings let you change the slicer's title and type:
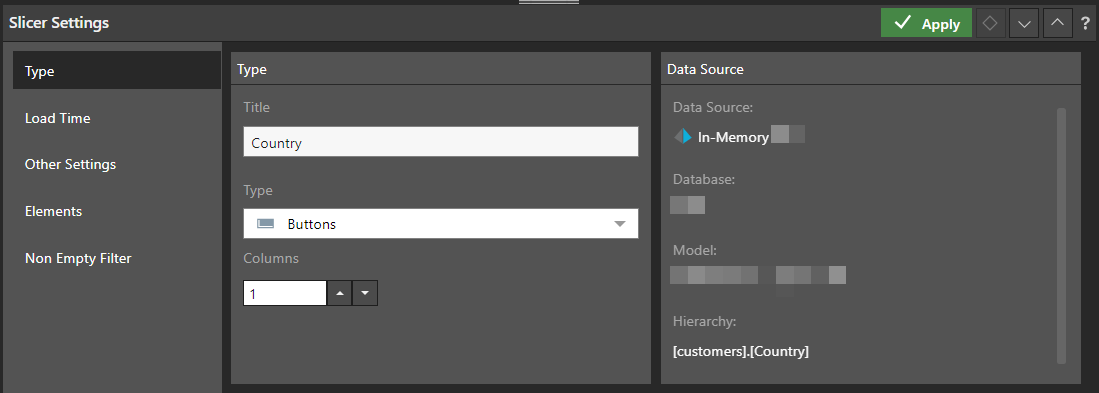
Type panel
- Title: Edit the slicer title.
- Type: Select a slicer type from the drop-down menu. See below for more information.
- Columns: (Buttons only.) If your slicer type incorporates buttons, select the number of columns of buttons that should be added to the presentation.
Slicer Types
The slicer type that you select here indicates whether the slicer you use to filter your presentation assets at runtime is a drop-down, set of buttons, a tree, or even a date-time calendar.
Select from the following slicer types:
- Drop Down: Adds a drop-down list that you can select one slice from.
- Multi Select Drop Down: Adds a drop-down list that you can select multiple slices from.
- Single Select Tree: Supports 'regular' hierarchies in both cube and SQL models. Adds a single-select tree, which you can navigate through to find the relevant element.
- Multi Select Tree: Supports 'regular' hierarchies in both cube and SQL models. Adds a multi-select tree, which you can navigate through to find and select relevant elements.
- List Box: Adds a single-select list within a box container.
- Multi Select List Box: Adds a multi-select list within a box container.
- Text Box: Adds a textbox with drop-down.
- Buttons: Adds single-select buttons, rather than a list.
- Multi Select Buttons: Adds multi-select buttons.
- Date Calendar: This calendar tool is a specialized slicer visualization designed to make it easier to use date-time hierarchies and their associated calculations. The date-time picker is automatically generated at runtime when using the dateKey hierarchy to create a slicer. As with other slicers, the date-time picker slicer can be customized from the slicer settings.
Date-Time Pickers are only supported for SQL models. This functionality is not currently supported for MS OLAP, Tabular, or SAP BW.
A Toggle is a special slicer visualization type that is only applicable to global binary parameters.
The following example shows a drop-down (blue arrow below) and a set of single-select buttons (orange arrow) as they might appear in a presentation when viewed at runtime:

Data Source details
The read-only data source metadata, including the data source, database, data model, and the hierarchy used in the filter.
Note: You will only see this panel if you are editing your slicer settings. If you are creating a new Advanced Slicer, the data source information is shown on the Data Sources panel.
Load Time
The load time settings determine which of the slicer's elements will be automatically loaded when the report is opened.
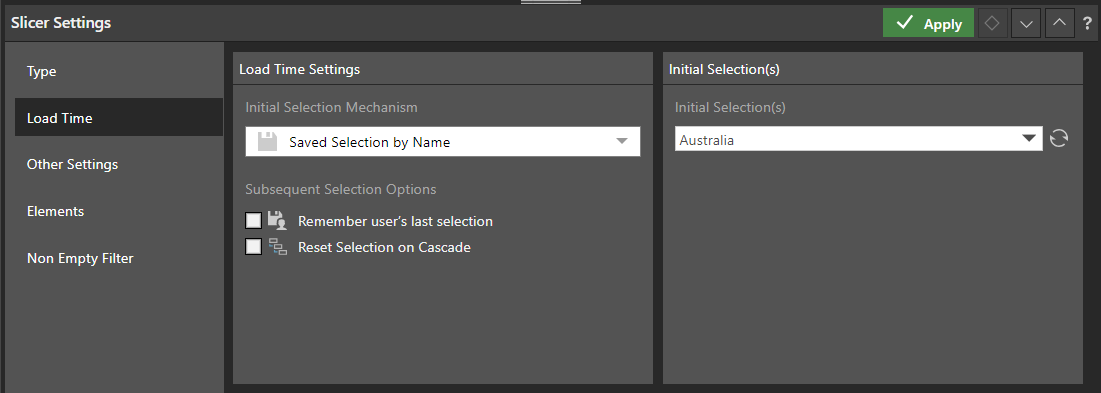
Initial Selection Mechanism
The initial selection mechanism determines which slice will be automatically loaded when the user opens the report.
- Saved Selection by Name: Select the initial slicer selection by name; this slicer will be selected by default whenever the report is opened.
- Saved Selection by Position: Select the initial slicer selection by position; this slicer will be selected by default whenever the report is opened. This is useful if the slicer is based on a custom calculation that shows, for example, the top ten products. You might want to automatically load the top selling product. In this case, the slicer position needs to be saved.
- First Member: Automatically select the first member in the slicer whenever the report is opened.
- Last Member: Automatically select the last member in the slicer whenever the report is opened.
Subsequent Selection Options
Subsequent selection options determine whether or not the user's slicer selection will be saved. If so, these selections will override the given 'initial selection mechanism'.
Remember user's last selection
Enable this option to save the current user's saved slicer selection. Each time the user saves the report, the currently selected slice will be saved, and that slice will automatically be loaded when the report is next opened by that user.
If this option is not enabled, the given 'initial selection mechanism' will be loaded every time the user opens the report.
Reset Selection on Cascade
Select this option if the selected slicer is being cascaded to. For instance, if you've configured a cascading slicer that cascades from Country down to State, check this option for the State slicer to apply the given slice value modes to State.
In this scenario, if Last Member is set as the load mode, then the last member in the state slicer will automatically be selected whenever a country is selected from the parent slicer. Then, when United States is selected from the country slicer, Wyoming will automatically be selected form the state slicer; when Australia is selected, Victoria will automatically be selected from the state slicer.
Other Settings
From the Other Settings tab, you can update the slicer elements limit for this slicer, disable and enable the filter button, specify whether you want to apply a change to a slicer automatically whenever its value is changed, and make this slicer into a pre-query slicer:
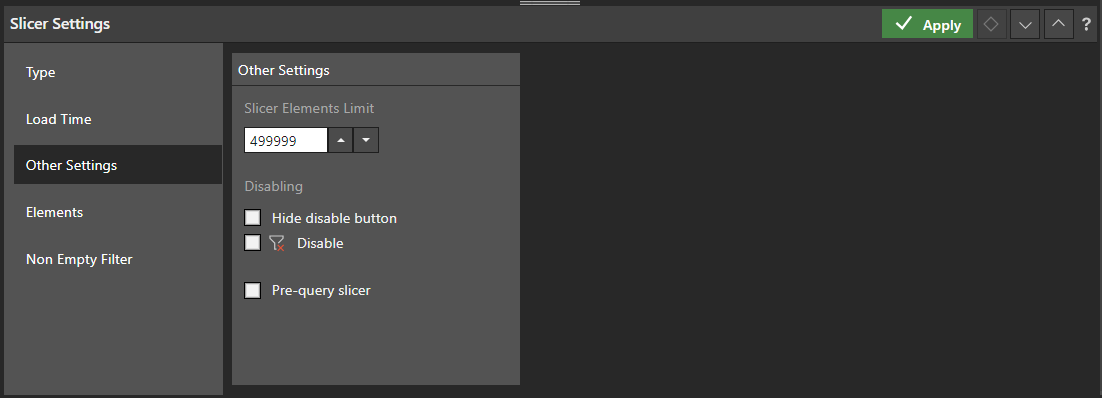
Slicer Elements Limit
Set the maximum number of slicer elements to include in the slicer. The limit set here cannot exceed the limit set from the user defaults. Where it is exceeded, the number of elements in the slicer is limited and a limit indicator is displayed on the slicer at runtime.
If the number of elements in the slicer hierarchy exceeds the elements limit, the limit indicator is displayed at runtime (green arrow):
You can hover your cursor over the indicator to see what the elements limit was:

- Click here for more information about slicer limits
- Click here for more information about the slicer limits in user defaults
Disabling
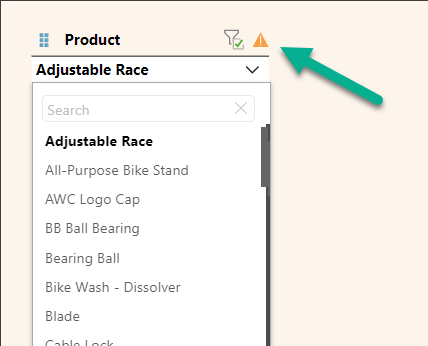
The disabling options relate to the filter associated with the slicer. By default, the filter is enabled and can be used to enable and disable the slicer. The following image shows a Product slicer in its default state at runtime; the filter is highlighted using a green arrow:

- Select the Hide disable button checkbox to hide the filter entirely. The filter is not shown on the presentation and, therefore, cannot be used to enable and disable the slicer.
- Select the Disable checkbox to make this filter disabled (rather than enabled) by default. Note: This option only changes the default state of the filter, the user can still enable the filter at runtime if they want to.
If you select the Hide disable button checkbox, your slicer appears as follows at runtime:

If you select the Disable checkbox, your slicer appears as follows at runtime (note the orange arrow):

Pre-query slicer
Pre-query slicers can be used to set the slicer selections for specified slicers and parameters upon opening the presentation at runtime, before the query is loaded.
Enable
Select the Enable checkbox to indicate that the query should not be run until the user specifies their slicer selections. The effect of this selection is that the Pre-Query slicer dialog opens and the user is prompted to select either bookmarks or individual selections for their discovery, publication, or tabulation slicers in the Pre-Query slicer dialog.
Note: The Pre-Query slicer dialog opens automatically when you open the discovery, presentation, or tabulation in its app, the discovery in the Viewer, or the presentation at runtime. If you view the discovery or presentation in the Hub or as an Embedded visual, you will need to click the Make Pre-Selections option to open the Pre-Query slicer dialog.
Apply default load mode
Use the Apply default load mode checkbox to indicate which options should be selected in the Pre-Query slicer dialog by default:
- Select the checkbox to use the default slicer selection.
- Clear the checkbox to use the last selected slicer in the Pre-Query slicer dialog.
- Click here for more information about Pre-Query Slicers
Auto Run
Controls the auto run behavior associated with this slicer. Clear the Auto Run checkbox to indicate that you do not want to apply new selections made from the slicer immediately. The purpose of this option is to allow users to only apply the filtering associated with their slicers once they are ready, perhaps once they have made all their intended slicer selections.
Enable or disable Auto Run for this slicer:
- When enabled, the filter applies automatically as soon as a new slice is selected. This is the default behavior.
- When disabled, the filter does not apply automatically (the query will not be run) when a new slice is selected; instead, a lightning bolt icon indicates that the slicer change needs to be applied manually.
- Click here for more information about Auto Running Slicers
Where Auto Run has been disabled for a slicer in Slicer Settings, selecting a different slice or enabling / disabling the slicer at runtime does not prompt any change to the visuals or dynamic assets. As you can see in the following example, disabling the Country slicer (green arrow) does not cause the filter to be cleared from our Sales by Promotion Category visual, which continues to be filtered by "United Kingdom" (purple arrow) despite our change:

The lightning bolt icons indicate that a change has been made but not yet applied:
- Where it appears on the Hamburger Menu or Button, it indicates that one or more slicers have been updated but have not yet been run. Whether or not to show the lightning bolt icon on the button is subject to configuration.
- Where it appears on a slicer itself, it indicates that specific slicer has not yet been run.
You can manually run the slicers by clicking Run Slicers in the Present runtime menu or on the right-click context menu, or by clicking any "button" that has been created with a Run Slicer Jump Action.
Running the slicer applies the expected filters to the visuals and removes the lightning bolt icons:

Search Type
Set the search type. This is applied to any slicer type that supports search (drop-down and text box).

What next?
Check or add Interactions
When you add slicers to a presentation you may need to apply interactions from slicers to visuals, from slicers to slicers, or from slicers to dynamic assets, to create the runtime interactions that allow your viewers to explore their data. Interactions are typically added automatically (the Auto Interact function is typically enabled), but you may need to add interactions manually using the Interaction Picker or the Interaction Manager. You are advised to use Show Interactions to check that your interactions are as expected.
- Click here to learn more about interactions