Present Pro offers a range of formatting and design tools to help you customize the look and feel of your presentations.
Themes and Masters
Themes are predefined and user-defined design templates that drive the color of the presentation slides, visual panels, and the master pages. Masters (associated with your theme) determine the content of every page; that your corporate logo is always seen at the top-left of your slides or that all footers include a slide number and link to your website. By applying a given theme to your presentation, you can change its entire look and feel. Themes and their masters can be used to standardize presentation design across an organization or department.
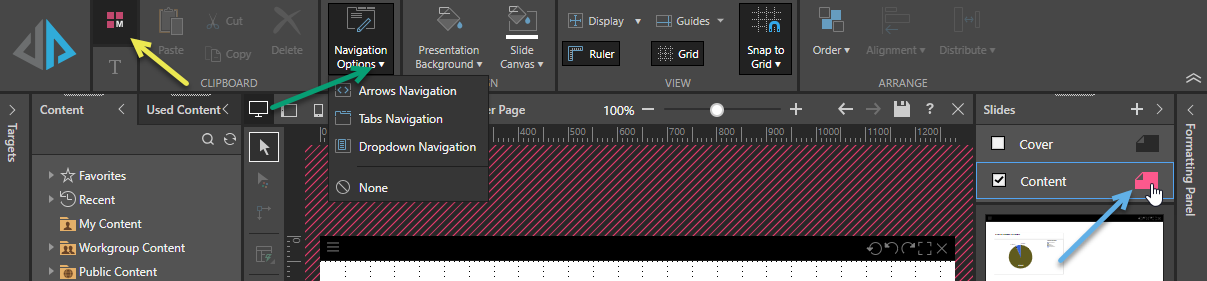
Navigation Options
Arrow navigation is added to all presentations by default. You can change the navigation type to better suit the structure of your presentation. For example, the default arrow navigation is useful when you want the presentation slides to be views in consecutive order. If you have a very large presentation with a lot of sections, you may prefer to use tab navigation, which lets users select any section or slide from a series of labeled tabs.
- Click here to learn about navigation
Slide Formatting
Canvas Size
You can change your presentation's canvas size either to one of the available "presets," which are standard sizes, or you can specify a custom canvas size to use for your slides in pixels. As an example, you might want to change your canvas size if you are distributing your presentation into a region where the standard sizes are different or if you are embedding custom-sized output into a web page.
- Click here to learn more about changing your canvas size
Content Formatting
You can customize various formatting options for visuals, slicers, and panels from the context-sensitive Formatting panel. The Formatting panel lets you customize the visual's colors, plotting area, slicers, legends, axes, titles, and more.
- Click here to learn more about content formatting
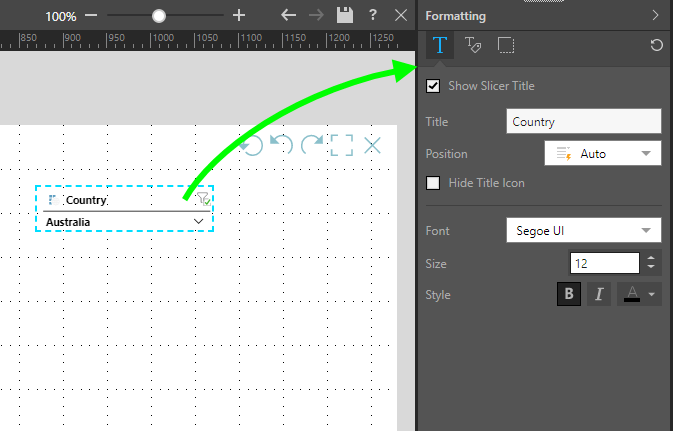
Slicers
Using the Formatting panel and the formatting selection tool, set styling preferences for the slicers to customize the slicer colors, title position, and title icon. This gives you the flexibility to apply your own styling, or make styling changes in accordance with your organization's branding.
- Click here to learn about formatting options for slicers
Panel Settings
To improve the appearance and readability of your presentations and publications, you can change the formatting of the panels (or "frames") that contain each of your visuals. These formatting options determine the panel's general look and feel (shadow, title font, and so on) as well as the formatting of its title and subtitle.
- Click here for more about the Formatting Panel
Tip: The formatting options shown in this panel are typically associated with your visualization type. For more information about the settings, see Formatting Panel in Discover Pro. The Settings that are specific to presentations relate to its panel or frame. For more information, see Panel Settings in Present Pro.