Date Range
The Date Range node is used to generate a date/ time column, based on a given date part, listing all dates in the given range, including dates that don't exist in the source column. The new column is extracted from an existing date-time column in the given table.
In this scenario you can add the Date Range node to auto-generate date/ time columns. You can then connect the Time Intelligence node to generate the required date/ time groupings as usual.
Other Date Time Functions
The Date Range node differs from the Add Date Time node, which adds a column in which each row lists the exact same date or date/ time. The Date Range node, on the other hand, is used to add a column that lists a range of consecutive dates based on an existing date-time column, or based on a given start and end date.
- Click here to learn about the Add Date Time node.
The Date Range node also differs from the Time Intelligence node, which is used to generate a variety of date-time columns based on different date parts, like year, quarter, month, etc.
- Click here to learn about the Time Intelligence node.
Configure the Date Range Node
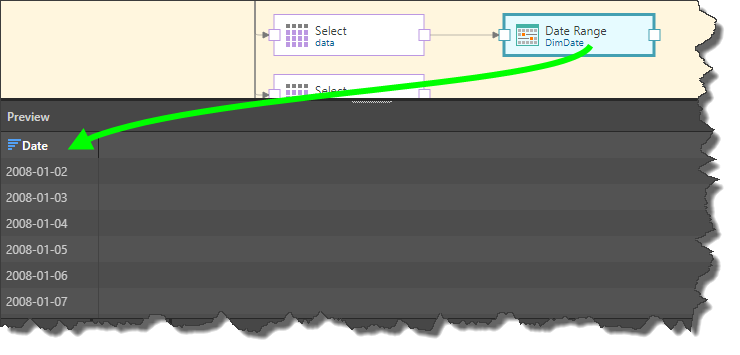
Add the Date Range node to the relevant table. With the node selected, go to its Properties panel to configure it (green arrow below).
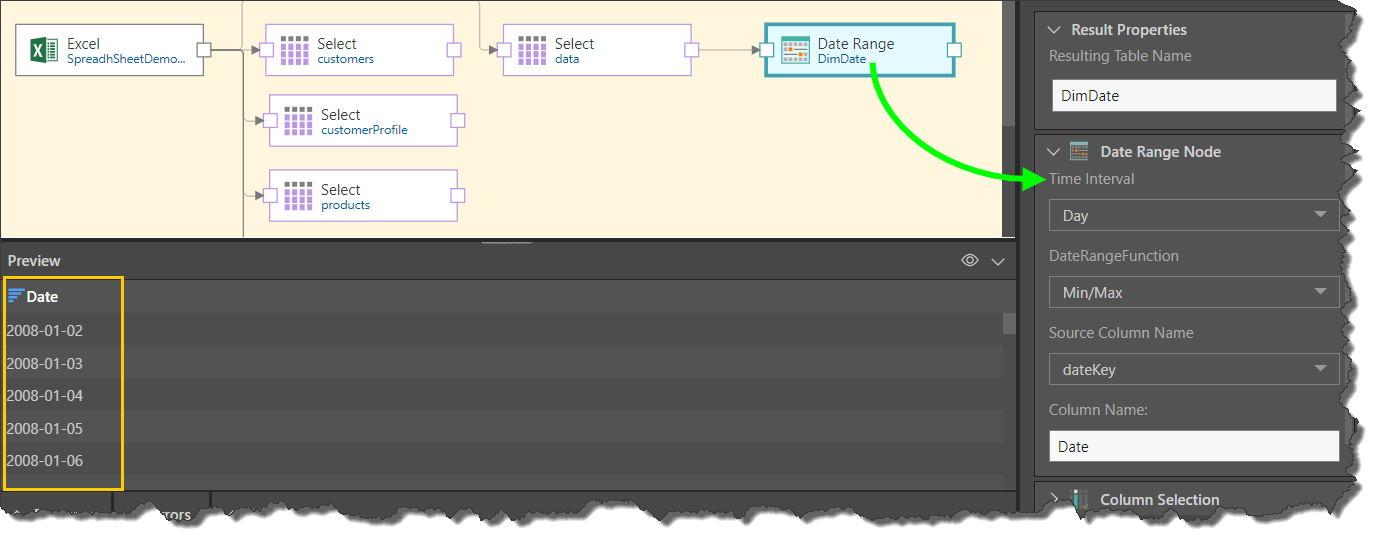
Time Interval
Select the required level of granularity for the date column output. This can be hour, day, week, month, quarter, or year.
Date Range Function
Select one of the two options here; Min/ Max or Static:
Min/ Max
This function takes the minimum and maximum date/ time values from the source column (an existing date-time column in the table), and generates all dates in between (at the selected level of granularity).
Source Column Name: select the table's date-time column.
Column Name: the name of the output column.
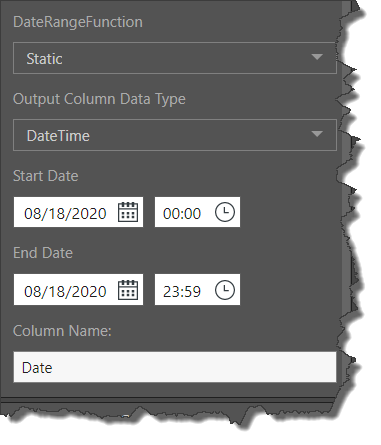
Static
Use this option to extract all the dates between a given start and end date. This is useful if you only want to extract a specified date range (say, July 01 - January 01), rather than all dates.
Output Column Data Type: choose either Date or DateTime.
Start Date: enter the start date or date and time.
End Date: enter the end date or date and time.
Column Name: the name of the output column.
Split Nodes
The Date Range node produces 1 date range column. In case you want to create multiple date range columns, you can split the table node by connecting it to multiple Date Range nodes. Each node can then be used to produce a different date range. Each column can then be combined with the original table using the Join function (see below).
This is useful if you want to extract multiple date ranges from the source table. For example, you may want to create a column of columns containing multiple static date ranges, rather than taking only one date range. Or you may have a table containing multiple date-time columns; for instance, a deliver company may have different columns for order date, shipped date, and delivery date. Or you may have multiple date-time columns for different date parts. For instance, you may have a column listing days, and another listing months. In these scenarios, you can simply split the source table by adding multiple Date Range nodes to it.
- Click here to learn more about split nodes.
Join the Date Range Node
Once configured, the Date Range node must be joined to the table. This can be done in either Data Flow, using the Join nodes, or in Data Model. The Data Flow is the ETL toolset for Pyramid users; join operations added to the data flow are loaded into the target and stored in the database.
Data Model, on the other hand, is the semantic layer of logic that is used to describe the structure of the data model. Joins configured in Data Model are not added to the database schema, but are used only in the querying process.
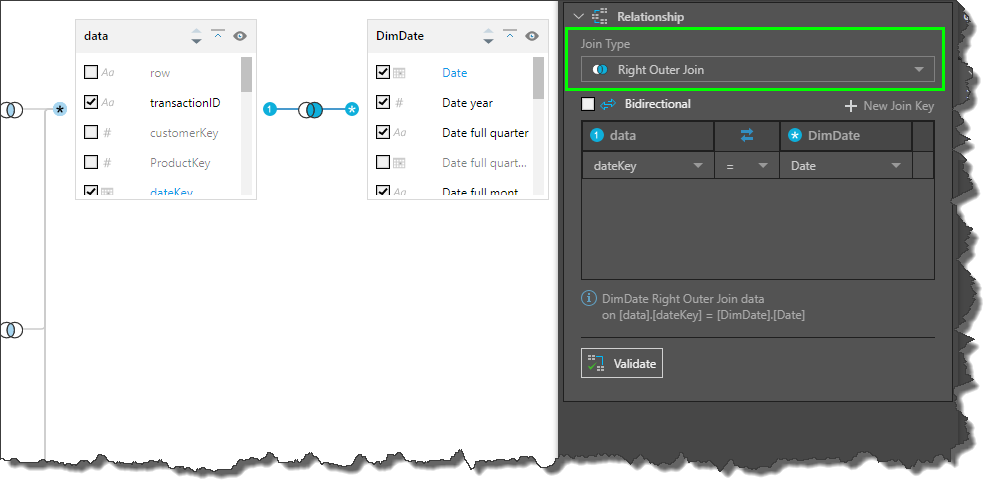
When adding the join, whether in Data Flow or Data Model, be sure to select 'Right Outer Join' as the join type. This will ensure that dates in the Date Range column that don't exist in the original date-time column will be returned.
In this example, we see that the dateKey column in the 'data' table is missing some dates:
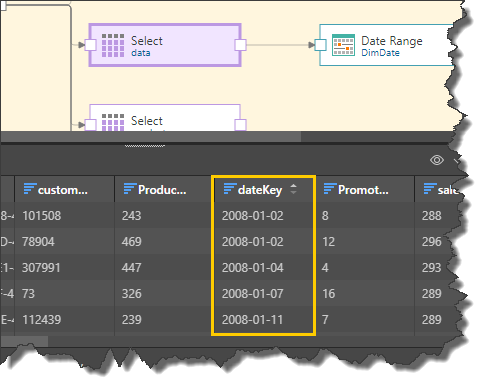
The Date Range node was added to generate the Min/ Max date range in a new tabled called 'DimDate':
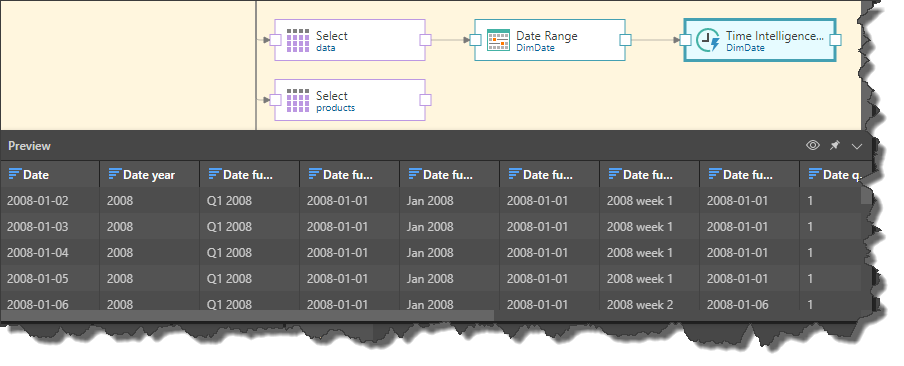
Next, the Time Intelligence node was connected to the Date Range node, extracted multiple date-time groupings:
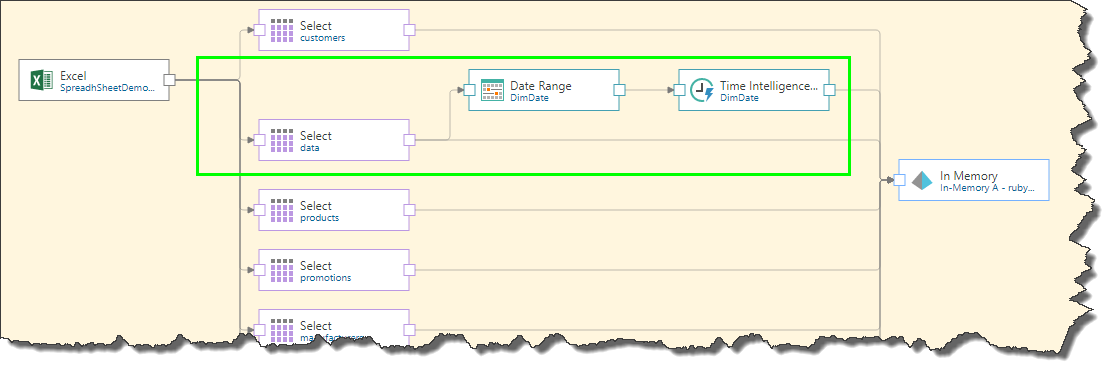
Next, the Target was connected, making sure to split the Data Table node by connecting the target to it. This is important because the Data Range node produces an output that does not include the original source table. To ensure that the original table is included in the data model, it must be connected directly to the target.
Finally, the 'data' and 'DimDate' tables were joined in Data Model using a Right Outer Join:
