The user defaults that are accessed from the Discover Pro ribbon configure the appearance and settings for your Discover and Model apps, as well as some General settings. Your settings take precedence over the equivalent User Default settings set by the administrator using the Admin Console, but only for you.
Access User Defaults for Discover

To open the User Defaults dialog:
- Click the Reports tab to open the Home ribbon.
- Click User Defaults in the workspace section of the ribbon (red).
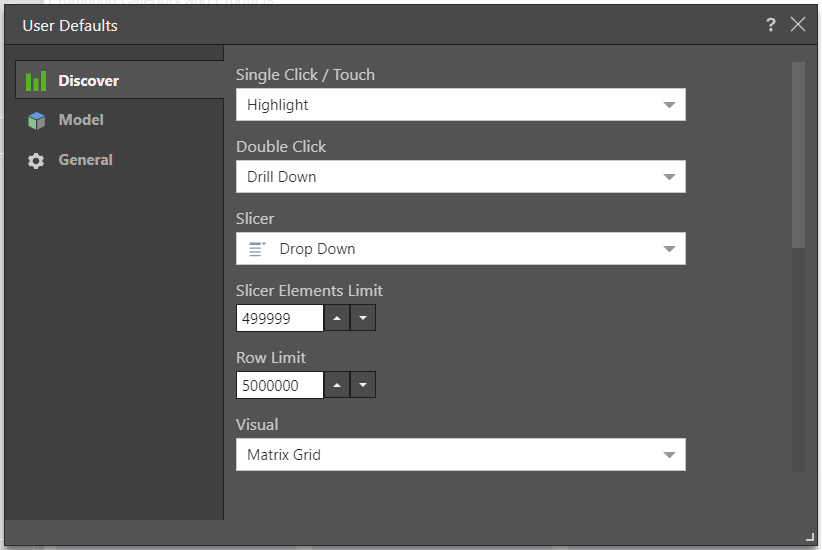
The User Defaults dialog opens:

Note: This dialog includes only those User Defaults relating to your Discover, Model, and General settings. You may also be able to edit settings for other apps in your User Defaults.
User Defaults
Discover
- Single Click / Touch: users can interact with visualizations via the selection tools and the context menus. Select a data interaction type that should occur with a single left mouse click.
- Double Click: select a data interaction type that should occur with a double left mouse click.
- Slicer: set the default slicer type; when a new slicer is configured, it will use the default type. Slicers can be edited and visualized as a different type.
- Slicer Elements Limit: set the maximum number of elements to be returned by a slicer.
- Row Limit: set the maximum number of rows retrieved by the query.
- Visual: set the default visual; when building queries in Discover, they will automatically be displayed with the default visual.
- Grid Design: set the default grid design.
- Color Logic: set the default color logic for the color drop zone.
- Tree Mode: how multi level hierarchies are displayed, Tree, Flat, Optimized.
- Slicer Execution: define whether slicer's default execution should be automatic or manual.
- Query Execution: define whether query execution should be automatic or manual.
- Default Tooltip: automatically show or hide the default tooltips.
- Empties: automatically show or hide empty cells in the query when working with MS OLAP or Tabular data models.
- Chart Scale Starts From: define the default start for chart axis scales; either 0 or automatic.
- Display Property Names in Column Caption: define whether to show or hide the property names in brackets next to the column caption. Click here to see how you can use cube-defined (SQL Server Analysis Services or SAP BW) hidden hierarchy properties as alternative captions for elements in the hierarchy - affecting the way they appear in the application, in visualizations and in slicers.
Model
General
- Choose Language: set the language to the cube's default language, or to the application language (the currently selected language in Pyramid).
OLAP and BW
- Context Heuristics: automatically enable context heuristics when working with MS OLAP or Tabular data models.
- Model Colors: automatically enable model colors when working with MS OLAP or Tabular data models.
- Model Formats: automatically enable model formats when working with MS OLAP or Tabular data models.
- Calculated Members: automatically include calculated members from the cube structure in the query.
- Sub Query Mode: automatically enable sub query mode when working with MS OLAP or Tabular data models.
- Optimize Totals: automatically enable optimize totals when working with MS OLAP or Tabular data models.
General
- New Context Menu: Show right-click context menus as compact, multi-level menus or flat menus in Discover and Present. The new context menus are streamlined to provide a smoother user experience.
- Sort Servers List: Determine the default sort order for the Servers List. The list can be sorted by name, by server type, or by folder.
- Chatbot Audio Response: Enable or disable the spoken / audio responses from the Chatbot throughout Pyramid. If you want to override this setting on a case-by-case basis, use the Mute button in the Chatbot to mute and unmute the response.
Note: New installations automatically display the New Context Menu view. However, existing installations retain the old context menu view, so you must explicitly choose the new context menu, if that is what you want displayed.