The calendar slicer is a specialized slicer for date-time columns coming from a SQL database, especially where the classic date-time data groups (quarter, semester, year, month, week) don't exist. The slicer enables you to filter the query by these groups, without the need to construct any complex formulations. This is an excellent solution for users who are directly querying a SQL database and cannot manipulate the database and don't want to spend time creating the relevant formulations.
Calendar Slicer Types
Pyramid data modeling enables users to construct these hierarchical date-time groups when designing the ETL and then add those elements to the query in Discover. However, this solution is only relevant to those users who construct the model in Pyramid; many users query the database directly. In a direct querying scenario, the user may want to add years to the query, while the database only contains a flat date-time hierarchy consisting of date keys. How can this user add 'years' to the query?
Note: Calendar slicers are supported only for SQL models. This functionality is not currently supported for MS OLAP, Tabular, or SAP BW.
Pyramid offers two solutions for this requirement:
Date Parts
On the fly "date part" calculations. Date part calculations produce custom columns which can be added to any part of the query.
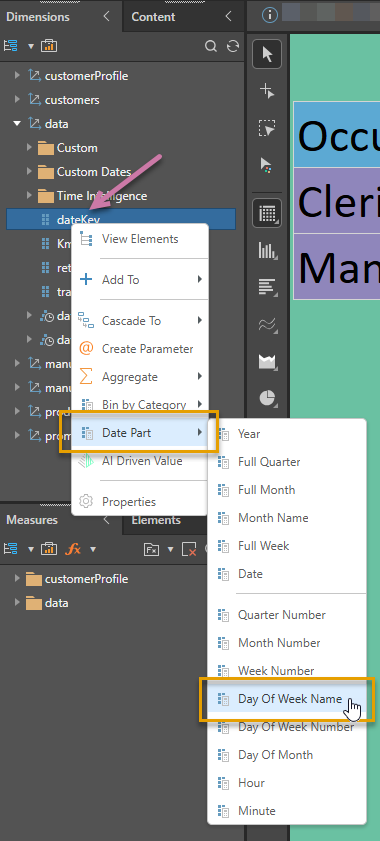
- Click here for more information about Date Parts
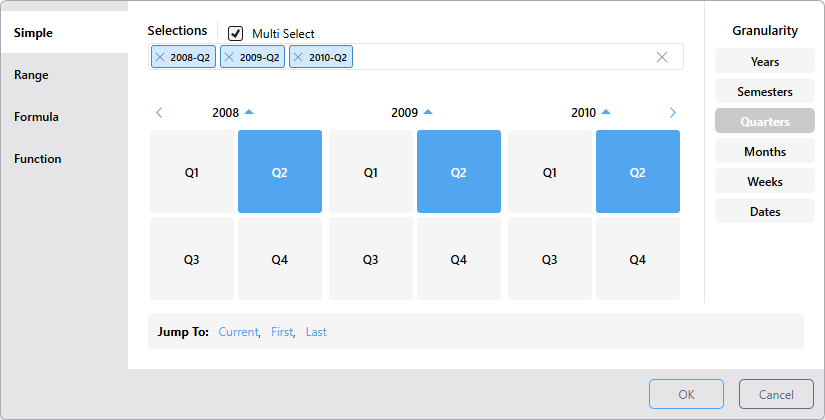
Date Calendars
The Date Calendar is used to filter the query by specified dates or time periods, date ranges, date formulations, and date functions. From the calendar slicer, the user selects the required dates or time period, and the query is filtered "on the fly," without creating any custom columns.
- Click here for more information about Date Calendars