You can add data filters to your discovery to filter the discovery by desired elements. This is different from a filtered hierarchy selection, because rather than adding the already filtered hierarchy elements to the visualization, the selection generates a slicer or a background filter.
Slicers and Background Filters
Slicers
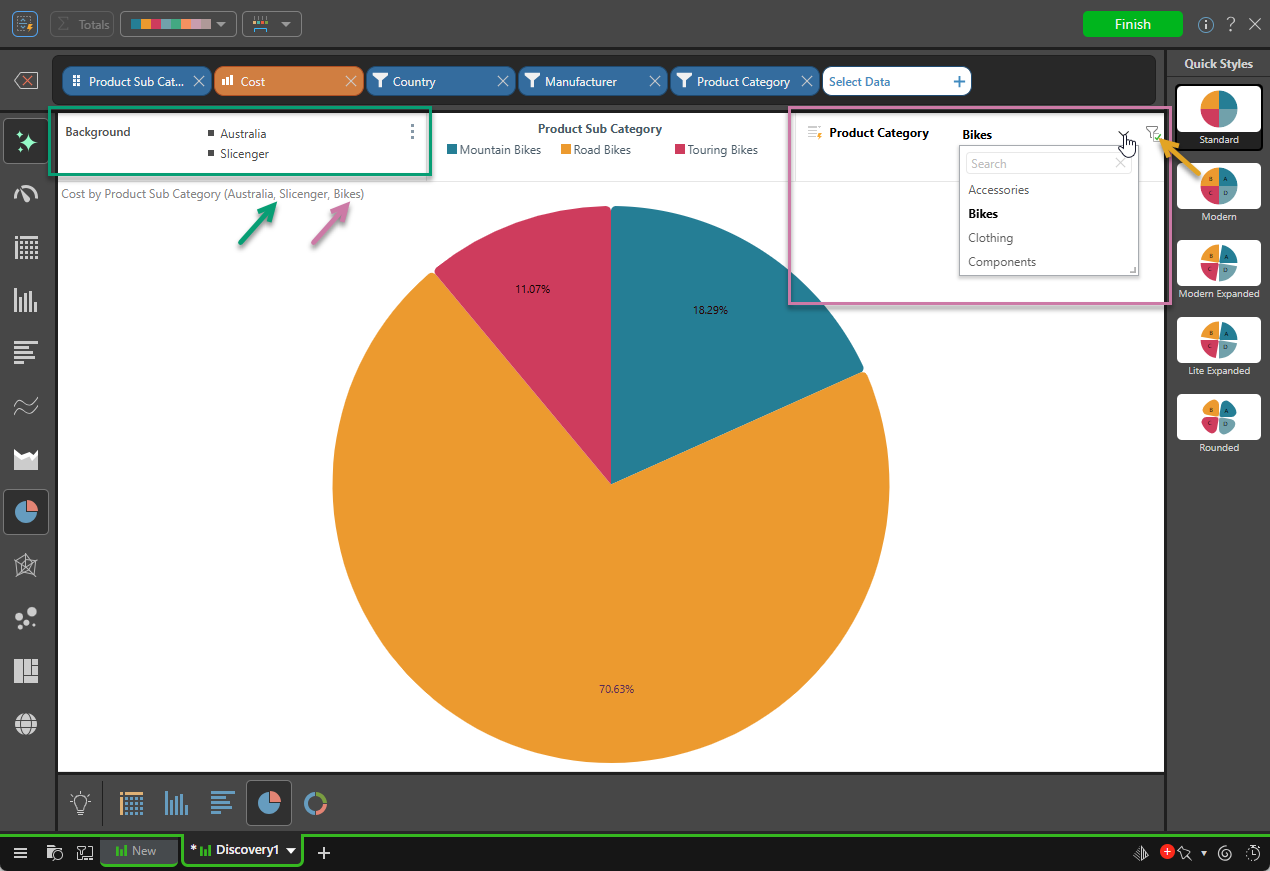
Slicers are added to the canvas and display a list of the selectable elements in a dropdown list (purple highlight above); when an element from the slicer is selected, the visual is filtered by that element. Note that you can see the filtering caused by this selection in the breadcrumb trail shown in the report title (purple arrow).
Disable Slicers
You can enable or disable the slicer by toggling its filter icon. In the preceding example, the slicer is enabled (orange arrow). Click the checkbox to disable the slicer and clear the filtering from the discovery.
Background Filters
If a single element from the hierarchy is selected as a filter (see Custom Selections), it is used to generate a background filter. A background filter filters the discovery by the chosen element. This is useful when you want to constrain the discovery to a specific element. For example, you may want to see Product Sales in your Country only; in this case, you can add your region (say, Australia), as a background filter.
The preceding example contains two background filters: Australia from the Country hierarchy, and Slicenger from the Manufacturer hierarchy (green highlight).
Adding Filters
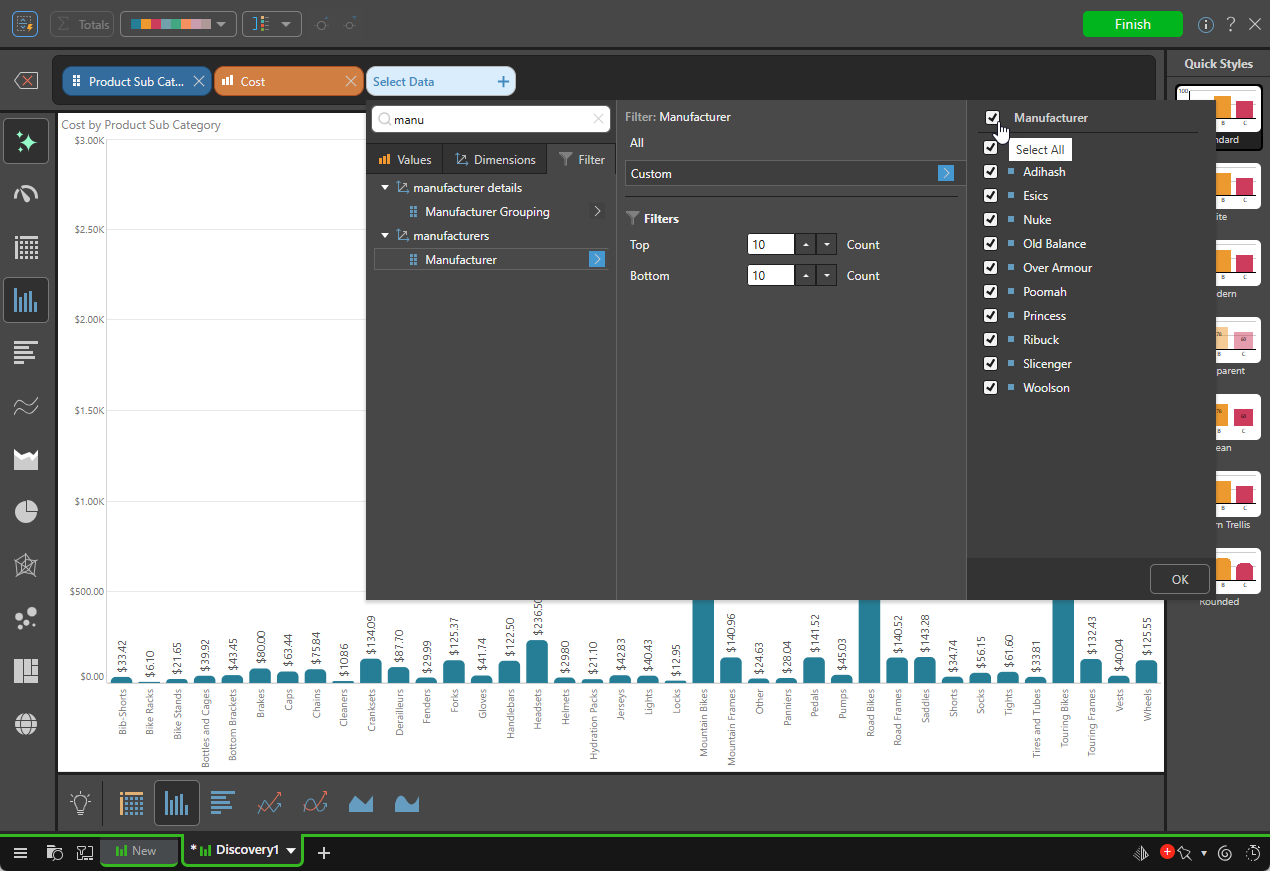
To add a filter, open the Data Selection panel and go to the Filter tab. Open the dimension containing the hierarchy you want to use as a filter and do one of the following:
- Click the hierarchy name to select it.
- Open the filter submenu (yellow arrow below), where you can choose from one of the filter types.
All
Either click the hierarchy's name (to select all) or All to add all elements from the hierarchy to a slicer.
Custom
Add custom elements to the slicer using the Custom submenu:
- Select individual elements from the hierarchy using the checkboxes (orange highlight above).
- Navigate to and select a formulation from the tree (green highlight) to include all of its items.
Once you have selected the elements and formulations to include in the filter, click OK. If you select a single item, a background filter is produced. If you select multiple elements, a slicer is produced.
Note: When individual elements and formulations are selected together, the items are combined into a single list. Where the same item appears in both, it only appears once in the final selection.
- For more information, see Custom Selections in Smart Discover.
Filters
- Top Count: Add the top n elements to the slicer, aggregated by the data model's default measure. For example, add the top 5 stores or the top 10 products by sales.
- Bottom Count: Add the bottom n elements to the slicer, aggregated by the model's default measure. For example, the 10 worst-selling products.
Removing Filters
To remove a slicer, or any other item, remove the slicer's chip from the Item Selection bar (yellow arrows):
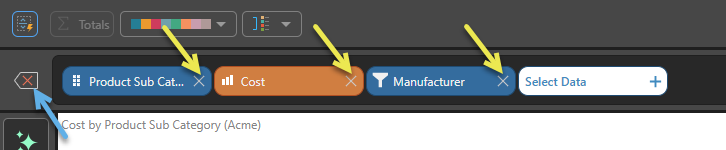
To remove all chips (all measures, dimensions, and filters), click Reset (blue arrow).
Removing Background Filters
To remove all background filters, open the background filter context menu and click Remove All (blue arrow below):
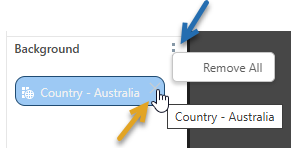
Alternatively, hover over the item and use its X icon (orange arrow above) to delete it from the background filter.