The Present Lite workspace is the user interface that you use to design and build presentations (or "slide shows") to communicate your data to others. The workspace has a standard layout that lets you open and then build and design each slide in the presentation.
The basic workspace layout includes a central canvas where you edit each slide; the toolbox where you add content items (including visuals), text, and so on; an overhead ribbon of formatting tools; and panels where you can manage the slide sequence and slicers. Present Lite is a simple version of the Present tool for non-technical users who want to build presentations and share them with their viewers.
Note: If you require more advanced features when creating your presentations, you should consider using Present Pro. For more information, see Present Pro Workspace.
Workspace Structure
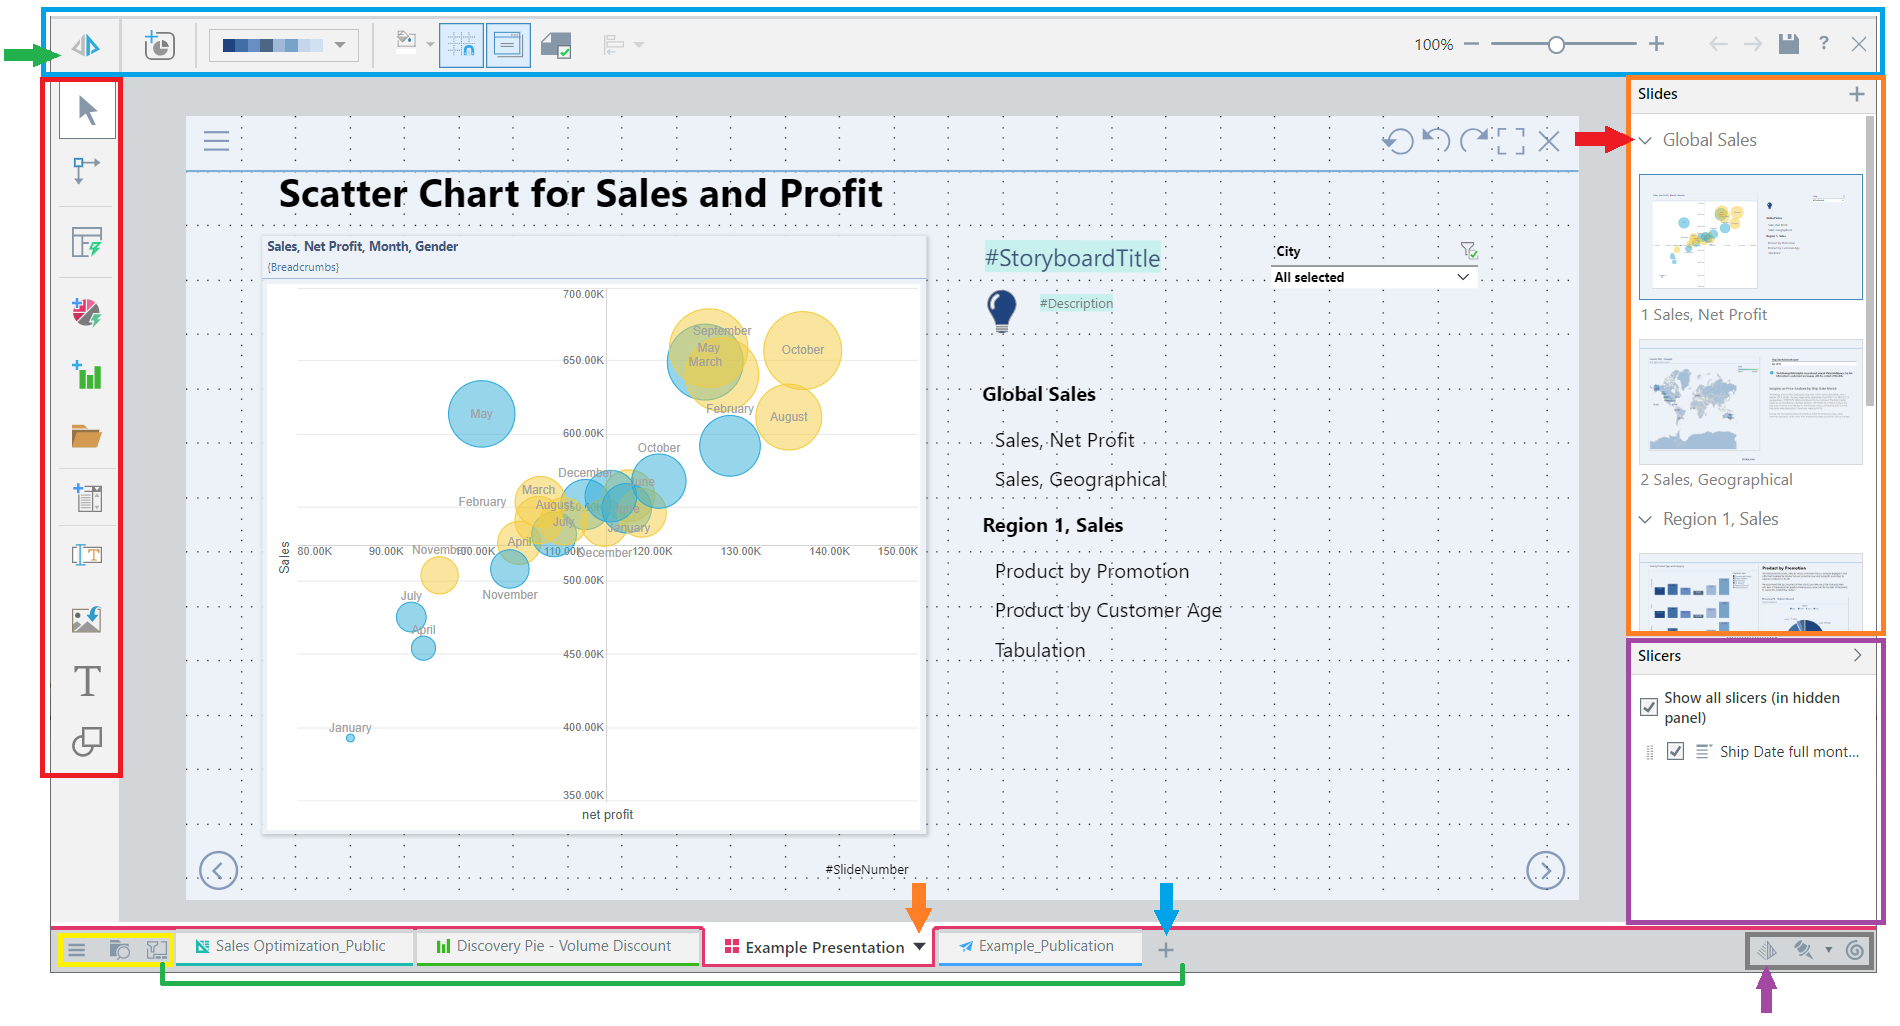
Canvas
You build the storyboard for your presentation by dragging and dropping content items onto the canvas at the center of the workspace. You can add visuals, text, images, slicers, shapes, and so on to the canvas, and then re-size and format them as needed.
The canvas displays one "slide" of your presentation at a time, and you select that slide from the Slides panel.
- For more information, see Present Lite Canvas
Note: Each slide includes navigation options that you cannot edit in Present Lite . Present Pro users can reposition these options and choose alternative slide navigation options (tabs or dropdown list navigation) by editing the Master.
Ribbon
The ribbon, located along the top of the canvas (indicated in blue in the preceding image), includes common design and formatting functions. Some context dependent functions display only when a relevant content item is selected on the canvas. For example, selecting a text box opens font options on the ribbon, while selecting a data visualization opens visual formatting options.
- For more information, see Present Lite Ribbon
Run
The Run button is in the upper-left corner of the workspace by default (green arrow). You can click it, or press your F2 key, to launch your presentation at runtime. The runtime version of the presentation opens with the slide that is currently open on the canvas as the first page. Tip: Always save your presentation before you run it; this ensures you include your recent changes. For more information, see Running Presentations
Toolbox
The Toolbox, on the left-hand side of the canvas (red), contains buttons that let you build up the content of the open slide, performing quick actions and opening tools. You can:
- Create new visuals using Discover Lite or Smart Discover.
- Add existing content items to the canvas by selecting them from private or shared Folders.
- Build new slicers.
- Add dynamic or static text, images, and shapes.
- Select an Auto Layout for the items on your slide.
- For more information, see Present Lite Toolbox
Panels
The panels to the right of the canvas let you interact with the whole presentation.
Slides
The Slides panel, located on the right of the canvas (orange highlight), is where you can add, remove, duplicate, and rename slides. You can also add sections (red arrow), change the sequence of your slides, and use the slides panel to navigate through the presentation while in edit mode.
- For more information, see Present Lite Slides and Sections
Slicers
The Slicers panel (purple highlight) is located underneath the Slides panel by default. You can dock it alongside the Slides panel if needed. The Slicers panel displays hidden slicers, and slicers that are on a slide that is not currently open.
You can disable or delete Slicers from the presentation using the slicers panel.
- For more information, see Present Lite Slicers
App Tabs
The App Tabs, along the bottom of your page, allow you to access both your apps and the features that are relevant across your apps. You can find and open your files (file access, yellow), move between currently open visuals, presentations, publications, and so on (app tabs, green), and make use of the other system tools.
Tip: You can also use the app menu to create a new visual, presentation, publication, or tabulation (blue arrow) and access "quick" options relating to a specific tab (orange arrow).
- For more information, see App Tabs
Chatbot
The Chatbot is used in Present to create and configure presentations using natural language prompts. If it is available, you can open the Chatbot from the bottom-right of the page (purple arrow) and ask it to create or update the content of each of your slides for you.
- For more information, see Exercise: Building a Presentation using AI
You can only make use of this functionality if your administrator has selected to Enable Generative AI in the AI Settings page of the Admin Console. Otherwise, the function is not available for use.