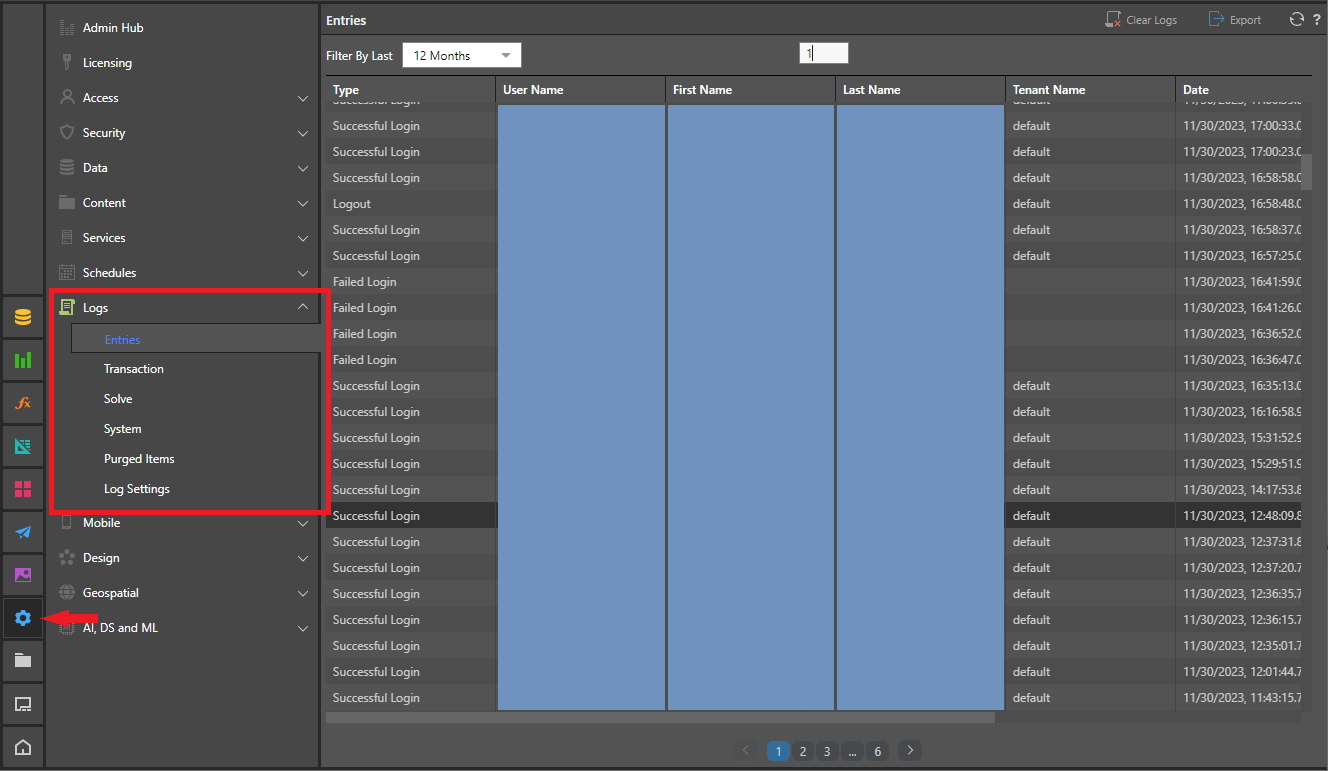
The entry logs provide a list of all users who have logged in to the application, within a given time period. The list shows each user's user name, first name, last name, login dates, whether or not the login was successful, and their tenant name.
Embedded User Tracking
In many embedding scenarios a generic account is used to log the user into the system. As such, tracking the entry log for a generic account will offer no details on the actual users logging in to the system. In this case, it is up to the host application to track users' ingress into the analytics.
However, if the "customdata" property is set as part of the programmatic logging procedure used for embedded content, it will be shown in the Entry log. This can provide a unique indicator to admins of which embedded user logged in and when.
Logout Log
The log does not show when users have logged out unless the user formally logs out of the application. However, it does capture failed login attempts.
Note: Audit logging is disabled by default. To enable this feature, go to Logs > Log Settings.
Logs > Entries
Page options (top-right) apply to the current view, and include:
- Clear Logs: Click Clear Logs to "purge" (permanently delete) all of the logs of this type.
- Export: Download the log as a CSV file. The exported file contains all logged events matching your currently selected filter criteria.
- Refresh: Refresh the page with the latest data.
- Help (question mark): Open the online Help.
Filter by last
Include only those events that were logged within a selected time period:
- Select a <time period> to include events logged between now and that selected time (between 1 minute and 12 months ago).
- Select All to include events logged at any time.
- Select Custom to include events logged within a custom period. From Date and To Date fields appear, letting you supply the details of your custom time period.
Sort and Filter
Most column headers include options to sort and filter the results:
- Hover over a column header to Sort the results by ascending or descending order.
- Hover over a column heading to open the Filter options. Filtering allows you to limit the results shown in the column by value. Click the filter icon associated with your column, specify the details of your filter, and click Apply. Which details you see depends on the data type of the value in the selected column:
- If the column contains a Date / time you can select from the options:
- Equals - Return logs with the selected date and time.
- Before - Return logs up to the selected date and time.
- After - Return logs after the selected date and time.
- Between - Return logs within a particular date and time window. In this case, you need to specify the start and end date for your filter.
- If the column contains a Number you can select from the options: Equals, Not Equals, Greater than, Greater than or Equals, Less than, Less than or equals, and specify a comparison value.
- If the column contains a String you can select from the options: Equals, Does Not Equal, Start with, End with, Contain, Does not contain, and specify a comparison value.
Pagination

Where there are more results than fit on a single page, a set of pagination controls opens underneath the table of results. You can use these controls to:
- See how many pages of results there are.
- Move between the pages of results.
- Go directly to a specific page of results.