When you're ready to schedule your publication, select Schedule from the Home ribbon. You can then configure your scheduling and distribution preferences from the Schedule panel. Scheduling can also be set from the content explorer interface. The content explorer also provides an interface for managing your schedules and viewing rendered output.
Note: Administrators can view all schedules in the system from the administrative console.
Important: This feature is not available in the Community Edition.
Open the Schedule panel
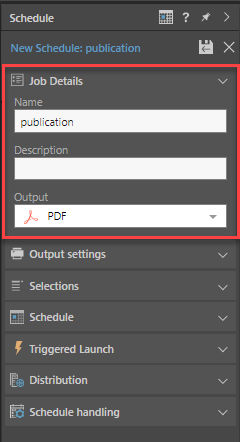
From the Publish ribbon, click Schedule (purple arrow) to open the Schedule panel:

Schedule sections
Job Details
Name your publication schedule, add a description, and select the required format under Output. Available output types are: PDF, PowerPoint, Word, Excel, HTML, PNG, CSV, JSON, and XML)
Output Settings
The Link-back feature enables direct URL loading for data discoveries in exported publications. When Link-back is enabled, the user can click on any discovery in the exported report in order to load it in the viewer.

Selections
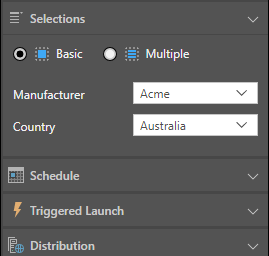
The Selections section is displayed if you have added slicers to your publication. This is where you indicate what Publish should do with the information from the slicers within the publication. The options are Basic or Multiple.
Basic
Allows you to select a single slice option (element) for each slicer added to the publication; filtering the publication according to the chosen elements:
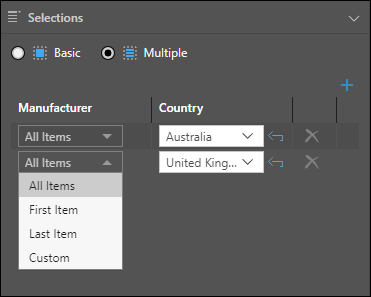
Multiple
Allows you to select multiple slicer elements from each slicer and produce multiple copies of the publication, with each copy filtered by a different slicer element.
Select Multiple (purple arrow), then click Plus (yellow arrow) to add a slicer selection. For each slicer, open the drop-down and select the slicer type:
- All Items: All slices in the slicer.
- First Item: Filters by the first slice in the slicer.
- Last Item: Filters by the last slice in the slicer.
- Custom: Enables custom selection of a slice. Use the drop-down again to select the custom slice.
To select multiple (but not all) slices, click Plus to add another slicer selection.
Additional options
- Back: (Blue arrow.) If you selected a Custom value, use the Back button to clear your selection from the drop-down.
- Delete: Remove a set of slicer selections, by deleting the row.
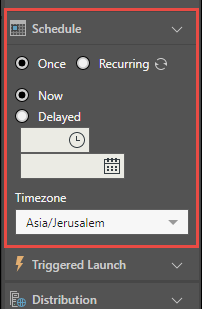
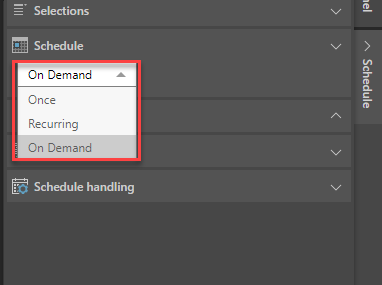
Schedule
Determine exactly when your schedule will be run.
Once
Schedule your publication to run once only, either immediately, or at a specified time and date.
- Now: the schedule will run immediately
- Delayed: the schedule will run at the specified time and date
Recurring
Schedule your publication to be run on a recurring basis.
- Run Now: check this box to run the schedule immediately.
- Hourly: run the job every x hours, starting from the specified time and date.
- Daily: run the job on the given Specific Days, or every x days (Days Interval).
- Weekly: run the job every x weeks, on the specified days.
- Monthly: run the job on the given quarters or months. Then select:
- Week and Days: to run the schedule during the specified week of the given months, and on a given day.
- Calendar Days: to run the schedule on a given calendar day, or the last day of the month.
- Workdays: to run the schedule on a specific workday during the month, or on the Last Workday of the Month.
- On Days: to run the schedule on a specific workday of the month. For example, enter 12 to have the schedule run on the 12th workday of the month.
Time and Date Settings
- For each recurring schedule option, you must select a start date and time - this is when the schedule job will start running.
- You can select an optional end date and time, when the schedule job will stop running. If no end date and time are given, the schedule will continue running indefinitely.
- Select the required timezone from the Timezone drop-down list.
On Demand
On Demand Schedules are used to trigger the rendering of specified publications, alerts, and subscriptions only when the underlying data models is reprocessed.
To configure on demand scheduling for the subscriptions, choose On Demand from the Schedule tab, either from the regular settings or the advanced settings. You must also configure on demand subscriptions for the relevant data models via the Master Flow or APIs.
- Click here to learn more about configuring the schedule.
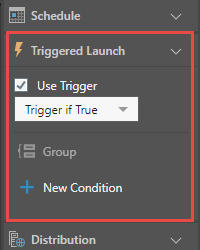
Triggered Launch
Schedule your publication to run only if a certain condition or a series of conditions are met. Triggers are driven off query results.
You can configure your own custom triggers, including model-refresh triggers that will render publications and run alerts and subscriptions when the underlying data model is reprocessed.
The trigger condition is defined using PQL, and can even incorporate the LLM PQL function.
- For details about configuring a triggered launch, click here.
Distribution
Determine how your publication will be delivered to recipients.
- Click here to learn about distribution options
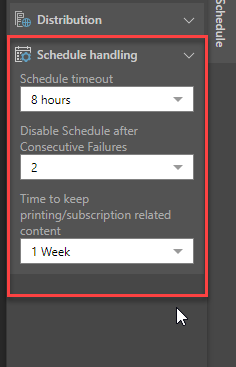
Schedule Handling
- Schedule Timeout: Disables the scheduled task after the given amount of time.
- Disable Schedule after Consecutive Failures: The maximum amount of consecutive failures allowed before the schedule is disabled.
- Time to Keep the Published Output: sets the amount of time to keep rendered content including printing, publications, and subscriptions. The time set here cannot be greater than the overriding time set by the administrator in the system schedule.
Note: Selecting System Default for these options applies the default setting created by your administrator in the System Schedule.
Data Source Authentication
If the data source used in the discovery or presentation is based on Windows Authentication, then a separate panel will be presented to the user. The user may need to supply a set of credentials to successfully submit the scheduled task.
This often occurs when the authentication method for the data source is set to "End-user" Windows Authentication. Under this model, the user running the queries is used to connect (via Kerberos token) to the data source. However, when running a batch task (offline), the user's token is not available - as such a set of their credentials is required for connectivity by the Pyramid engine.
Schedules can also be configured for SAP BW sources if SAP Logon Tickets is selected as the authentication method in the Admin console. In this case, you'll be prompted to enter the relevant credentials.
Note: SAP Logon Tickets are available with an Enterprise license only.