This option is used to send the rendered publication to a static list of email addresses. This is a good option if the publication doesn't contain any information that needs to be filtered by the recipient. For example, you may have a Country slicer in the publication; if all the recipients should see data for all countries, then a static distribution list is a good choice. However, if each user should only see data for a specific country, then you should consider a dynamic distribution list.
This topic is a walkthrough that uses the Email Distribution configuration options to achieve a specific goal. For more information about the Email Distribution options, see Email Distribution in Publish Pro.
Note: The emailing option is not operational unless messaging services have been enabled in the admin console first.
Note: Sending as an attachment is only available with the External Bursting License.
Setting up a Static Distribution List
To distribute your publication to a static list of users by email, you will need to:
- Create a Schedule for your publication.
- Select the target Static Email List in the Distribution section.
- Provide a semicolon-separated list of email addresses that you want to send your publication to.
A copy of the publication will be sent to all emails in this list. If the publication schedule was configured with multiple slicers in the Selections section (multi mode), then every copy of the publication will be sent to every email address in the distribution list.
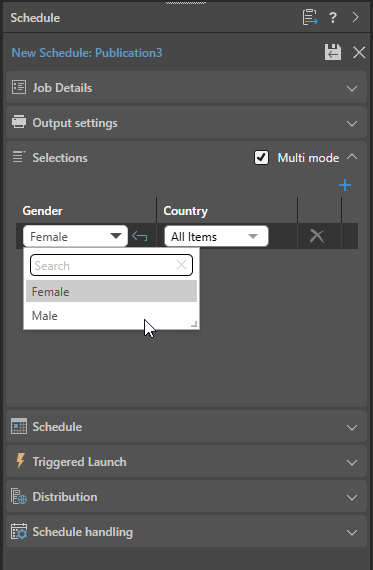
Step 1: Specify multiple slicer selections (Optional)
Set your Selections preferences as required. You will need to select the Multi mode checkbox if you want to select multiple slicer options.
Remember: All recipients included in the static list of emails will receive all copies of the publication that are generated according to the slicer preferences set in the Selections section. This means that if you have two slicers, both set to Every Item, then a separate publication will be generated for each possible slicer combination and every recipient will receive every copy.
- Click here for more information about selecting slicers
Step 2: Set up your Static List of Email Addresses
From the Distribution section:
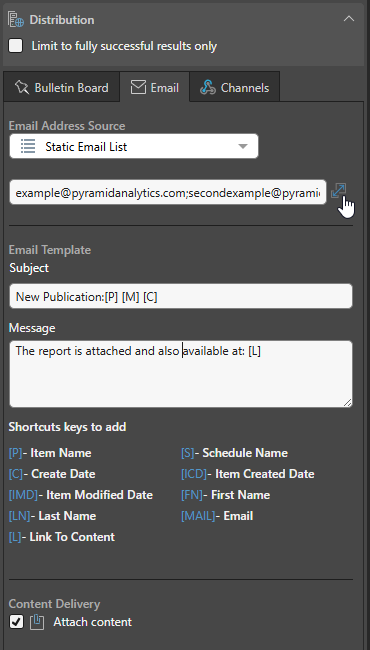
- Select the Email tab.
- From the Email Address Source dropdown list, select Static Email List.
- You can either:
- Type your list of email addresses into the text field as a semicolon-separated list.
- Click the Expand icon alongside the field to open the Text Editor. Type the email addresses into the Text Editor as a semicolon-separated list. Click OK to close the editor.
- Once you are happy with your list you should set up details of the email that you want to send, specifying:
- A Subject line for the email.
- A Message for the email.
- Lastly, if you have the External Bursting license, you might want to select the Attach Content checkbox to attach the publication to the email.
The following field becomes a text field.
Step 3: Committing the Schedule
Once you are done building your schedule, click Save (purple arrow below) to save and launch it. You can view the schedule's progress in the Content Explorer (or from the Admin Console if you are an admin):
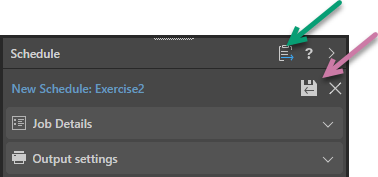
Note: When viewing your schedule in the Publish app, there is an option to go to the Schedule list in the Content Explorer (green arrow above). This provides access the publication's schedules for edit, delete, and so on and view any built publications.