When you create a new presentation in Present Pro, you make use of the New Presentation wizard. This wizard lets you set up all the basic design properties for your presentation in one page; that is, its theme, device, layout, and size; and then open the new presentation in Present Pro for editing. The purpose of this wizard is to make the initial creation of your presentation as easy as possible; in fact, if you accept the defaults, it becomes a matter of just clicking Create!
Note: It is important to note that all the design options that you set using the New Presentation wizard can be changed later, apart from the layout.
Creating a new presentation
This topic describes how to create a new, empty, presentation ready for you to add slides and content, improve the layout, change the format, and so on. If you are new to Present Pro, you might want to try our end-to-end walkthrough before you begin making your own presentation. This will help you to understand the basic functionality in a guided fashion.
- Click here for the Present Pro walkthrough
Open the New Presentation wizard
You can open the New Presentation wizard, and begin creating your presentation, from the following locations:
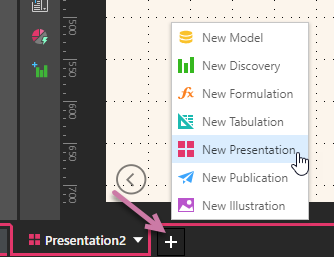
- From the App Toolbox, select Home (blue arrow) > New Presentation (yellow arrow).
- From the App Tabs menu, select Plus (+) > New Presentation.
- From the Content Explorer, right-click the background and choose New Item > New Presentation from the context menu. You will then be prompted to provide a name for your new presentation before you can begin the process:


The New Presentation wizard opens, ready for you to select the basic design options and Create your new presentation.
Select New Presentation settings
You can, optionally, select settings for your new presentation in the New Presentation wizard. Alternatively, if you are happy to accept the default settings, skip to the next step!
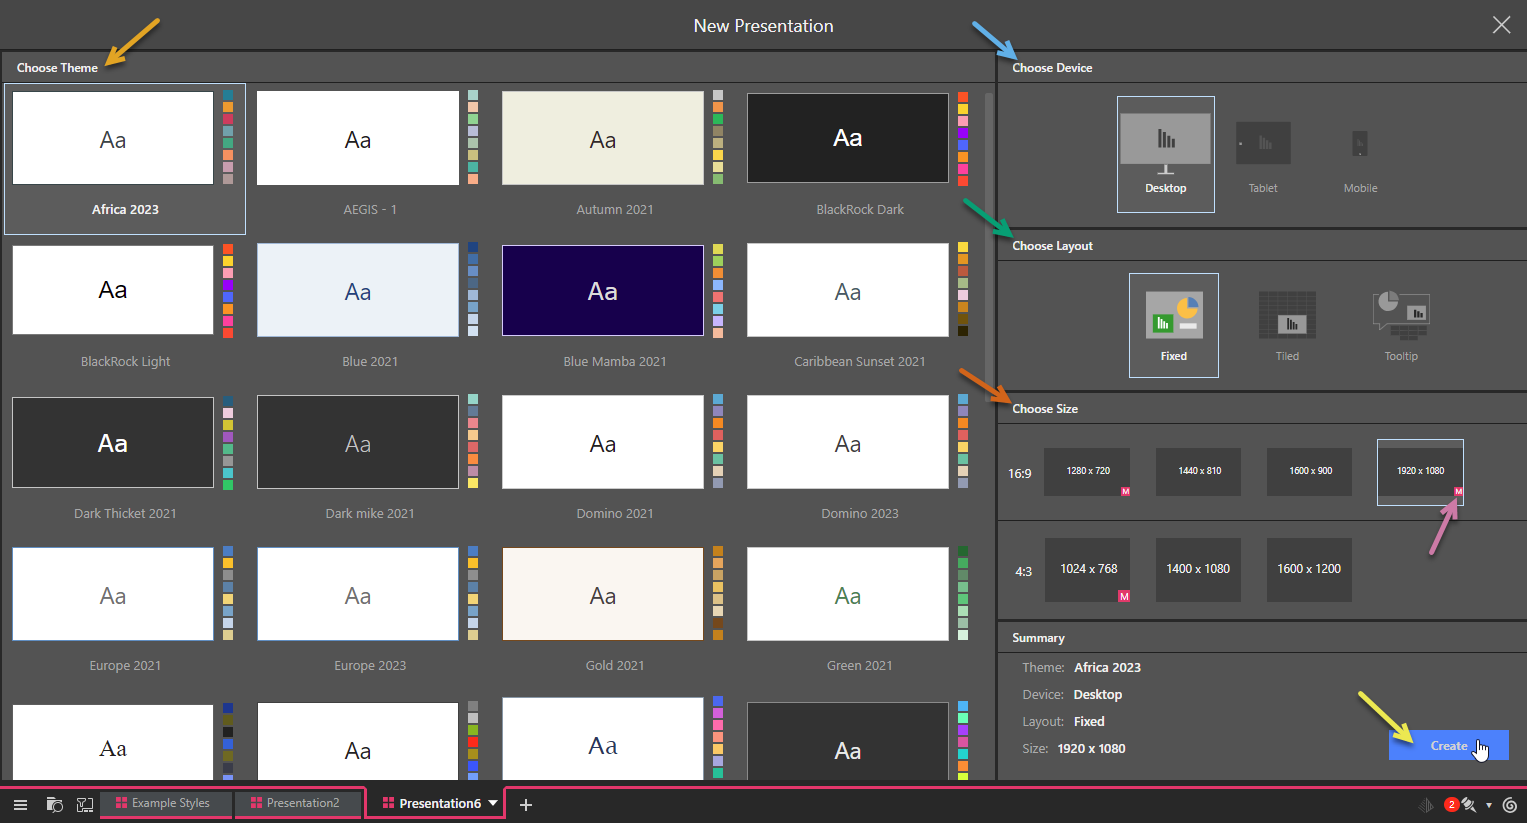
Choose Theme
Choose a design theme for your presentation (orange arrow). Themes control the look and feel of your presentation; defining the color palette and fonts used throughout, appearance options relating to specific types of visual, and those "master pages" that add some common graphics (logos), text, navigation options, and so on to all the slides in your presentation.
You can change the Theme later from the options on the Design ribbon. See: Themes in Present Pro.
Choose Device
Choose the main device type that you expect your users to have (blue arrow):
- Desktop: The presentation design that is optimized for desktop viewing.
- Tablet: The presentation design that is optimized for tablet viewing. Selecting this option ensures the slide size is optimized for tablet use. For more information, see Tablet Presentations in Present Pro.
- Mobile: The presentation design that is optimized for mobile viewing. Selecting this option enables miniature visuals, text, buttons, and dynamic assets (dynamic images, dynamic text, dynamic URLs, and dynamic jump actions). For more information, see Mobile Presentations in Present Pro.
This is the main device type, not necessarily the only device type. When you are editing your presentation, you can create optimized "layouts" for all or any of these device types. When your users access the presentation at runtime, the device type they are using is automatically detected and the appropriate optimization layout is selected (so if they use their phone, the Mobile optimization is used). For more information about this functionality, see: Optimizing for Device Types in Present Pro.
Choose Layout
Choose the layout option to use in Present Pro's design view (green arrow):
- Fixed: Your slides can include a grid, which can be shown or hidden, and which new content items can optionally "snap to." Note: The layout options on the Design ribbon control the grid and Snap to Grid functionality. With a fixed layout, you can place visuals anywhere on the canvas.
- Tiled: Your slides always display a tiled layout, and your visuals can only be placed along the tile lines. The tiles cannot be disabled.
- Tooltip: This is a streamlined layout used to define the content for graphical tooltips. This type of presentation is optimized for this use with a small canvas size (which you can customize) and single slide content. When your user hovers over a cell in another presentation at runtime, this presentation pops up in a tooltip according to the configured tooltip action. For more information, see Tooltip Presentations in Present Pro.
Important: You cannot change the layout type after you have created your presentation.
Choose Size
If you have selected the Desktop device and Fixed layout, you can select the required canvas size from the preset options (brown highlight):
4:3 aspect ratio - Designed for older computer monitors
- 1024 x 768
- 1400 x 1080
- 1600 x 1200
16:9 aspect ratio - Designed for HD and wide-screen displays
- 1280 x 720
- 1440 x 810
- 1600 x 900
- 1920 x 1080
Note: Where there is at least one "master" associated with your selected theme and canvas size, you will see the 'M' symbol in the Choose Size field (see purple arrow). If you select a theme and size without a master, you might want to define your own once the presentation is created. For more information, see Master Pages in Present Pro.
You can change the canvas size later, including to a custom size, using the setting on the Design ribbon. For more information, see Resetting the Canvas Size in Present Pro.
Create your presentation
- Check that your New Presentation settings are correct in the Summary panel.
- Click Create to build the new presentation.
Your empty presentation is created.
What next?
Now that you have created your presentation, you might want to take one of the following next steps:
- Run your presentation, by pressing F2 on your keyboard, to see how it will look at runtime.
- Begin to build your presentation's content by adding slides and content items.
- Save your presentation.