You can add text to your publication to provide some additional information and context for your readers. Typically, this information helps them to find their way around the publication (providing headings and naming visuals) or provides them with additional information, such as AI-driven insights providing some analysis of visuals in the pages. Free text is typed or pasted directly into static text fields, which are then used in the publication as titles, headers, or explanatory notes.
Note: You can alternatively add variable text fields, which are dynamically replaced with information from the publication at build time, and dynamic text fields, which are dynamically replaced with values from slicers or from the underlying data model at build time.
Tip: You can combine static, variable, and even "placeholder" text into a single text field. This allows you to add a minimal number of text boxes onto the canvas to fulfill your requirements. For more information, see Combining text fields (below).
Adding static text to your publication
From the Toolbox:
- Click Text.
- Do one of the following:
- Click the canvas at the point where you would like to add your text field.
- Click and drag your cursor to draw a text field on your canvas. (This option allows you to customize the size of your text field.)
- Type or paste your required text into the text box.

A text box is added to the page at the selected point. Note: You will be able to move it at any time, so don't worry about this being the final location.
Your text field is created. You should re-size, format, or move your text as per your requirements. Once you are ready, remember to save your publication.
Editing Text Fields
Formatting your text
You can select the text box or highlight some text inside the text box to apply styling changes. Use the Component ribbon options to change the font type, emphasis (bold or italics), color, and heading style of your text (blue box), or to change its size or position (orange box).

You can also use drag and drop and the text box handles to re-size and rotate the text box and move it to a more appropriate location on the canvas, and the right-click options to align or distribute it with reference to other items on the canvas.
- Click here for Text Formatting details
Note: There may be text boxes on your pages that you cannot select. These text boxes are part of your underlying theme and can only be selected, edited, moved, or deleted in the masters view. For more information, see Master Pages in Publish Pro.
Heading Styles
In Publish, the text fields that use the Heading styles (yellow arrow above) will be incorporated into any table of contents you add to your publication and, if you are creating a PDF, will also be used as hyperlinks in your PDF's "document outline." For more information, see Table of Contents in Publish Pro.
Combining text fields
You can combine variable and static text fields, by pasting #Variables from one text field into another, by typing static text into a variable text field, or by adding placeholders whose content will be replaced with slicer values at runtime.
For example, the following shows a text field that will be used to create "Page X of Y" on your page, where X and Y are driven by the #PageNumber and #TotalPages variables (purple arrows below):

- Click here for more information about variable text
- Click here for more information about placeholders
Advanced options
You can also select your text and change it into a dynamic infographic (including changing it from text into a graphical file) in Illustrate. This is done using the Open in Illustrate option on the right-click context menu when your text field, shape, or image is selected.
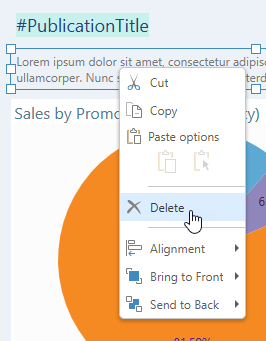
Deleting text
To delete text, select the text box on the canvas and do one of the following:
- Click Delete from the Publication ribbon.
- Right-click Delete in the context menu.
- Click Delete (DEL) on your keypad.