Placeholders can be added to your text fields and replaced with values from your slicers when you build your publication. This is useful if you want the text to tell your reader something about the slicer selection.
For example, if your publication uses a slicer to filter a Sales pie chart by country, you might want to name that country in the page heading or in a paragraph of text describing the visual. Since the country filter applies when building your publication, it is not appropriate to write a country name in static text, you should instead add a placeholder and replace that with the slicer value that also filters the visual.
Adding a placeholder
This end-to-end example describes how to incorporate a placeholder into one of the text fields on your page and then replace that placeholder with the value selected from a Nation slicer at build time.
Before you begin
To follow these steps in full, you need to have a publication. We also recommend that you add a visual to your publication as this allows you to create your functioning placeholder and see how the slicer both updates the text placeholder and filters the visual.
- Click here for instructions describing how to build a new publication
- Click here for instructions describing how to create a simple, one off, visual
Step 1: Create a placeholder
Add a basic text box to your canvas and then add one or more placeholders that will be replaced with slicer values when building the publication.
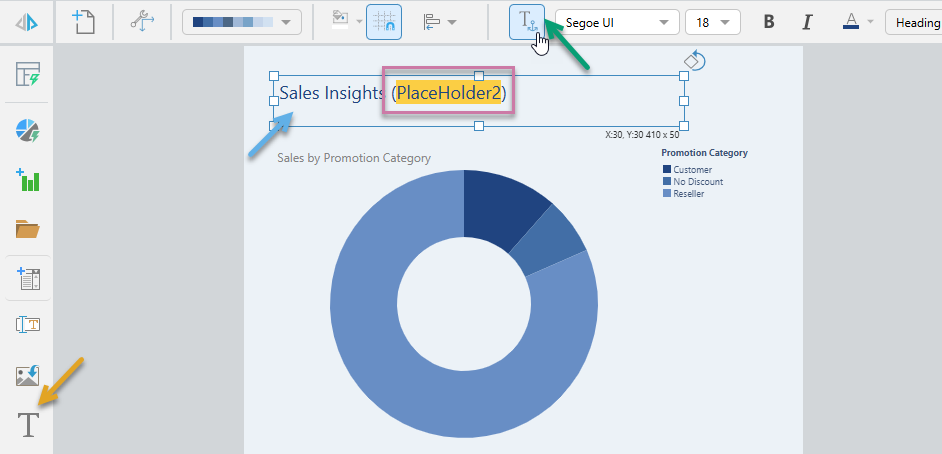
- From the Toolbox, click Text (orange arrow above) and then click the canvas.
- Add static text to the text box and format it as required (blue arrow).
- Place your cursor where you would like to create your placeholder and click Placeholder on the ribbon (green arrow).
A text box is created on the canvas at your selected location.
Note: In the preceding example, the style Heading 1 has been applied to the page name using the style options on the ribbon.
The placeholder variable is created and added to the text field at the selected location (purple highlight).
If you were to build your publication now, your placeholder would not be visible on the page. This is because there is nothing to replace the placeholder with at this stage.
Step 2: Create a slicer to placeholder interaction
Connect the placeholder to the slicer that will provide the replacement value when you build your publication:
- Add or view your slicer:
- If you need to create a new slicer, click New Slicer (black arrow above) in the toolbox and select the relevant hierarchy for your slicer (for example, click Countries in the current model). For more information about creating slicers, see Creating Slicers in Publish Lite.
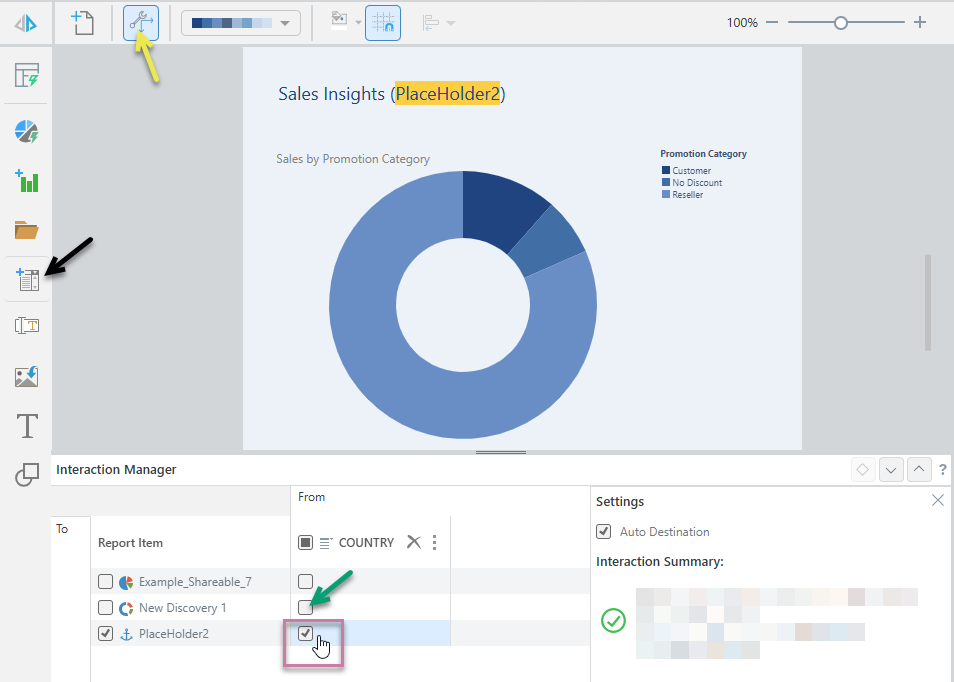
- If there is already a relevant slicer associated with this publication, click Interaction Manager (yellow arrow) in the ribbon.
- Create the interaction between the Nation slicer and PlaceHolder1 by selecting the checkbox between the two items (purple highlight).
- Optionally, create an interaction between the same slicer and the visual on the same page (green arrow).
In both cases, the Interaction Manager opens at the bottom of the page. The Placeholder and slicer are both present in the view.
This interaction will cause the placeholder to be replaced with the selected value from the Nation slicer when you build the publication.
An interaction is added between the Nation slicer and both PlaceHolder1 and the Sales discovery called New Discovery 1. When you build the publication, the placeholder text will be replaced with the Nation selected from the slicer and the discovery will be filtered to show sales data from that selected country too.
Tip: You can pin the Settings panel in the Interaction Manager to keep it open while you work. Click the Pin icon (blue arrow above) in the header to pin the panel. The panel will remain open until you unpin it.
Step 3: Test your placeholder
To test that your placeholder is replaced as expected, you should build your publication with a particular value selected and check that the replacement is applied.
From the ribbon:
- Click Run Publication (purple highlight) or press your F2 key to open the Print & Export dialog and manually print your publication.
- Set up your Print properties:
- On the Output tab, select PDF.
- Click the Slicer tab, and select the option from your slicer that you'd like to apply to the publication:
You do not need to change any of the other settings, the intention is just to run a test that shows the placeholder replacement in action.
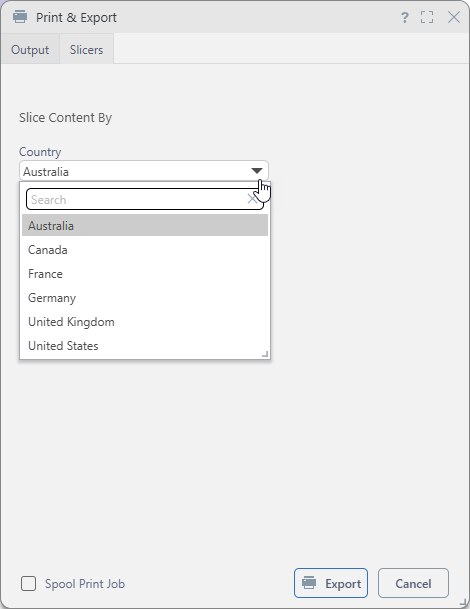
- Click Export.
- Open the PDF and check its content:
- The placeholder is replaced by the selected slice in the page (purple arrow above).
- Since the Heading 1 style was applied to the whole of the string, including the placeholder, it also appears in the document outline (blue arrow) and would also be included in any Table of Contents in the publication.

Your PDF builds and downloads.

In the preceding example:
Editing your placeholder
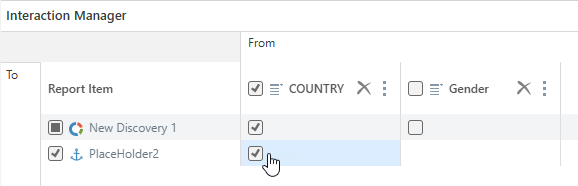
To change the replacement value for the placeholder, update the interaction in the Interaction Manager. Important: You can only create interactions from one slicer to one placeholder. If you want to change which slicer is connected to your placeholder, you must first remove the existing interaction:
To change the appearance of the placeholder in the publication, change the style or font formatting applied to it on the canvas. The placeholder behaves as any standard text would.
Delete your placeholder
To delete a placeholder from your publication, simply select and delete the "variable" (PlaceHolderX) from the canvas.